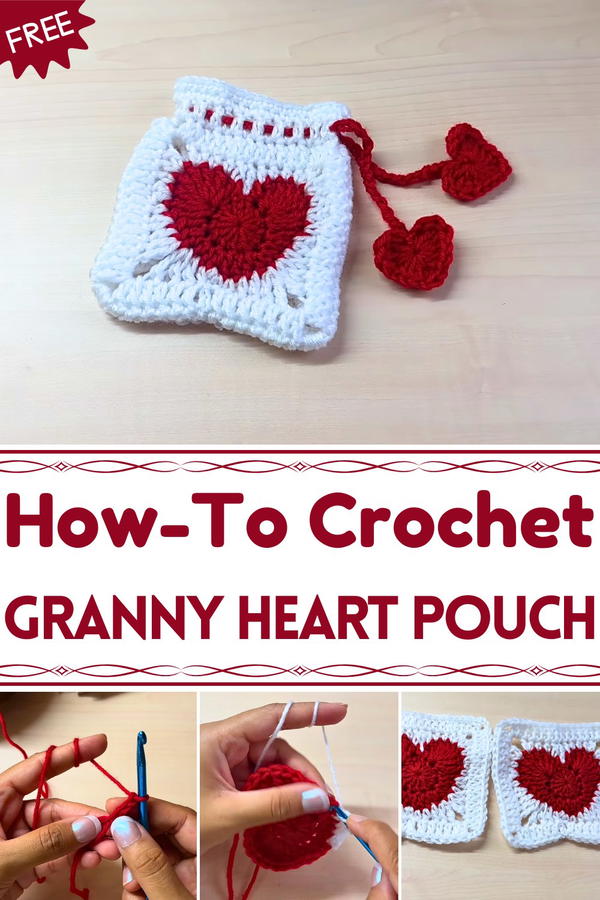
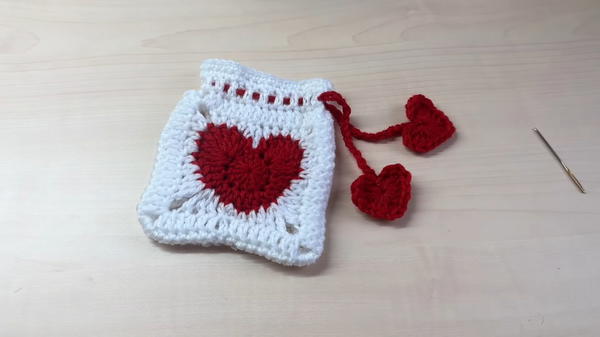
Carry love with this Free Crochet Granny Heart Pouch Pattern, adding playful charm, cozy texture, and sweet elegance to your everyday essentials.
Its beauty lies in the textured crochet motifs, where gentle curves and layered stitches create a visually appealing, tactile piece that draws attention and admiration. The specialty of this pouch rests in its compact charm and adaptability; it can be made in various colors, paired with delicate closures, or accented with small details to reflect personal style.
Lightweight and durable, it keeps items organized while fitting easily into a handbag, backpack, or drawer. Suitable for both beginners and experienced makers, this project provides a satisfying and rewarding experience from start to finish. Combining charm, function, and handmade elegance, the Granny Heart Pouch becomes more than an accessory, it is a small creation full of personality, warmth, and lasting appeal for everyday use or special occasions.
Materials Needed
Yarn:
- Acrylic yarn from Mr. DIY or any similar yarn.
- Suggested colors: Red (for the heart and drawstring) and White (for the granny square edges).
Hook:
- 5 mm crochet hook.
Other Notions:
- Scissors
- Stitch marker (optional)
- Yarn needle
Special Features
- Heart Motif: The center of the granny square features an elegant heart, adding charm to the pouch design.
- Customizable Size: You can adjust the pouch size by making the granny squares larger or by adding more rows to the pouch's sides.
- Decorative Drawstring: A handmade chain drawstring with small crocheted hearts at both ends enhances both functionality and aesthetic appeal.
- Beginner-Friendly: Focuses on basic stitches like single crochet, double crochet, half-double crochet, and triple crochet.
Level of Difficulty
The project is beginner-friendly to intermediate due to the mix of basic stitches and techniques like the magic circle and shaping the heart. Beginners with basic crochet knowledge will find it enjoyable, while more experienced crocheters will appreciate its simplicity and charm.
Tutor's Suggestions
- Check Alignment: While joining the squares, ensure the right sides of the squares face each other for proper alignment.
- Use Stitch Markers: Adding markers for the longest part of the heart helps keep your work symmetrical when transitioning between colors.
- Adjust the Drawstring Length: Customize the chain length of the drawstring to suit your preference and purpose.
- Block Your Granny Squares: Blocking will give your finished squares cleaner edges before final assembly.
Step-by-Step Instructions
Part 1: Crochet the Heart
Start with a Magic Circle:
- Using red yarn, make a magic circle.
Round 1:
- Chain 3 (counts as the first double crochet) and make 12 double crochets (DC) into the magic circle.
- Pull the loop to close the magic circle.

- Slip stitch into the top of the chain-3 to finish the round.
Round 2:
- Skip the first two stitches.
- Into the third stitch, make eight triple crochets (TRC).
- In the next stitch, make a double crochet (DC).
- In the following stitch, make a double crochet and half-double crochet (HDC).
- Into the next stitch, make two HDC stitches in the same stitch.
- Continue following the pattern with combinations of HDC, DC, and TRC as described.
- End the round with eight TRC into one stitch and finish with a slip stitch.
Tie Off:
- Cut the yarn and weave in the ends.
- Your heart is now complete.
Part 2: Create the Granny Square Around the Heart
Attach White Yarn:
- Insert your hook into the stitch marked (center of the longest part of the heart) and attach white yarn.

- Insert your hook into the stitch marked (center of the longest part of the heart) and attach white yarn.
Round 1:
- Start with a single crochet (SC) into the marked stitch.
- Continue with combinations of stitches (SC, HDC, DC, TRC) as described in the tutorial to build the granny square around the heart.
- Increases and chains are made at specific points to shape the square.
Round 2:
- Start with a chain-3 (this acts as the first DC).
- Make DC stitches across and form corners in chain-3 spaces with 2 DC, chain-3, 2 DC.
- Continue until the granny square shape is complete.
Tie Off and Weave Ends:
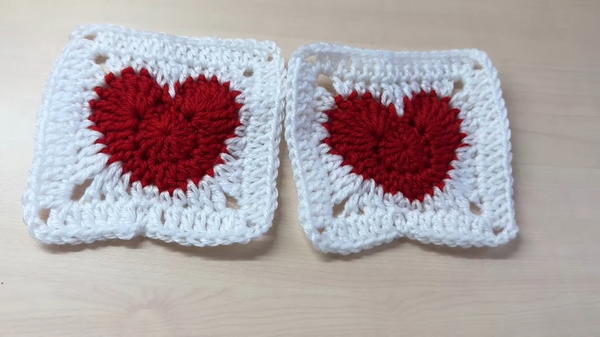
- Your granny square is now complete.
- Make another identical granny square to form the back of the pouch.

Part 3: Join the Granny Squares
Place Squares Together:
- Align both granny squares with right sides facing inward.
Single Crochet Edges:
- Use white yarn and join the squares by single crocheting across three edges.
- Add 3 single crochets into the chain-3 space at the corners to ensure smooth edges.
- Leave one edge open for the pouch opening.
Turn Inside-Out:
- Turn the joined squares inside-out to reveal the clean outer surface.
- Turn the joined squares inside-out to reveal the clean outer surface.
Part 4: Add Length to the Pouch
Continue Crocheting the Opening:
- Begin crocheting across the open edge to add length to the pouch.
- Alternate a round of double crochets (DC) and single crochets (SC) until you reach your desired height.
Tie Off and Weave Ends:
- Finish the edge with a final row of SCs, tie off your yarn, and weave in the ends.
Part 5: Create the Drawstring
Chain a Long String:
- Using red yarn, make a long chain (e.g., 56 chains).
- Cut the yarn, leaving a long tail at both ends.
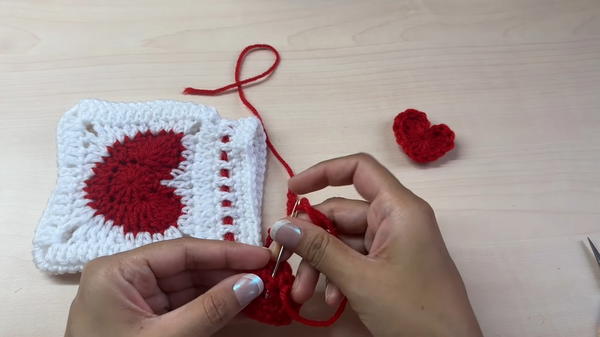
Thread the Drawstring:
- Use a yarn needle to weave the chain through the pouch’s top edge (in and out motion).
Add Mini Hearts to the Drawstring:
- Make two small hearts using the same pattern as the main heart but stop after the first few rows.
- Sew one mini heart to each end of the drawstring.
Conclusion
Your crochet heart granny square mini pouch is complete! This charming pouch is perfect for gifting or storing small items while showcasing your crochet skills. The heart motif and drawstring with tiny hearts make it both functional and decorative. You can experiment with colors to create unique versions for different occasions.
Bonus Tip
If you plan to gift this pouch, consider adding a small scented sachet or decorative items inside for an extra thoughtful touch. This will enhance its appeal as a handmade gift!