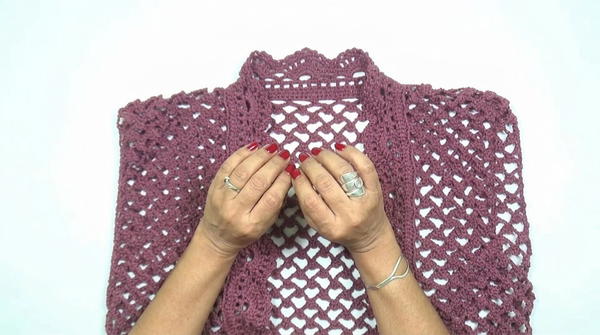
Spruce up your wardrobe with a stunning crochet bolero using this free guide! Add style and comfort with a lightweight layer that pairs beautifully with any outfit.
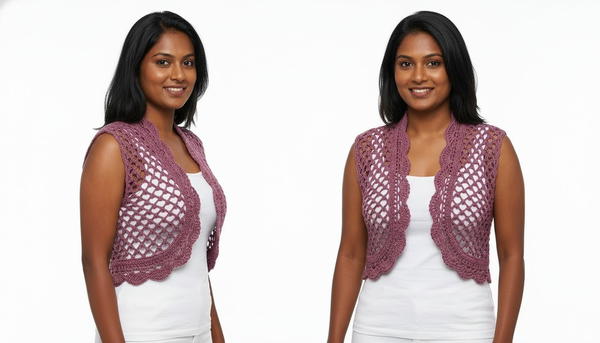
A bolero is a stylish and practical garment that adds charm and sophistication to any outfit. Designed as a short, cropped jacket, it provides a lightweight layer that is perfect for mild weather or indoor settings. Using a free crochet bolero pattern, you can easily create a versatile shrug that enhances your wardrobe without being bulky.
Free Crochet Bolero Pattern Perfect for Any Season
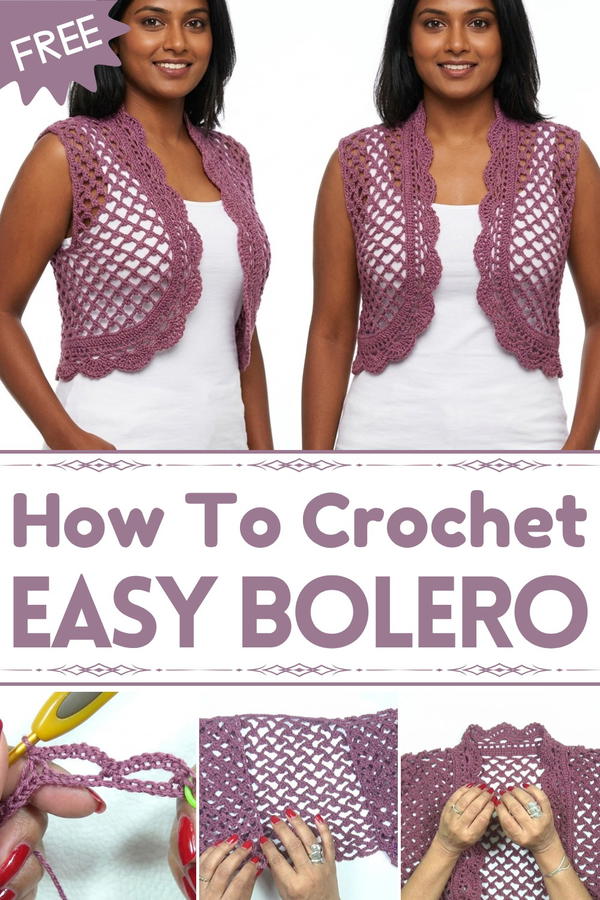
The crochet bolero boasts delicate designs, often crocheted with soft yarn and intricate stitches, resulting in a beautiful and elegant piece. Its appearance can elevate flowy dresses, t-shirts, or sleeveless tops, creating a polished and graceful look. This garment is especially useful for layering, offering just enough shoulder coverage while maintaining a light, airy feel.
Moreover, the bolero is a practical addition, it can be tailored to your preferred size, style, and color, making it uniquely yours. Simple instructions make this pattern beginner-friendly while still being enjoyable for experienced crocheters. Whether for casual outings or more formal occasions, a crochet bolero is both functional and fashionable, serving as a timeless piece you’ll reach for again and again.
Step-by-Step Crochet Bolero Pattern
Materials Needed
Yarn:
- Scarly Els yarn (or comparable Breeze-style medium-weight yarn with a slight sheen)
- Yarn weight: Medium (#3).
- Quantity: Approximately 120g for a size Medium. Larger sizes may require additional yarn.
Hook:
- Recommended: 4.5 mm crochet hook
- (Also compatible with hooks ranging from 3 mm to 5 mm depending on gauge.)
Notions:
- Tapestry needle for weaving ends and seaming
- Measuring tape
- Stitch markers
Gauge
Establishing proper gauge will ensure your bolero fits as expected.
- Pattern Repeat in Fan Rows: 7 v-stitches = 10 cm (or 4 inches) wide, worked in the repeat stitch section.
- 7 finished arches (row 2 repeat): ≈ 10 cm wide.
If your tension doesn’t match, adjust your hook size accordingly.
Sizing Information
This pattern can be customized for any size. Measurements to consider:
- Back Width: Measure from one shoulder to the other across your back. This determines the width of the base rectangle.
- Front Length: Decide how far down the front the bolero will fall.
- Neck Opening: Leave a central neckline gap according to your preference (approx. 14–16 cm for medium size).
- Armhole Width: Measure around your armhole for a comfortable fit (generally 18–22 cm for medium size).
Special Stitch Techniques
- Foundation Chain: Basic starting foundation chain for your desired width or measurement.
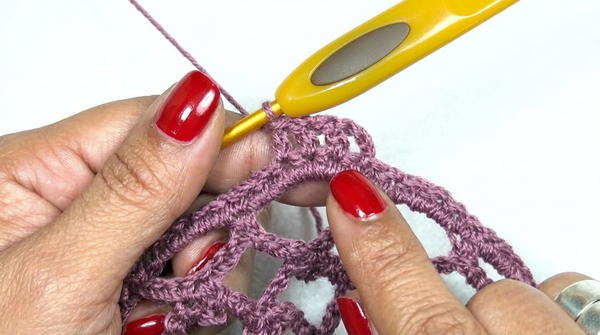
- Arches: (sc, ch 7, skip 4 stitches). Creates the characteristic “openwork” base of the bolero.
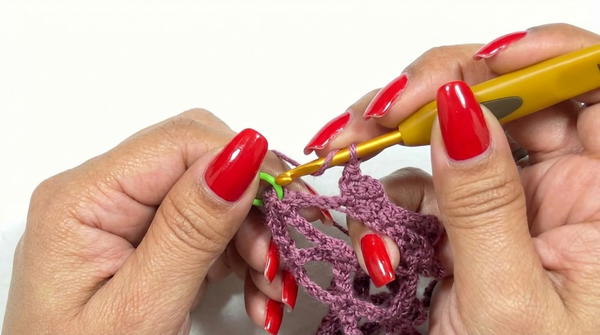
- Fan Stitch: Work 7 double crochets (dc) in one space.
Pattern Guide
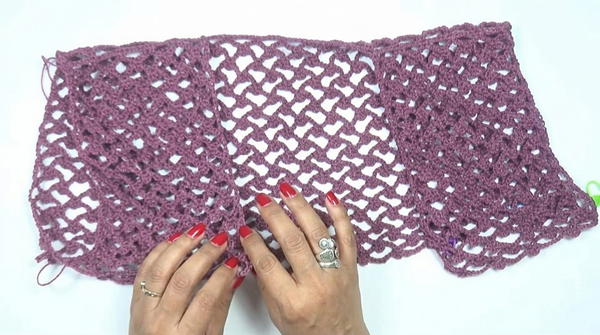
The bolero is made in three sections: the back panel, two front panels, and then all three are joined and worked in the round.
Step 1: Back Panel
Determine Back Width: Measure the back from shoulder to shoulder. Add an extra 4 cm (for ease) if desired.
Foundation Chain:
- Chain the desired width measurement in arches, ensuring the chain is multiple of 7 + 1.
- Example for a medium size: Back panel = approx. 38 cm → Foundation chain: ~69 stitches.
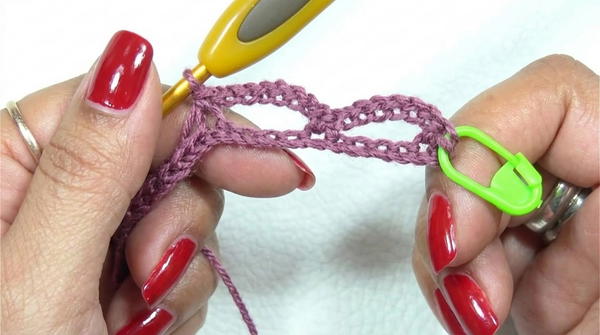
Row 1 (Arch Stitch Row):
- Ch 7, skip 4 chains, sc in the next chain.
- Repeat across the row to the end. Finish with a single crochet.
Row 2 (Arches with Fans):
- Ch 4 (counts as the first dc). Skip the next 3 stitches. In the 4th stitch, work: (1 sc, ch 3, 1 sc) → this creates a small anchor.
- Chain 7 chains, repeat the (1 sc, ch 3, 1 sc) in every middle chain of your arches from the previous row.
Repeat rows 1 and 2 alternately until the back panel measures the length desired (ending at or slightly below the armpit).
Step 2: Left and Right Front Panels
For the front panels:
Divide the Back Panel into 3 Sections:
- Count how many arches fit across the back panel.
- Leave a central gap for the neckline (≈ 14–16 cm for Medium size).
- Divide the remaining arches equally for the left and right front panels.
Working the Front Panels:
- Attach yarn to the first arch on the left side of the back panel.
- Work rows in the same way as the back panel (alternate arch rows and fan rows).
- Repeat on the right side, ensuring symmetry (make sure both panels are of equal length).
Step 3: Joining the Panels
- Seam the Front and Back Panels at the Sides:
- Fold the panels and leave armhole space (≈ 18 cm for Medium size).
- Use a whip stitch or mattress stitch to seam from the armpit down to the hem.
- Seam the Shoulders:
- Whip stitch or mattress stitch along the shoulders, leaving the neckline and armholes open.
- Whip stitch or mattress stitch along the shoulders, leaving the neckline and armholes open.
Step 4: Edging in the Round
Once the panels are joined, the bolero is worked continuously in the round to create the curved front and provide more coverage.
Round 1 (Single Crochet Base Row):
- Attach yarn at any neckline point.
- Work 1 sc in every stitch along the edges, placing 4 sc in each space for arches and 1 sc on each seam.
Fan Stitch Rows (Increase the Front Curve): Alternate a fan stitch pattern with “straight row” arch stitch rows:
- Fan Rows: Work (7 dc in one space, sc in the next space) around.
- Arch Rows: Return to (sc, ch 7, skip 4 stitches).
Repeat Until Desired Length Is Reached: Work until the bolero drapes well past your bust and slightly curves in at the front.
Step 5: Finishing Touches
- Work single crochet around the neckline and the armholes to ensure the edges are smooth.
- Place 2–3 sc per edge of dc rows, and 1 sc per sc row or horizontal stitch.
- For a more finished look, incorporate reverse single crochet (crab stitch).
- Weave in all yarn tails using a tapestry needle.
Customization Suggestions
- Add Sleeves: To make this bolero a long-sleeved shrug, crochet directly into the armholes and use the same fan/arch stitch repeat to extend the sleeves.
- Increase Front Curve: Add more rows to the front edging if you prefer a longer or more dramatic bolero style.
Conclusion
This lightweight and easy-to-make bolero is perfect for casual outfits or special occasions. It combines an elegant fan design with lightweight openwork arches while being adaptable to any body size.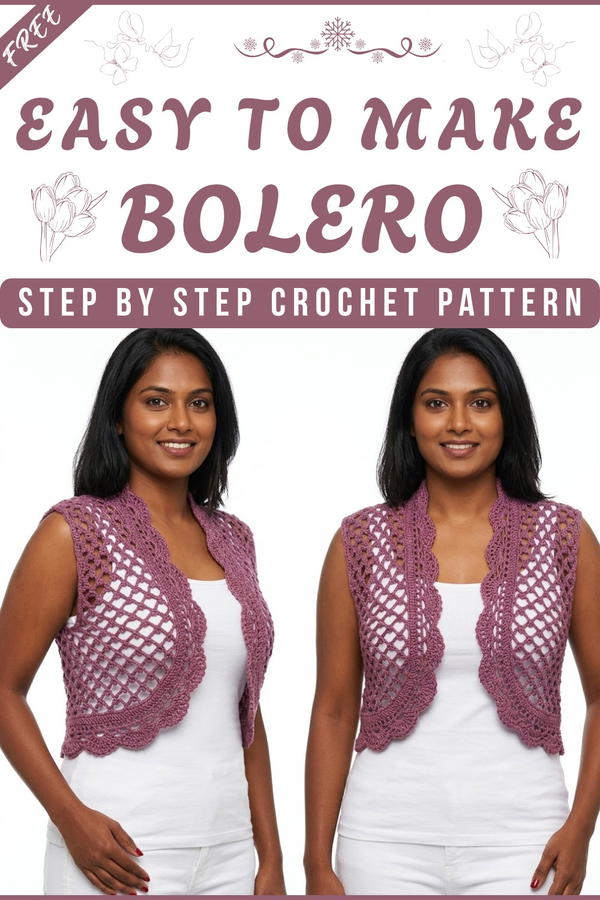
Final Tips
- Blocking: To ensure your bolero lies flat and fits perfectly, lightly block it after completing your work.
- Yarn Substitution: Use any medium-weight yarn with a good drape (cotton, bamboo, or blended yarns work well).
- Keep Measuring: While crocheting, try the bolero on frequently to ensure the fit is right for your size and style preferences.