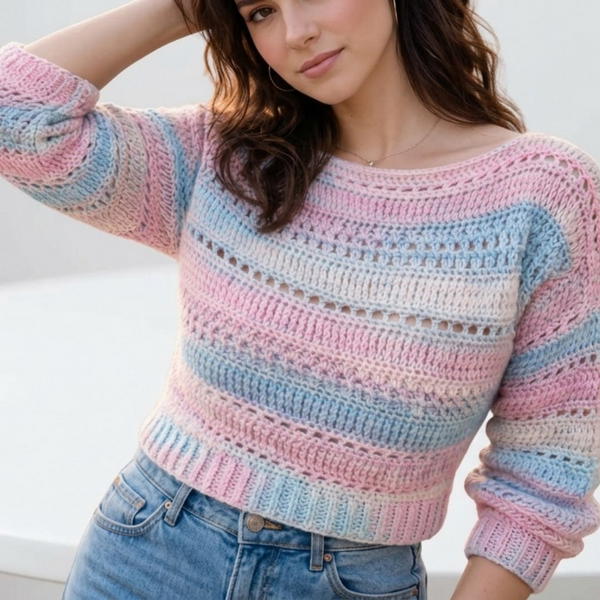
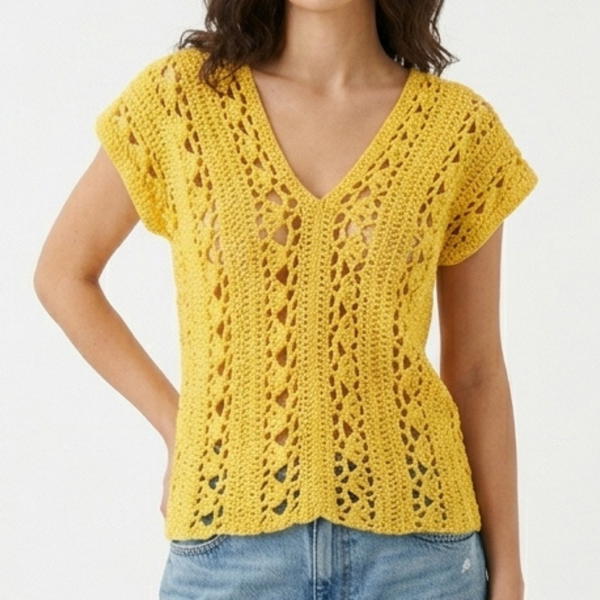
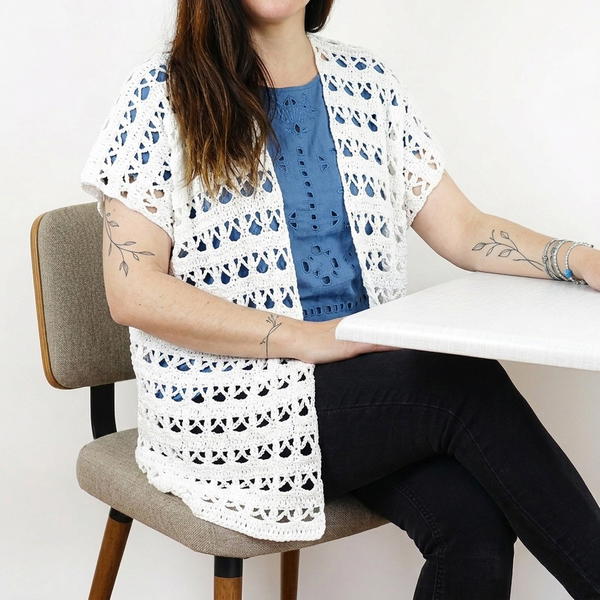
Learn how to make a light and airy crochet mesh top with this simple free pattern, perfect for sunny days, casual outings, or layering over your favorite outfit.
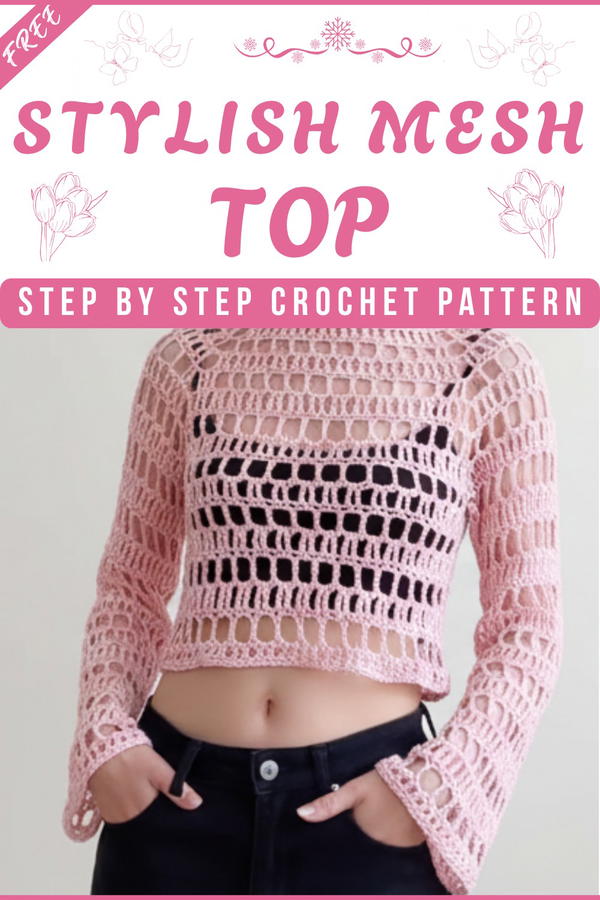
Perfect for warm weather, this lightweight and breathable top is both stylish and practical. Featuring a beautiful mesh design, it adds a touch of elegance and charm to any outfit. Its airy pattern keeps you cool while creating a fashionable and trendy look that’s easy to pair with jeans, skirts, or beachwear. Whether you’re heading to a picnic, a casual outing, or simply relaxing outdoors, this top offers comfort without sacrificing style.
Crochet Mesh Top Easy Free Pattern Perfect for Holidays

The handmade detail gives it a unique and creative touch, making it stand out from store-bought clothing. It’s versatile enough to dress up or down, making it a must-have for any wardrobe. With its soft texture and open design, it feels as good as it looks, bringing together beauty, functionality, and timeless appeal in one simple piece.
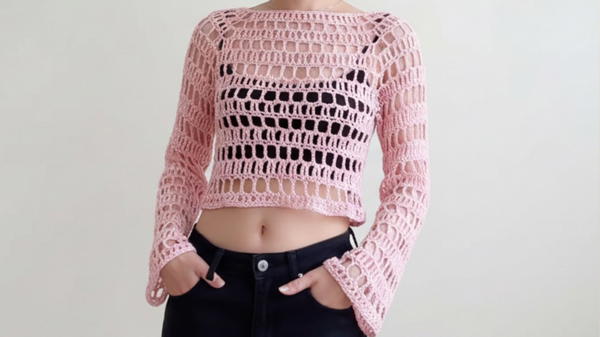
Step-by-Step Crochet Crop Top Pattern
Skill Level
Intermediate - This pattern requires knowledge of basic stitches, triple crochet, stitch marking, and increasing/decreasing techniques. While this is beginner-friendly, handling finer yarn with a larger crochet hook can be slightly challenging but rewarding.
Finished Size
This crop top can be customized for various body sizes. The provided instructions are for a general Small size, but size adjustments are included in the customization section.
Materials
Yarn:
- Fine yarn (Category #2) or equivalent.
- For a looser and lightweight fabric, consider using super fine yarn (Category #1) or lace yarn.
Hook:
- 5.5 mm crochet hook, designed to create a loose and breathable fabric.
Additional Tools:
- 4 stitch markers (pin-style or clip-style recommended for convenience).
- Scissors.
- Yarn needle (for weaving ends).
Special Techniques
Triple Crochet (Tr):
- Yarn over two times, insert hook, pull through, and work through loops in sets of two loops at a time.
Increasing:
- Work Tr, ch 3, Tr into the same stitch for increases.
Underarm Chain:
- Create a 3-chain space during the sleeve construction for a seamless underarm area.
Magic Knot for Joining Yarn:
- Tie knots on both yarn tails, tighten, and pull against each other to securely join two pieces of yarn.
Gauge
While gauge measurement is not strict for this loose crop top, approximate dimensions are:
- 4-inch square (10 cm x 10 cm):
- 5 rows of triple crochet, worked with fine yarn and 5.5 mm hook.
Pattern Overview
The crop top is worked in the round without seams, starting with the body section and later transitioning to the sleeves.
Crop Top Pattern Instructions
Body Construction
Step 1: Foundation Chain
- Begin with a slip knot, leaving a long tail (to adjust chain length if necessary).
- Measure or chain according to size:
- For Small: Chain 120 stitches (adjust as needed for larger sizes by following a multiple of stitches).
- Ensure chains are loose enough for a smooth starting row.
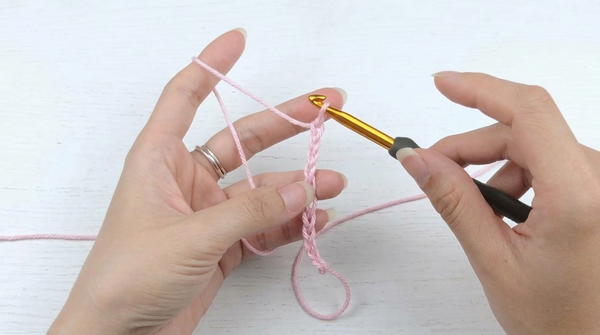
Step 2: Row 1 - Triple Crochet
Skip the first 3 chains; in the 4th chain, work 1 Tr.
Work Tr into each chain up to the required number for your size.
- For Small: Work 8 Tr, stop, and begin increases.
Increasing:
- In the next chain: Work Tr, ch 3, Tr into the same stitch. Place a stitch marker in the ch-3 space.
Continue as follows:
- Work Tr into the next set of chains until the next increase is required.
- Repeat Tr, ch 3, Tr (increase) every ¼th of the row.
- Aim for 4 increases total spaced evenly in Row 1.
At the end of Row 1:
- Slip stitch into the first Tr to join the round, ensuring the work is not twisted.
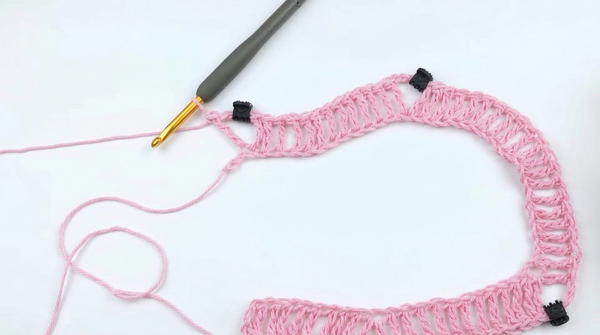
Step 3: Row 2 - Chain Space Row
Start Row 2:
- Begin with ch 3 (counts as 1 Tr), turn your work. Work Tr into the first stitch.
Repeat Pattern:
- Work ch 1, skip 1 stitch, Tr into next stitch for the row's simple pattern.
At increases (ch-3 spaces from Row 1):
- Remove marker. Work Tr, ch 3, Tr into the marked ch-3 space. Place the marker into the new ch-3 space created.
Repeat until the end of the row. Slip stitch to join.

Step 4: Row 3 - Triple Crochet Everywhere
- Start the row with ch 3 and work Tr into each stitch and chain from Row 2.
- At increases (ch-3 spaces marked): Work Tr, ch 3, Tr into each marked space.
Repeat Rows
Alternate Row 2 and Row 3 to gradually create the body. Continue this pattern until the body section is long enough for your desired crop length.
Sleeve Construction
Once the body section is complete, start dividing for the sleeves and body.
Step 1: Create Sleeves
Working pattern:
- When nearing a ch-3 space, work Tr into the ch-3 space.
- Chain 3 (underarm chain). Skip all stitches between increases and work directly into the next ch-3 space on the other half of the sleeve area.
- Resume pattern stitch immediately after the sleeve.
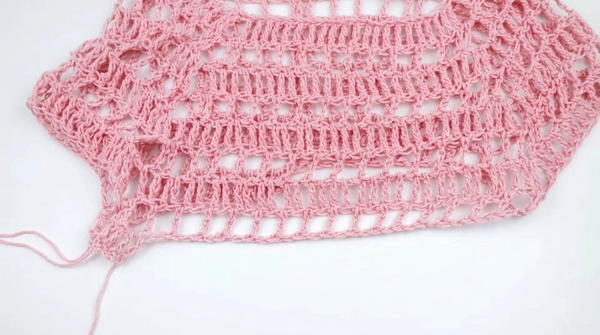
Repeat around the whole body to define sleeve openings.
Step 2: Shaping Sleeves
- Attach yarn to the underarm chain and begin working in the round.
- On underarm chains: Work Tr into each chain, treating each chain loop like a regular stitch.
- Continue with body pattern: Tr in each stitch, and alternate with chain rows to match sleeve length to the desired fit.
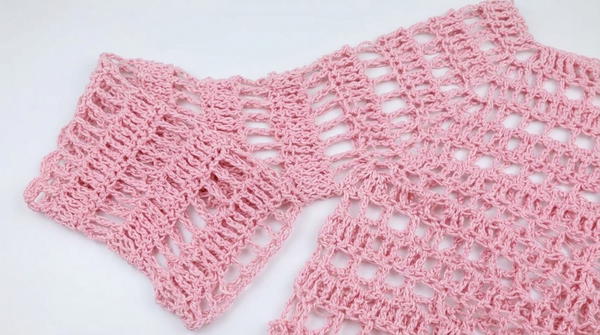
Finishing
Sleeve and Body Edges
- Work a final double crochet row at the body's lower edge for a clean finish. Use chain 2 for turning instead of chain 3 to reduce gaps.
- Add one final single crochet row at the edge of the body and each sleeve for sturdiness and cleaner edges.
Weave Ends
- Use the yarn needle to weave all ends securely with the technique:
- Twist ends into nearby stitches by weaving up, down, left, and right to ensure they are locked in place.
- Stretch fabric at the weave points gently to maintain an even drape.
Final Words
This crochet crop top is flexible and stylish, with simple yet effective stitches creating a comfortable texture. Its open and breathable design makes it perfect for warm weather. Customize the sleeve length, body length, or width to suit your preference.
Tips for Success
- Avoid Tension Errors: Work loosely with thin yarn to achieve softer drape.
- Use Long Tail: Always leave a tail at the foundation chains to adjust for size errors.
- Count Stitches: Regularly check stitch counts after rows to ensure symmetry.