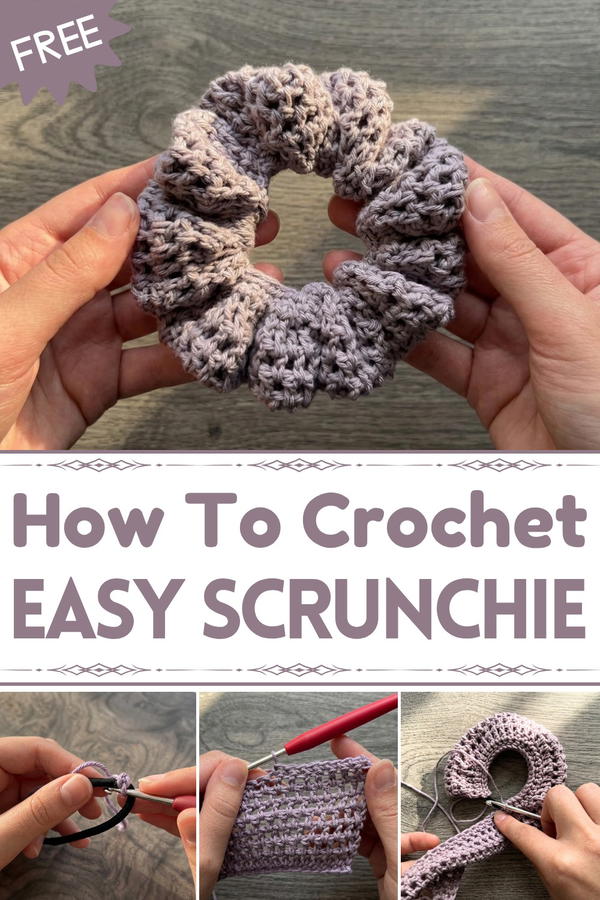
Upgrade your hairstyle with this free crochet scrunchie pattern that blends style and comfort, making it the perfect accessory for everyday wear or special occasions.
Add a pop of charm to your hair with a beautiful crochet scrunchie that’s soft, stylish, and perfect for every occasion. The free pattern lets you create this elegant accessory, which not only enhances your hairstyle but keeps your hair secure without causing damage. Its unique design, vibrant colors, and delicate texture make it a versatile choice for casual days or special events.
Free Crochet Scrunchie : Quick and Easy Pattern
Light and comfortable, this scrunchie feels gentle while adding a playful touch to ponytails, buns, or braids. Whether used as a daily essential or gifted as a heartfelt creation, it offers durability and beauty in one perfect package. It’s a blend of fashion and functionality that gives your look a personal and creative edge. Treat yourself to this handmade treasure and enjoy the compliments it brings to your effortless style.
Crochet Pattern: Cotton Scrunchie
Materials
- Yarn: Fine-weight cotton yarn (Recommended: Friends Cotton Yarn by Hobby – 100% cotton).
- Hook Size: 3.5 mm crochet hook (or upsize by 1 mm for looser stitches if your stitches feel tight).
- Hair Tie: Ensure it is sturdy and non-slip for durability.
- Darning Needle: To sew ends together.
- Scissors
Abbreviations (US Terminology)
- ch: Chain
- sc: Single Crochet
- dc: Double Crochet
- sl st: Slip Stitch
Special Techniques
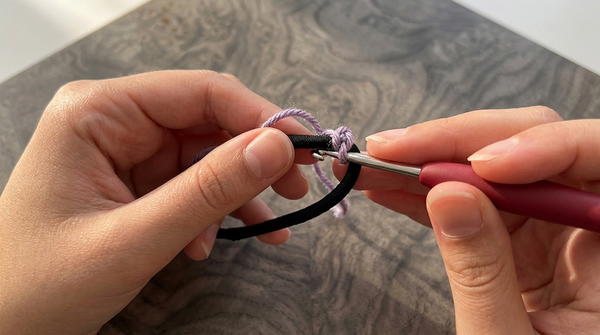
Creating a Slip Knot:
- Wrap yarn around two fingers to form an "X".
- Pass your hook under the bottom strand and grab the top strand.
- Pull the strand through and tighten around your crochet hook.
Working with a Chainless Foundation (Optional):
- To start this project, you'll use traditional chains; however, the length of your chain depends on the size of your hair tie. (See steps for calculating chain length under Step 1.)
Working on Back Bars of Chains:
- Instead of working on the front side of the chain stitches, you will insert your hook into the back bars (the small bumps on the back). This creates a neater and more uniform finish.
Slip Stitch Assembly:
- Slip stitching combines the folded halves of your work while securing the hair tie inside. Work into the front loop of one side and the back loop of the opposite side.
Pattern Steps
Step 1: Chain Calculations
Start by covering the hair tie with single crochets to measure its circumference.
- Insert your hook into the hair tie, yarn over, pull through two loops to make single crochets. Space these single crochets evenly across the tie, ensuring the stitches are neither too tight nor too far apart.
Count the total number of single crochets completed (e.g., 56 sc).
Divide this number by 2 (e.g., 56 ÷ 2 = 28) and add the two numbers together (56 + 28 = 86 chains).
- This calculation ensures the chain length matches the stretch of the hair tie for optimal fit.
- This calculation ensures the chain length matches the stretch of the hair tie for optimal fit.
Once the number of chains is calculated, undo the single crochets from the hair tie and start the project.
Step 2: Crochet Base
Row 1: Foundation Chains
- Make a slip knot and place it on your hook.
- Crochet the number of chains calculated from Step 1 (e.g., 86 chains).
- Yarn over and pull through the loop to form a chain. Repeat until the desired chain count is reached.
Rows 2–9: Crochet Stitches
Row 2: Single Crochet
- Turn your chain to see the back bars (little bumps on the reverse side of the chain).
- Skip the first back bar and insert your hook into the second back bar.
- Yarn over, pull through, yarn over again, and pull through both loops to complete an sc.
- Repeat in every back bar across the row.
- Tip: Place a stitch marker in the first stitch for easier tracking.

At the end of Row 2, chain 1 and turn your work.
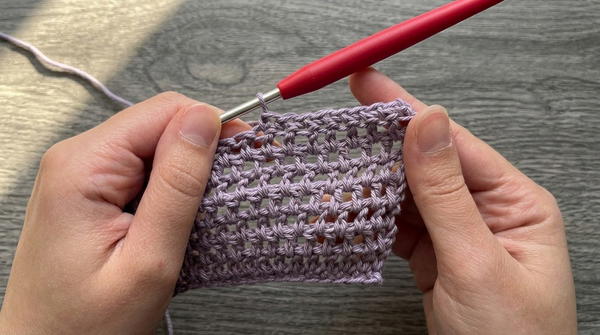
Row 3: Double Crochet (Basic Stitches)
- Yarn over, insert the hook into the first stitch (skip chain 1), yarn over, pull through (3 loops on hook), yarn over, pull through the first 2 loops, yarn over, pull through the last 2 loops.
- Repeat across the row.
- Note: Work into the stitch tops for this row.
Chain 1, turn your work.
Rows 4–8: Double Crochet (Using Large Holes)
- For these rows, instead of working into the stitch tops, insert your hook into the large holes formed between double crochets in Row 3.
- Yarn over, insert the hook into a hole, and complete a double crochet as normal.
- Repeat for all rows, ensuring stitches remain consistent.
- For the last hole in each row, insert your hook into the chain-1 space to add stability.
- Repeat Row 4 for a total of five rows.
Row 9: Single Crochet
- After completing Row 8, transition into single crochets for Row 9 to add a clean finishing edge.
- Insert your hook into each stitch top as before. Work sc across the row.
- Chain 1 at the end.
Step 3: Assembly
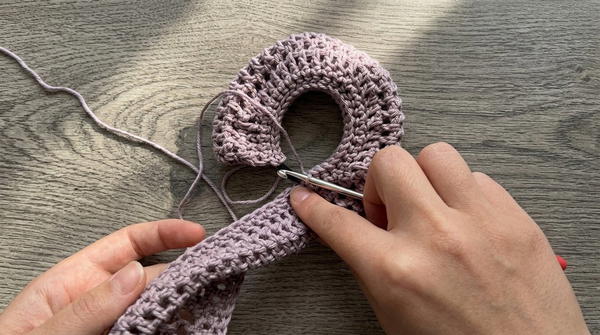
Slip Stitch Around Hair Tie
- Fold your work lengthwise and align edges together.
- Place the hair tie inside the folded piece.
- Insert your hook into:
- Front loop of the stitch on one side.
- Back loop of the stitch on the opposite side.
- Yarn over and pull through all loops on hook to create a slip stitch.
- Continue slip stitching across the folded edge, moving the hair tie as needed to create space.
- Pull the hair tie snugly to ensure proper fit.
- Pull the hair tie snugly to ensure proper fit.
Step 4: Final Sewing
Once slip stitching is complete, leave a 30 cm tail and cut the yarn.
Sew together the remaining ends using the darning needle:
- Pass the yarn through small loops moving back and forth evenly on both sides to create a neat closure.
Tie a knot with leftover tails if needed and weave all ends using the needle. Push the excess thread into the scrunchie’s folds to conceal it.
Finishing
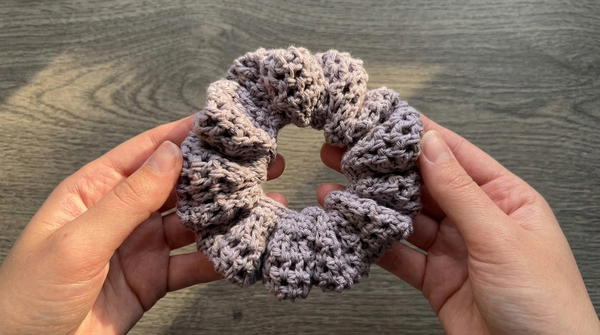
Your scrunchie is now complete! The final product should be stretchy and durable, with the hair tie hidden neatly inside. The double crochets provide texture and volume, making the scrunchie playful and stylish.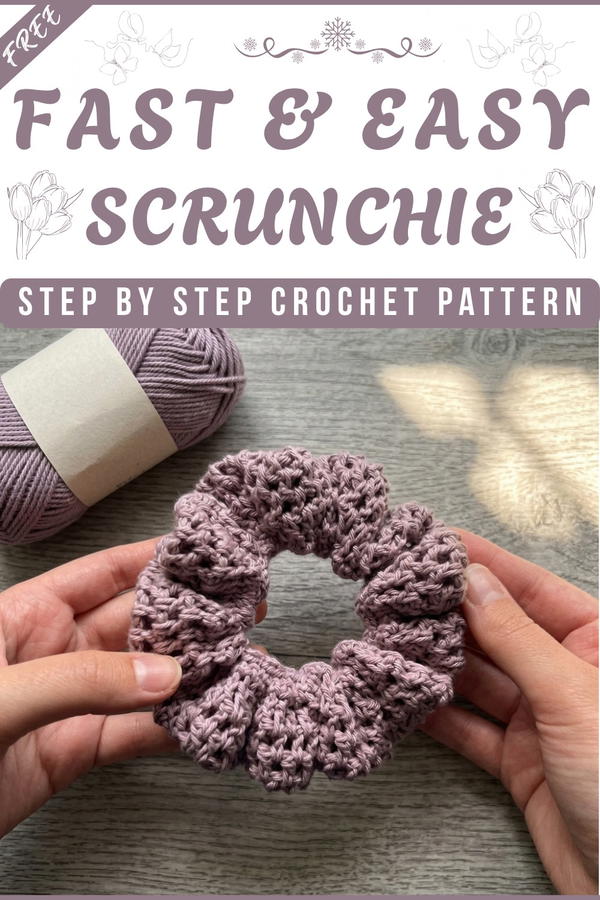
Final Words
Crocheting scrunchies is not only fun but also rewarding. It’s a small and highly customizable project that lets you experiment with colors, textures, and materials. Here's why these scrunchies make a great addition to your crochet repertoire:
- Quick Gift Idea: These scrunchies take little time and are a perfect DIY gift.
- Eco-Friendly: Handmade cotton scrunchies replace plastic ones, which may harm the environment.
- Versatile: Experiment with yarn weights and colors to create different looks.
Maintenance Tips
- Wash the scrunchie gently by hand using warm water and mild soap.
- Avoid placing the scrunchie in the dryer to prevent unnecessary wear.
- Store scrunchies in a drawer or separate container to maintain their shape.