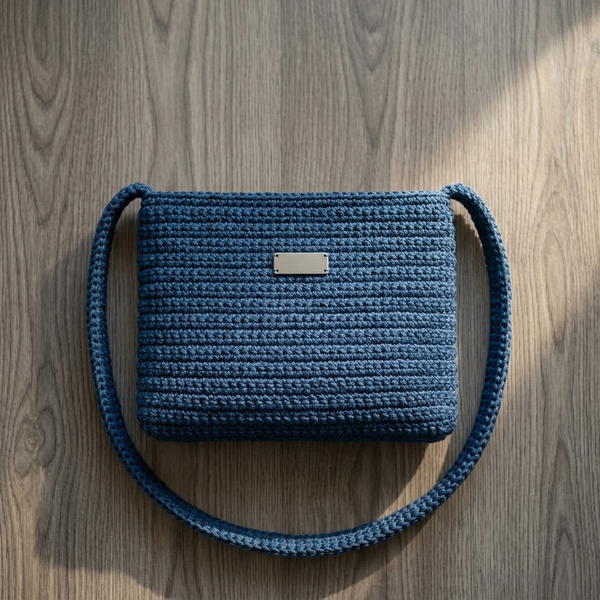
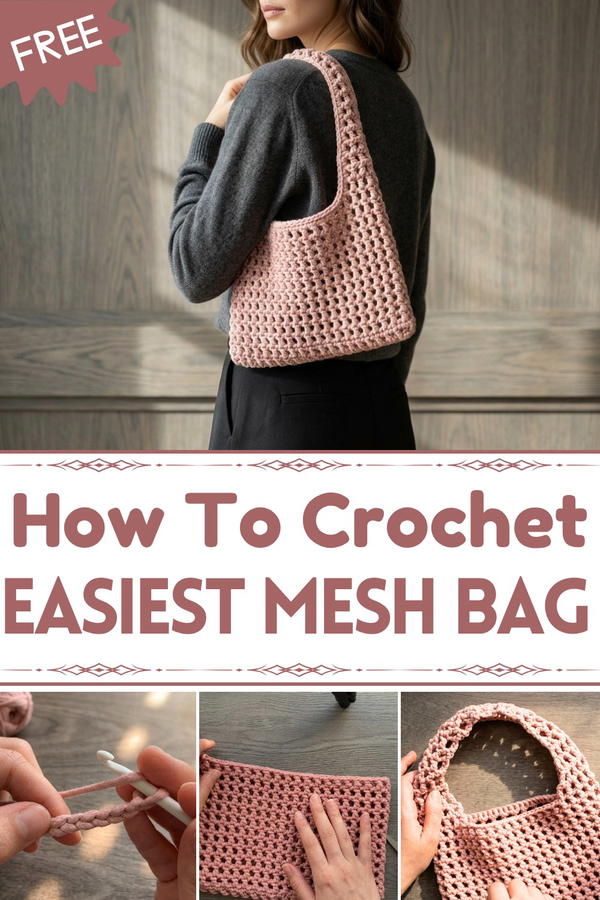
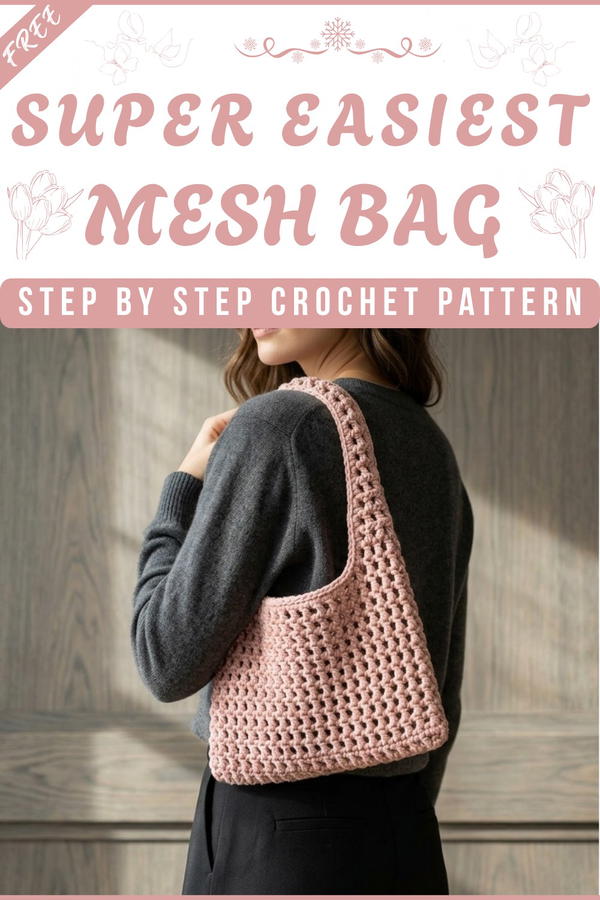
Create your own cute and stretchy crochet mesh bag with this easy pattern, perfect for shopping, beach trips, or just showing off your handmade style.
Looking for a stylish and easy accessory you can make yourself? This crochet mesh bag is the perfect answer! With its airy, openwork design, this bag adds a fresh and trendy touch to your everyday outfit while being practical and reusable. It’s lightweight yet sturdy, making it ideal for carrying groceries, beach essentials, or daily items with ease.
Mesh Bag Pattern with This Free Crochet Instructions
The unique mesh pattern gives it a beautiful look while allowing it to stretch and hold more than it seems. Its soft handle ensures comfort, even when packed full. What makes it extra special is how simple and fun it is to create, making it a fantastic project for beginners and experienced crochetters alike. A crochet mesh bag is not just a useful item, it’s a stylish and eco-friendly choice for every occasion.
Mesh Crochet Bag Pattern
Materials
- Yarn: Bulky or chunky weight yarn
- The label: 8 mm hook
- The maker uses: 5.0 mm hook for a tighter, neater look
- With one skein, you can make at least two bags, possibly three depending on skein size.
- Crochet Hook: 5.0 mm (H-8) or size needed to achieve gauge and desired fabric firmness
- Tapestry/Yarn Needle: For sewing ends and joining straps
- Stitch Markers: At least 4–6
- Scissors
Gauge
The video does not give an explicit gauge, but we can approximate based on the instructions:
- With 5.0 mm hook and chunky yarn:
- Mesh section:
- 19 mesh squares/holes across the round
- 12 mesh rounds high for the body before straps
- Mesh section:
For practical purposes, aim for:
- About 12–13 mesh squares = 10 cm (4") horizontally
- About 7–8 mesh rounds = 10 cm (4") vertically
If your mesh looks too loose and floppy, go down a hook size. If it is too tight and stiff, go up a hook size.
Finished Size (Approximate)
With bulky yarn and 5.0 mm hook:
- Bag body height (mesh part only): approximately 22–25 cm (9–10")
- Total height including straps: roughly 40–45 cm (16–18") depending on strap length and blocking
- Bag width (lying flat, side to side): about 25–30 cm (10–12")
Actual size will vary with yarn, hook, and individual tension.
Special Stitches & Techniques
- Slip Knot
- Chain (ch)
- Single Crochet (sc)
- Double Crochet (dc) – used to form the mesh squares
- Slip Stitch (sl st)
- Working in Chain Spaces (ch-sp) – inserting hook into holes between dc stitches
- Invisible/Seamless Join with Slip Stitch into 2nd Chain of Turning Chain – to hide the join in the mesh and keep it looking continuous
- Fake Stitch with Needle – at the end edge to make the border look continuous
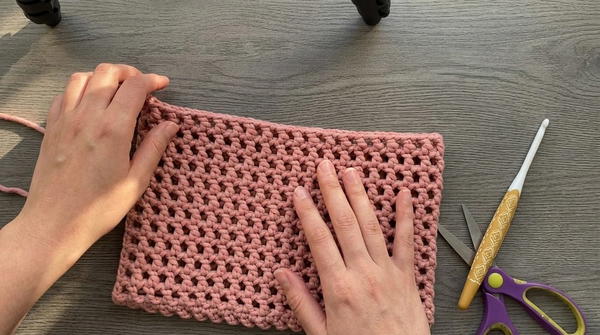
General Construction
- Chain foundation and first mesh row.
- Work single crochet around to form the base/oval bottom.
- Work continuous mesh rounds up the body of the bag.
- Create two straps by working mesh “pyramids” and reducing the number of squares each row.
- Maintain strap with 3 squares for several rows to lengthen.
- Repeat on the opposite side.
- Join the two straps at the top.
- Add a single crochet + slip stitch border around the strap edges and top bag opening for a neat finish.
- Weave in all ends.
Pattern Instructions
1. Foundation Chain & First Mesh Row
Slip Knot
- Make a slip knot on your hook.
Chain 42
- ch 42.
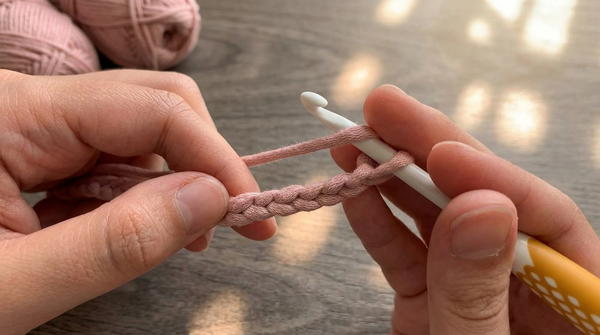
- ch 42.
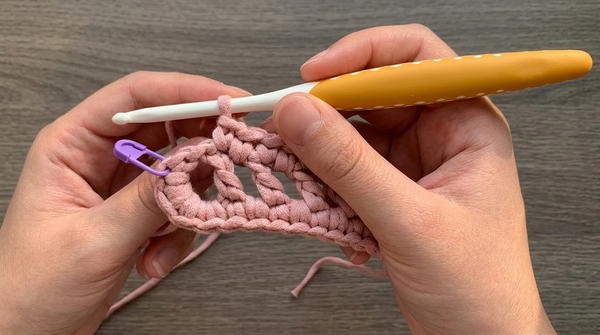
Row 1 – Mesh Setup
- Count back from the hook and skip the first 5 chains.
- Yarn over, insert hook into the 6th chain from the hook.
- dc in that chain:
- yo, insert hook, yo, pull through, yo, pull through 2 loops, yo, pull through last 2 loops.
- This starts your first mesh square.
- ch 1.
- [Mesh pattern]
- yo, skip 1 ch, dc in next ch (the following chain).
- ch 1.
- Repeat the [Mesh pattern] across the row until you reach the last chain.
- You should end with a dc in the last chain.
- At the end of this row, you should have 19 mesh holes (squares).
Do not turn; you will now work around the end to create the base.
2. Forming the Base with Single Crochet
You now work around the chain and mesh row to create an oval base using single crochet.
Single Crochet at First End
- At the end of Row 1, locate the first mesh hole (the open space at the end).
- Insert hook into that hole (space), yo, pull through, yo, pull through 2 loops – this is a sc.
- Place a stitch marker in this first sc.
- Work 3 more sc into the same hole (space).
- You now have 4 sc in the first hole.
Continue Around the Long Side
- Going down the side of the mesh row, you will alternate:
- sc into the space “face-to-face” with each dc post (side of the stitch)
- sc into the next mesh hole (ch-1 space).
- Pattern along this side:
- sc into side of dc cluster/edge (“face-to-face” with dc)
- sc into mesh hole
- sc into side of next dc
- sc into mesh hole
- Continue this pattern down the whole long side.
- Going down the side of the mesh row, you will alternate:
Second End – Increase
- At the opposite short end, in the corner mesh hole, work 5 sc into the same hole.
- This curves the bottom and builds the other half of the oval.
Return Along the Second Long Side
- Repeat the same “face-to-face” pattern back down the other long side:
- sc into side of dc
- sc into mesh hole
- sc into side of next dc
- sc into mesh hole
- Continue until you reach the starting end.
- Repeat the same “face-to-face” pattern back down the other long side:
Last sc & Join
- In the last hole where you began, work 1 more sc if needed to complete the pattern.
- Locate the first sc where your stitch marker is.
- Insert hook into that marked stitch, yo, pull through both loops – sl st to join.
- Move your stitch marker to the last sc made in this round, not the slip stitch.
Your base/first round of single crochet is complete, and you have an oval bottom.
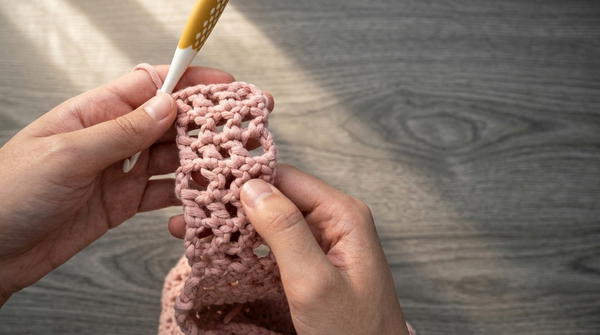
3. Mesh Rounds for Bag Body
From this point, the mesh pattern is worked in the round around the oval base.
Round 1 of Mesh (Body)
- ch 4 (counts as dc + ch 1 for the first mesh square).
- This ch-4 originates from the joined top of the base.
- Find your first stitch of the round (the one after the sl st).
- Mesh pattern in the round:
- yo, skip 1 stitch, dc in next stitch.
- ch 1.
- Continue: yo, skip 1 st, dc in next st, ch 1 around the entire oval.
Joining the Mesh Round Invisibly
- When you reach the starting point, you will see the first ch-4 from the beginning of the round.
- Count the chains: 1, 2, 3, 4.
- Insert your hook into the 2nd chain from the top of this ch-4.
- yo, pull through all loops on the hook – sl st to join.
- This keeps the join hidden and seamless.
Subsequent Mesh Rounds (Body)
- For each new mesh round:
- ch 4 (dc + ch 1).
- yo, skip the first stitch, dc into the next stitch (the one over the “little line” – top of a dc cluster).
- ch 1.
- Repeat: yo, skip 1 st, dc in next st, ch 1 around.
- Join with sl st into the 2nd chain of the starting ch-4 as before.
- Continue until you have a total of 12 mesh rounds (counting from the first mesh round at the top of the base).
- For each new mesh round:
At this stage, the mesh body of your bag is complete: 12 rounds high.
4. Preparing for Straps
Fasten Off the Body
- After completing and joining the 12th mesh round, ch 1, pull up a loop.
- Cut yarn leaving a tail.
- Pull tail through the loop to fasten off.
- Weave it partially through a nearby hole and make a small knot, then hide inside the mesh.
Mark Strap Positions
- Lay the bag flat with the seam (where you sl st each round) centered.
- You will now place stitch markers to position the straps.
- On the front top edge:
- Count 4 mesh squares (holes) from the side seam and place a stitch marker.
- From that marker, count 4 squares towards the center and place the second marker – this marks the width of the first strap.
- On the back top edge:
- Repeat on the opposite side: count 4 squares from the side, place a marker.
- Count 4 more squares, place another marker.
- Check the number of squares between markers on each side: they should match.
- Adjust a marker slightly if needed so both sides have the same number of mesh squares between markers.
- Adjust a marker slightly if needed so both sides have the same number of mesh squares between markers.
5. First Strap – Shaping (Decreasing Squares)
Attach Yarn for First Strap
- Find the hole (mesh square) where you placed your first stitch marker for this strap.
- Insert hook into that hole.
- Attach yarn, pull through, and ch 4.
- Pull the initial knot tight.
Row 1 of Strap
- Starting from this ch-4, work mesh stitches exactly like the body mesh:
- yo, dc into the next appropriate hole, ch 1.
- Continue within the marked strap section until you reach the last strap marker.
- At the last marked hole, work your final dc and ch 1.
- Turn your work.
- Starting from this ch-4, work mesh stitches exactly like the body mesh:
Row 2 and Onward – Decreasing to Form a “Pyramid”
- After turning, instead of working into the very first stitch, you:
- Insert hook into the next stitch (the 2nd stitch).
- sl st in that stitch (this moves you into position).
- ch 4.
- Now work your mesh across the strap only into the center holes of each mesh square:
- yo, skip 1 st, dc into the next (middle space of square), ch 1.
- Work across to the last available hole.
- Turn your work.
- After turning, instead of working into the very first stitch, you:
Repeat Decrease Rows
- For each new row:
- sl st into the 2nd stitch at the start to shift inward.
- ch 4.
- Work mesh across, always skipping the first stitch and working into the next (middle of square).
- Each row, you lose one mesh square in width:
- Example: if the first strap row has 8 squares, next will have 7, then 6, then 5, etc.
- Continue this decreasing pattern until you have only 3 mesh squares left in the row.
- For each new row:
6. First Strap – Lengthening with 3 Squares
Maintaining 3-Square Strap
- When you reach a row with 3 mesh squares, stop decreasing.
- For the next rows of the strap:
- Do not sl st at the beginning.
- Simply:
- ch 4, turn,
- work 3 squares as usual: yo, skip 1 st, dc in next, ch 1, repeated across three squares.
- Count the rows of 3 squares: you want a total of 7 rows of 3 squares.
- The video says: “Now I have my seven rows of three squares: one, two, three, four, five, six and seven.”
Fasten Off First Strap
- After completing the 7th row of 3 squares, ch 1.
- Pull a longer tail of yarn (for weaving if needed), and cut.
- Pull tail through the loop to fasten off.
7. Second Strap – Repeat
- Repeat Steps 14–19 on the opposite side of the bag for the second strap:
- Attach yarn at the marked hole.
- Work decreasing rows until 3 squares remain.
- Then work 7 rows of 3 squares.
- Fasten off with a tail.
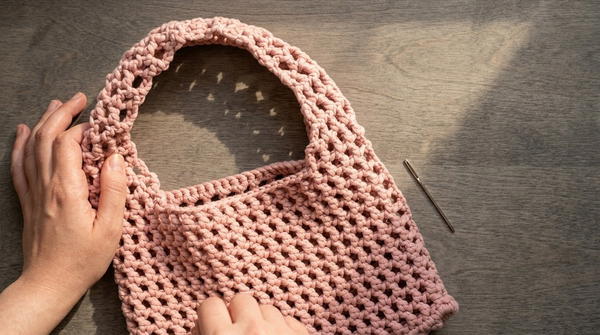
You now have two strap extensions that will be joined at the top.
8. Joining the Two Straps
Join Straps at Top with Needle
- Cut a new piece of yarn, long enough to sew across the width of the straps and secure.
- Thread the tapestry needle.
- Align the two strap ends so that the stitches (chains at the top of the last row) match.
- Identify the 2nd chain from the top on one strap and the corresponding spot on the other strap.
Sewing Method (as in video – using front/back loops):
- Insert needle through the back loop of the 2nd chain of one strap.
- Insert needle through the front loop of the 2nd chain of the corresponding stitch on the other strap.
- Pull yarn through.
- Move to the next pair of chains:
- Back loop of next chain on one strap + front loop of next chain on the other.
- Continue across all chains to join the straps.
Secure Join
- After the last stitch, pull gently to bring the two strap edges closer and snug.
- Make one or two secure knots.
- Weave in the ends into the strap using the needle, hiding them inside the stitches.
The two straps now form a single continuous handle.
9. Finishing Edges and Top Border
You now finish the raw edges at the start of each strap and the top opening of the bag.
Attach Yarn at Strap Base
- Find the point where you first started the strap on one side (the hole where the strap begins on the mesh body).
- Insert hook into that same hole.
- Attach new yarn, pull through, and ch 1.
- Place a stitch marker in this ch-1 to mark the start.
Single Crochet Border Along Top Edge
- Around the top edge (including around the base of straps), work:
- 2 sc in each mesh hole (ch-1 space).
- Insert hook into a hole, work 2 sc.
- Move to the next hole, 2 sc.
- Continue all around the top opening and along the strap edges where needed.
- This creates a straight, firm edge.
- Around the top edge (including around the base of straps), work:
Join Single Crochet Round
- When you reach the first marked stitch:
- Remove the stitch marker.
- Insert hook into that sc, yo, pull through – sl st to join.
- Note: The stitch just before the sl st is your last sc of the round; the sl st is not counted as another sc.
- When you reach the first marked stitch:
Slip Stitch Finishing Round
- Now work a round of slip stitches over the entire edge for a smooth finish:
- Insert hook into next stitch, yo, pull through both loops – sl st.
- Continue sl st in each stitch around the top edge.
- When you come back to the beginning:
- Remove any temporary marker.
- Work one final sl st into the starting stitch (if not already done).
- Pull up a loop, cut yarn, leaving a tail.
- Now work a round of slip stitches over the entire edge for a smooth finish:
Fake Stitch (Invisible Join)
- Thread the tail onto a tapestry needle.
- Insert needle under both loops of the first sc of the round to mimic another stitch.
- Then insert needle down into the last real stitch of the round and out the back.
- This creates a “fake” top loop that makes the edge look completely continuous.
- On the back side, tie this tail to the other nearby tails to secure.
Weave in Ends
- Tie any remaining tails together (as in the video – three extra strands tied).
- Weave all ends securely inside the bag, especially in the mesh and strap areas.
- Trim any excess.
Your bag is now finished.
Tips for Success
- Hook Size Choice:
- The video uses a smaller hook (5 mm) than the yarn label suggests (8 mm) for a denser and neater mesh. A tight mesh holds items more securely and looks more polished.
- Counting Mesh Squares:
- Frequently count your mesh squares to ensure symmetry (19 around the body, decreasing straps evenly, matching both sides).
- Strap Comfort:
- The 7 rows of 3 squares give a medium-length strap. Add or subtract rows of 3 squares to adjust for your height and comfort.
- Mark Everything:
- Use stitch markers at strap beginnings, endings, and key points to keep your work aligned and even.
Customization Ideas
- Size Adjustments:
- Wider bag: chain more than 42 at the start (keep an even number that maintains the mesh pattern).
- Taller bag: work more than 12 mesh rounds for the body before starting the straps.
- Yarn Choice:
- Use cotton or a cotton blend for a sturdy market bag.
- Use acrylic or wool blends for a soft everyday bag.
- Color Play:
- Use different colors for the base, body, and straps.
- Make stripes by changing color every few mesh rounds.
- Extra Features:
- Add a fabric lining if you want to carry small items (keys, coins) that could slip through the holes.
- Add buttons or a drawstring at the top for closure.
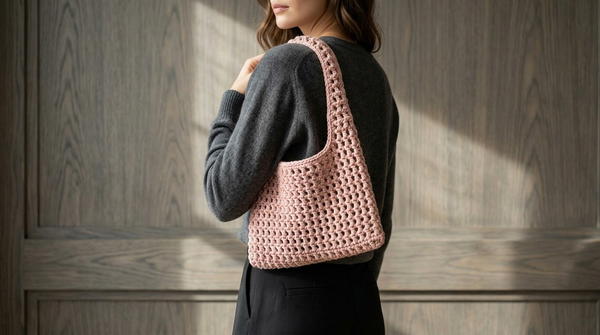
Final Look & Characteristics
- The finished bag has:
- A flat, oval base built from single crochet.
- Open mesh sides that expand to hold items such as groceries, beach items, or lightweight daily essentials.
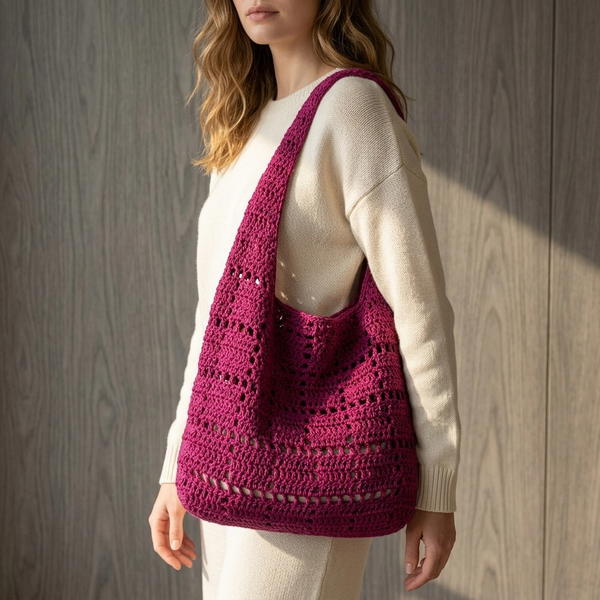
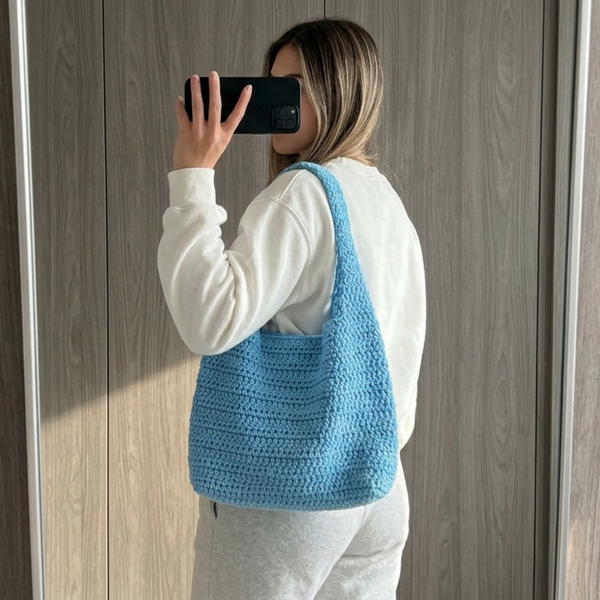
- Two tapered mesh straps that join into one handle, creating a comfortable shoulder fit.
- A straight, clean top edge thanks to the final single crochet and slip stitch border.
- A seamless appearance at the joins, since slip stitches are hidden in the 2nd chain of the ch-4 at each mesh round.
Important Remarks & Conclusion
- This pattern recreates the steps from the video as faithfully as possible using written instructions. Small differences may arise because the original creator relies on visual demonstration rather than strict stitch counts.
- Always adjust hook size and yarn type to your personal tension and desired fabric firmness. A slightly denser mesh will produce a stronger, longer-lasting bag.
- The result is a stylish, modern mesh bag that can be completed in under a day by most crocheters, making it a practical and satisfying project for everyday use, gifting, or market sales.