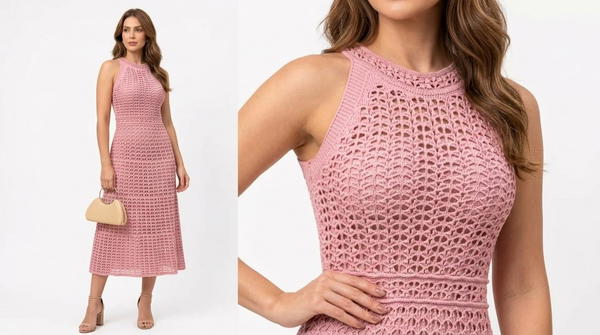
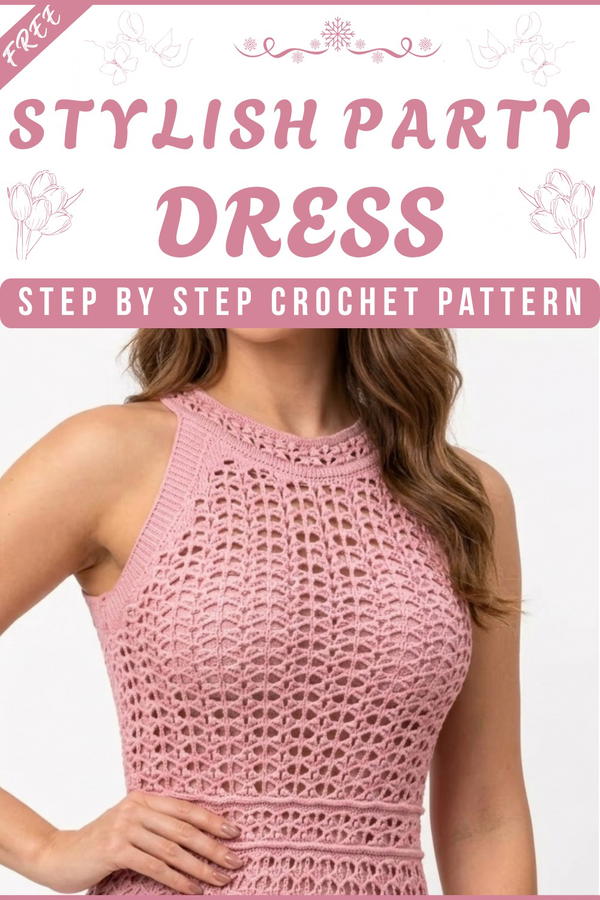
Create a beautiful crochet party dress with this free pattern that is easy to follow, stylish to wear, and perfect for making any occasion special and memorable.
Wearing a dress that looks both elegant and fun, perfect for any special occasion. This crochet party dress stands out because of its delicate design and handmade charm. Its soft and breathable fabric keeps you comfortable while making you look stylish. The dress features intricate yet simple crochet stitches that create a beautiful pattern, making it unique and eye-catching.
Free Crochet Party Dress Pattern That’s Simple and Stunning
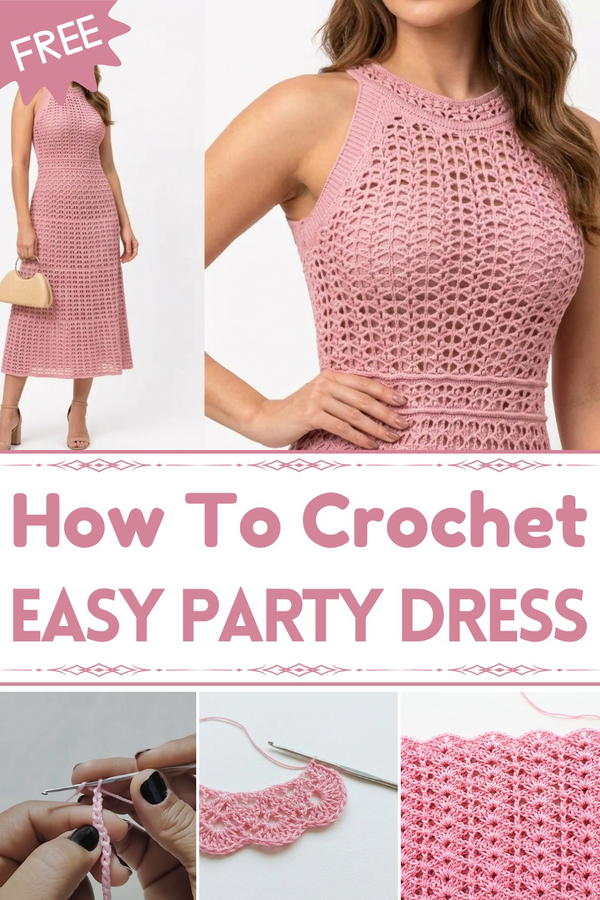
Whether it’s a birthday, wedding, or dinner, this dress can brighten up your look effortlessly. The flowy design allows for easy movement while adding a touch of grace to your outfit. It’s a wonderful way to showcase creativity and turn heads wherever you go. This stunning creation proves that beauty can be simple and timeless, making it a must-have for anyone who wants to look and feel special.
Step-by-Step Crochet Dress Pattern
Skill Level
Intermediate to Advanced
This pattern includes foundational stitches (e.g., double crochet, half double crochet) combined with fan motifs and increases. Familiarity with measuring, shaping, and maintaining consistent stitch patterns is recommended.
Materials List
Yarn:
- Raíça Yarn in off-white, Tex size 288 (or equivalent lightweight mercerized cotton yarn).
- Approximately 4 skeins for sizes up to Medium (Adjust quantities for larger sizes).
Hook:
- 1.75 mm crochet hook (preferred for tighter stitches).
- Alternatively, you can use a 2 mm crochet hook, as per your stitch preference.
Optional Tools:
- Measuring tape
- Stitch markers
- Tapestry needle (for weaving in ends and sewing)
- Scissors
Key Abbreviations
(All terms are written in US crochet terminology.)
- ch: Chain
- dc: Double Crochet
- hdc: Half Double Crochet
- sl st: Slip Stitch
- st(s): Stitch(es)
- yo: Yarn Over
Special Notes
Measurements Needed:
Take the following key measurements before starting:- Bust circumference: Full measurement around the bust.
- Armhole height: From shoulder to the top of the armhole.
- Waist height: From shoulder to waist.
- Waist circumference: Full measurement around the waist.
- Skirt length: From the waist to the desired hem length.
Fan Details:
- Neckline Fans: Each fan is made of 4 dc groups separated by 2 ch.
- Body Fans: Each fan is made of 6 dc groups separated by 2 ch.
Customization:
Adjust increases and measurements based on individual fit requirements.
Crochet Dress Pattern
1. Foundation Chain for Bodice
Start Chain:
- Chain 145 stitches. Ensure you have a loose chain to avoid puckering as the row develops.
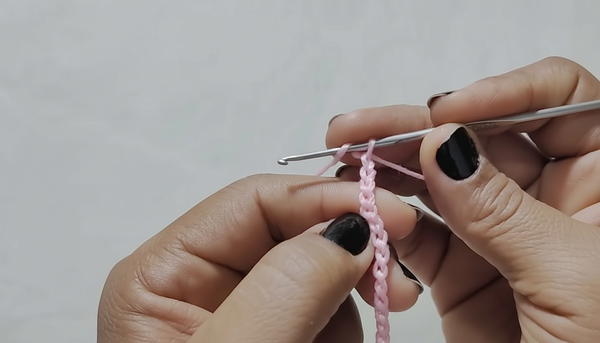
- Chain 145 stitches. Ensure you have a loose chain to avoid puckering as the row develops.
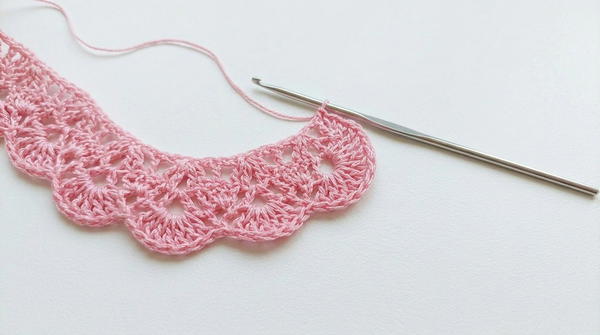
Row 1 - Fan Pattern:
- Skip the first 7 chains from the hook.
- In the 7th chain stitch, work 2 dc, 2 ch, 2 dc (1 full fan motif).
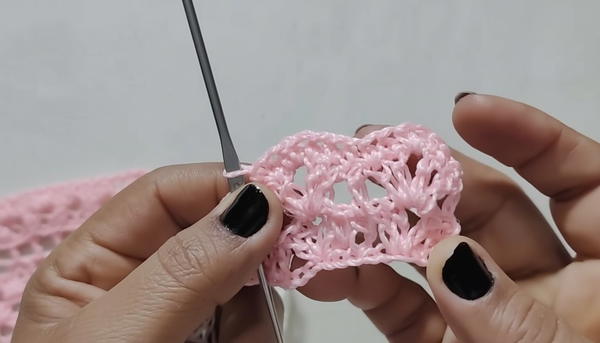
Continue:
- Skip 2 chains on the base row.
- In the next (3rd) chain, repeat the fan pattern (2 dc, 2 ch, 2 dc).
- Skip 2 chains; in the next chain, work 1 dc.
- Repeat: Fan → dc → Fan → dc.
- At the end of Row 1, you should have 20 fans, interspersed with 1 dc.
2. Start Building the Bodice
Row 2 - Continue Fan Pattern
Begin:
- Chain 3, turn. This counts as the first dc.
- Work 1 fan in each 2 chain space from the previous row (2 dc, 2 ch, 2 dc).
Single dc:
- For every dc from Row 1, work 1 dc.
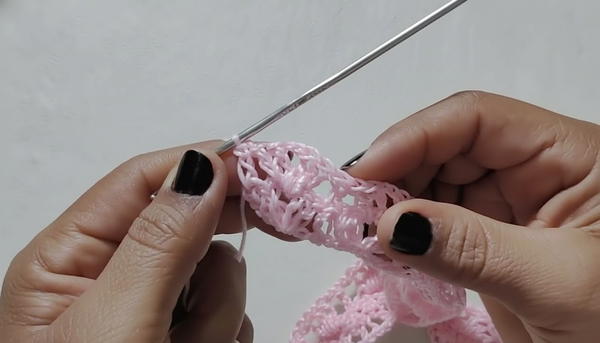
- For every dc from Row 1, work 1 dc.
Row 3 - Half Double Crochet (HDC)
Begin:
- Chain 2, turn. Switch to hdc stitches for this row.
Work:
- Over the dc stitches, make 1 hdc for each dc stitch.
- In each 2-chain space, work 2 hdc stitches.
Finish:
- Continue with hdc stitches across the row.
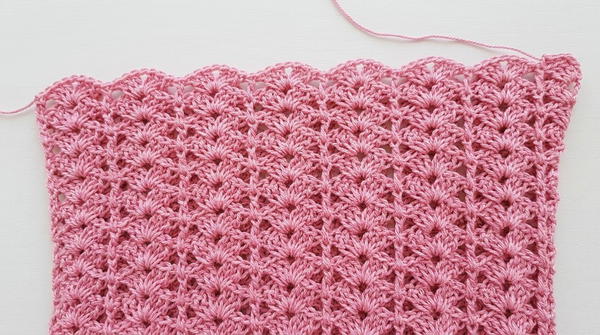
Row 4 - Center Fans
Begin:
- Attach yarn again at the center of the bodice and turn the piece to the right side.
Fans:
- In each 2 chain space: Work 3 dc, 2 ch, 3 dc (this creates larger fans).
Between Fans:
- Work 1 dc above each single dc from the previous row.
Continue this pattern across the bodice center section.
3. Shaping With Increases
Begin:
- Continue alternating fan rows with simple rows of dc.
- Add increases at the start and end of rows by working 2 dc into the first stitch and the last stitch of rows.
Measure:
- Continually measure the bodice against the desired shape (your bust or shoulders).
Stop Increasing:
- Once the shape aligns with your measurements, stop adding increases except for areas such as the skirt hem where flaring may be desired.
4. Skirt Section
Transition:
- Begin working fans with 6 dc groups, separated by 2 ch.
- Leave the fans from the bodice untouched and gradually increase fan stitches for fuller skirt flare.
Length:
- Work rows in alternating fan patterns and solid dc rows until the desired skirt hem length is achieved.
5. Armholes and Finishing
Armholes:
Begin:
- Work small finishing rows (~1.5 cm) of single crochet around the armhole openings to add structure.
Neatly Close Gaps:
- Reduce deep edges by creating slip stitches if necessary.
- Reduce deep edges by creating slip stitches if necessary.
Back Piece:
Split Construction:
- Work the back bodice in two separate sections, mirroring the front bodice.
- Use stitch increases on one side for shaping, leaving the other side straight (no increase).
Join Sections Together:
- When both sections are completed, join them with slip stitches or whip stitches.
Finishing
Join Front and Back Panels:
- Use stitch markers to align key points (shoulders, bust, waist).
Weave in Ends:
- Use a tapestry needle to tidy up loose ends.
Block the Dress:
- Lightly block the dress to open up the fabric and improve drape.
- Lightly block the dress to open up the fabric and improve drape.
Conclusion
This dress is an elegant project, combining fan motifs with simple stitches. Its versatility makes it ideal for formal or festive events. Adjust sizing and embellishments as needed to create a unique piece.
Pattern Correction Notes
- Ensure accurate measurement of the bodice circumference and armhole height.
- Adjust fan counts for wider or narrower panels based on your material and tension.
Tips
- Gauge Swatch: Always make a gauge swatch to ensure consistency.
- Test Fan Patterns: Practice fan motifs on scrap yarn.
- Steam Finishing: Light steam-blocking ensures the fans stay open and the dress sits gracefully.