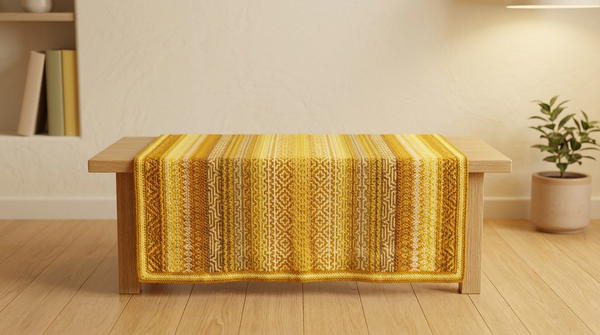
Reveal the beauty of symmetry with this mesmerizing crochet mirror mosaic pattern that's for adding unique charm and stunning detail to your projects.
Creating breathtaking designs that look identical on both sides, like a perfectly mirrored reflection. This unique crochet pattern uses a special mirror mosaic technique to make symmetrical, colorful designs that feel magical to the eyes. The colors blend beautifully, making it ideal for creating blankets, scarves, or other home décor pieces that stand out. Whether you use self-striping yarn for gradual color changes or solid yarn for sharp contrasts, the pattern’s design ensures stunning results every time.
Crochet Mirror Mosaic Free Pattern for Bold Color Combos

Starting from the center and working outward allows both sides to grow at the same time, giving the project a sense of balance and harmony. Its smooth texture and detailed appearance make every piece feel handcrafted with care. It’s easy to customize the size and style, so whether you dream of a cozy blanket or a stylish table runner, this pattern transforms simple stitches into works of art anyone can admire.
Mirror Mosaic Crochet Pattern
Materials
To complete this project, you will need:
Yarn:
- Two contrasting colors of yarn recommended:
- Color A: (Background Color) Light beige.
- Color B: (Design Color) Teal.
- Any yarn weight can be used, but fingering, DK, or worsted weight yarns work best with this technique.
- For optimal results with self-striping yarn, use one cake for rows going up and another cake for rows going down.
- Two contrasting colors of yarn recommended:
Crochet Hook: Size appropriate for your chosen yarn. The video uses a 3.5 mm–4.5 mm hook, depending on yarn weight.
Additional Tools:
- Stitch markers (flat markers are recommended to track key stitches).
- Scissors.
- Tape measure for gauging your project’s size.
Gauge and Finished Size
- Gauge: Approximately 16 stitches x 14 rows = 10 cm (4 inches) in single crochet.
- Finished Size: This depends on the number of pattern repeats you choose. The pattern is worked in multiples of 16 stitches, plus 3 additional chains for the edge.
- Example: For a blanket, 5 pattern repeats will result in about 80 stitches in width plus the 3 extra stitches for the edges.
Skill Level
- Intermediate: Knowledge of basic stitches (chain, single crochet, double crochet, and slip stitch) is required, along with comfort in working overlay mosaic patterns and handling multiple colors.
Abbreviations (US Terminology)
- ch: Chain
- sc: Single Crochet
- dc: Double Crochet
- fl-dc: Front Loop Double Crochet
- bl-sc: Back Loop Single Crochet
- sl st: Slip Stitch
Special Notes and Techniques
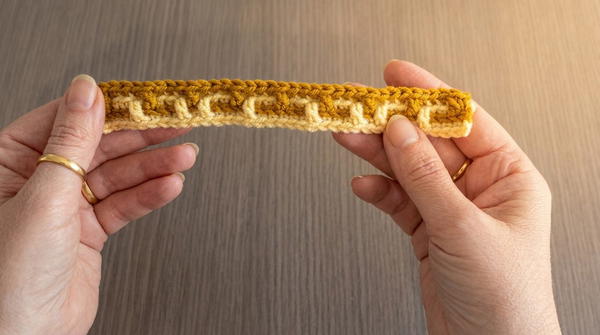
About the Mirror Mosaic Technique
- This method starts from the center and works toward both the top and bottom simultaneously, creating mirrored color patterns and designs.
- Self-striping yarn coordinates beautifully with the technique—one cake for rows going to the top and another for rows going to the bottom.
Foundation
- The project begins with a long tail foundation chain, which also acts as Row 1.
- All initial rows are worked into one loop of the back of the foundation chain, leaving the “V” of the chain neat and intact for later use.
Pattern Instructions
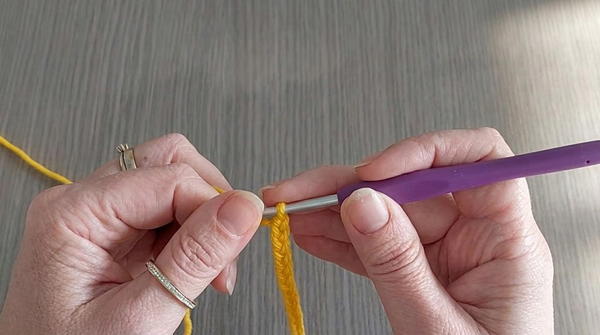
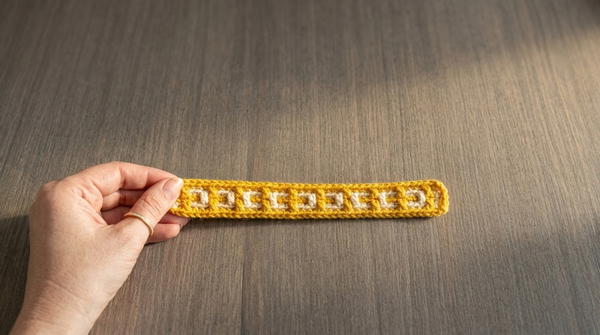
Step 1: The Long Tail Foundation Chain
- Use Color B and leave a long tail before beginning.
- Begin with a slip knot and chain multiples of 16 plus 3 for the edge stitches.
- For instance, a blanket with 80 stitches would be: 16 x 5 repeats = 80 stitches + 3 = 83 chains.
- Make sure your chain is not too tight or too loose, and keep tension consistent.
- At the end, cut the yarn and tie off with a chain 1 to secure.
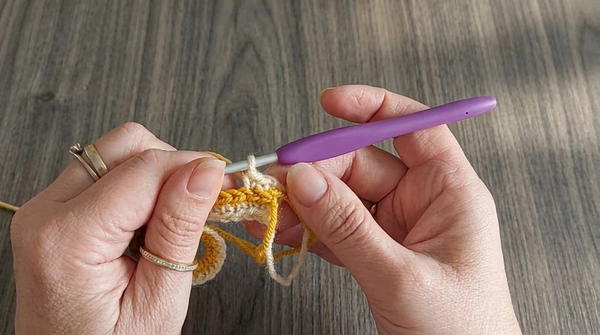
Step 2: Rows 2 and 3 (Center Rows)
Row 2: (Using Color A – Background Color)
- Attach Color A with a slip knot.
- Starting at one end of the foundation chain, work into one loop only of the back of the chain. Leave the “V” loops in front unworked for a cleaner look.
- Make 1 single crochet (sc) in each chain across.
- At the end of the row, cut the yarn, tie off with a chain 1, and secure.
Row 3: (Using Color A – Background Color)
- Attach Color A at the opposite end of the long tail foundation chain.
- Skip the first two loops of the foundation chain and work into the last unworked back loop.
- For this row, work front loop double crochet (fl-dc) stitches into the front loops of Row 2 and back loop single crochet (bl-sc) into the available back loops of the foundation chain.
- Pattern Repeat:
- 3 back loop single crochets (bl-sc).
- 1 front loop double crochet (fl-dc).
- Repeat this 16-stitch sequence until the row is complete.
- Pattern Repeat:
Important: Be cautious during these rows, as they serve as the “mirror center” of your project.
Step 3: Pattern Repeats (Rows 4 & Onward)
Begin working the design toward both the top and bottom, alternating rows in Color A (background color) and Color B (design color).
General Pattern Steps
- Row 4 is worked in Color B from one side of the foundation chain.
- Begin with a standing center single crochet (sc).
- Work into the foundation chain following the repeat pattern:
- 3 bl-sc stitches.
- 1 fl-dc stitch into the front loop of the corresponding stitch.
- At the end of each row, secure with a tight chain 1, and cut the yarn.
- Repeat the same pattern from the opposite side of the foundation chain, creating a “mirror” effect with your colors.
Step 4: Stitch Mirroring and Color Placement
When using self-striping yarn:
- Use one cake of yarn for rows going toward the top of your project.
- Use a second cake for the rows going toward the bottom.
- Ensure you are matching the colors with “mirrored striping” for symmetry.
Step 5: Customizing the Pattern
Adjusting Width and Length:
- Add more pattern repeats (multiples of 16 stitches) when creating a wider project.
- Continue repeating rows until your project reaches the desired size.
Adding a Double Border:
- After the body of your project is complete, you may add a double border for a clean edge.
- Work the double border into the loops left unworked along the foundation chain.
Conclusion
The Mirror Mosaic Crochet Technique offers breathtaking symmetry and opens up endless design possibilities. This technique works particularly well with self-striping yarn but adapts equally to solid or contrasting colors. One of the most significant advantages is the ability to adjust the project freely without prior planning, as designs are mirrored from the center outward.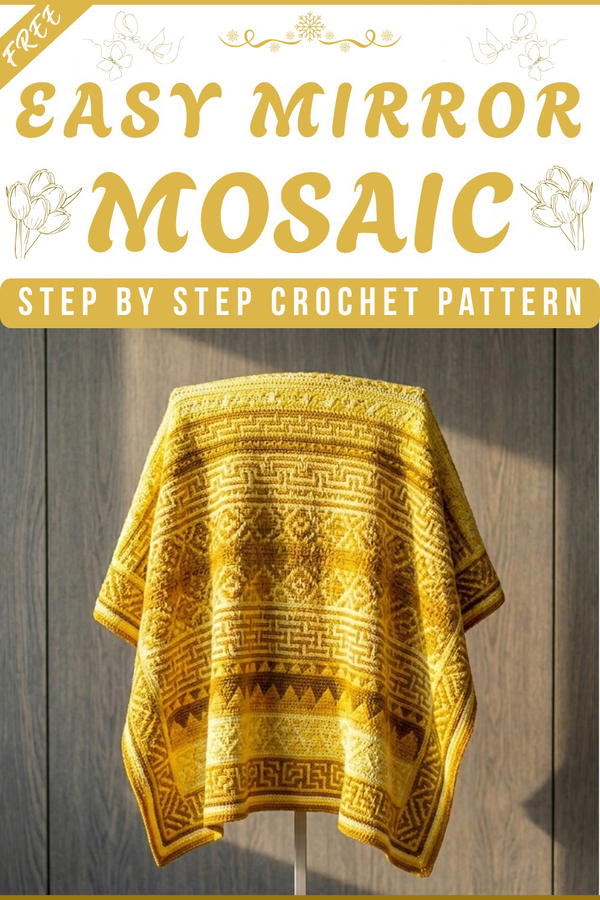
Tips and Final Remarks
- Take Your Time: When first starting this technique, work slowly to master the foundation chain and transition rows, as these serve as the backbone of the project’s symmetry.
- Experiment with Colors: Try gradient or hand-dyed yarns for a unique effect.
- Customizable Size: Whether you create a scarf, blanket, or decorative piece, the adaptability of this method ensures it suits any project.
- Save Time: The mirrored rows give the illusion that the project grows more quickly, offering satisfaction and faster progress.