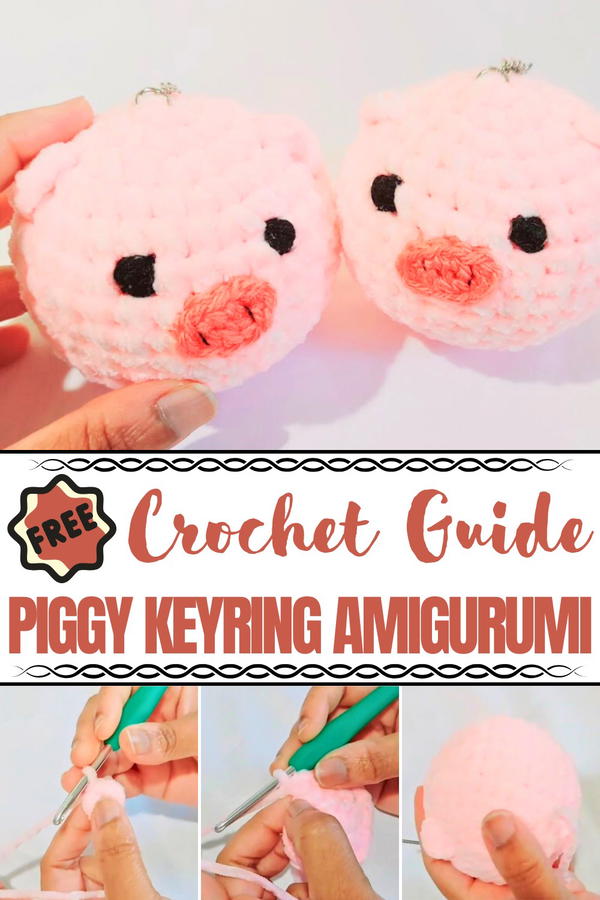
Oink up your style with this Crochet Piggy Keyring Amigurumi pattern, a cute design to keep charm close for everyday use or sweet gifting.
The charm of tiny keepsakes often lies in how they bring joy to everyday life, and a cheerful piglet is no exception. The Crochet Piggy Keyring Amigurumi pattern captures that delightful spirit in a soft and lasting form, turning yarn into a miniature friend that travels wherever you go. With its rounded shape, adorable snout, and playful ears, it reflects the innocence and cuteness of a piglet while adding personality to keys, bags, or backpacks. Lightweight yet sturdy, it ensures your essentials are easy to find while doubling as a decorative accessory that sparks smiles.
Pretty Spark Crochet Piggy Keyring Amigurumi with Fun Spirit
Its compact size makes it perfect for daily use, while the durability of the stitches ensures it stays intact through constant handling. Beyond functionality, it also serves as a meaningful gift, offering a touch of charm to friends, family, or anyone who enjoys unique accessories.
The softness of the yarn gives it a comforting texture, making it pleasant to hold as well as to look at. Versatile, practical, and undeniably cute, the Crochet Piggy Keyring Amigurumi pattern is more than an accessory—it is a playful symbol of joy, luck, and sweetness that brightens every moment.
Materials Needed
- Yarn:
- Light pink acrylic yarn for the piggy body (weight 4).
- Smaller double knitting yarn for the nose.
- Hook Sizes:
- 4.5 mm hook for the body.
- 3.5 mm hook for smaller details like the nose.
- Embroidery Thread:
- Black DMC pearl cotton thread (size 8) for the eyes.
- Fiber Stuffing: Polyfill or toy stuffing for shaping.
- Embroidery Needle: Thin needle for sewing eyes, nose, and closure.
- Scissors: For cutting yarn and thread neatly.
- Keyring: To attach to the piggy for functionality.
Special Features
- Amigurumi Design: The piggy has soft, rounded features that make it perfect for keyrings or hanging ornaments.
- Invisible Decreases: A seamless method to avoid visible gaps when reducing stitches.
- Detailed Body and Facial Features: Includes instructions for adding ears, nose, eyes, and a blush accent.
- Compact and Easy to Carry: Ideal for keyrings or bag charms.
- Customizable: Choose different yarn colors for personalization.
Level of Difficulty
This project is beginner-friendly to intermediate, involving basic crochet stitches like single crochets, increases, decreases, and some decorative techniques like invisible decreases and embroidery. Beginners may need extra practice with the magic circle and bobble stitches for the ears, but overall the process is manageable for new crocheters.
Step-by-Step Instructions
1. Starting with the Piggy Body
Magic Circle and First Rounds
- Magic Circle: Start by making a magic circle and work 6 single crochets (SC) into the circle.
- Row 2: Increases
- Work 2 SC into each stitch for a total of 12 stitches.
- Work 2 SC into each stitch for a total of 12 stitches.
- Row 3: Alternating Increases
- Work 1 SC in the first stitch, then 2 SC in the next stitch. Repeat for a total of 18 stitches.
Row 4–5: Building Up
- Row 4:
- Work 1 SC in the first and second stitches, then 2 SC in the third stitch. Repeat for 24 stitches.
- Work 1 SC in the first and second stitches, then 2 SC in the third stitch. Repeat for 24 stitches.
- Row 5:
- Work 1 SC in the first three stitches, then 2 SC in the fourth stitch. Repeat for 30 stitches.
Six Rows of Stability
- Rows 6–11: Work 1 SC in each stitch for 30 stitches per row. This builds the height of the piggy body.
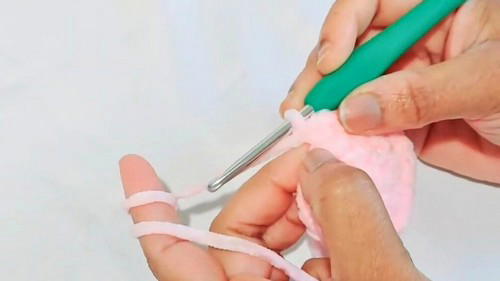
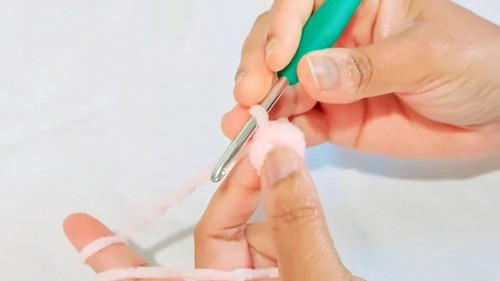
2. Decreasing the Body and Closing
Row 12:
- Work 1 SC in the first three stitches, then invisible decrease over the fourth and fifth stitches. Repeat for the entire row.
Row 13:
- Work 1 SC in the first two stitches, followed by an invisible decrease over the next two stitches. Repeat for the row.
Row 14:
- Work 1 SC in the first stitch, followed by an invisible decrease over the next two stitches. Repeat for the row.
Row 15: Final Decreases
- Work 6 invisible decreases to close.
Stuffing: Add fiberfill stuffing firmly before closing the body entirely.
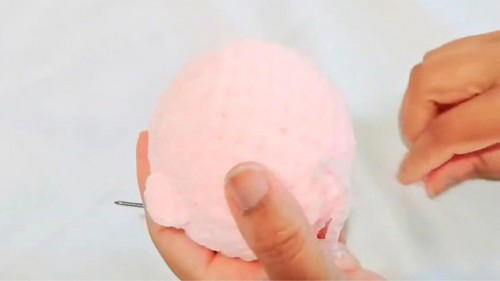
3. Adding the Piggy Ears
Find Ear Positions: Count three stitches from the center to align the ears symmetrically.
Ear Construction:
- Insert your hook and secure pink yarn.
- Chain 2, then yarn over to make a double crochet (DC) stitch into the same location.
- Skip the next stitch and slip stitch into the following one.
Repeat for the Other Ear: Mirror the process on the opposite side of the head.
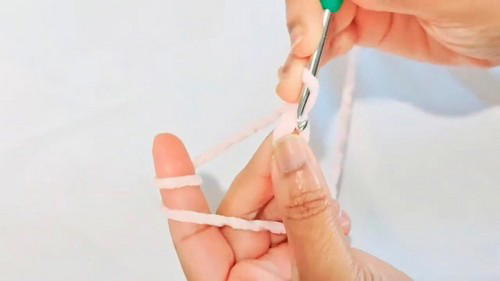
4. Crocheting the Piggy Nose
Switch to Smaller Yarn and Hook (3.5 mm).
Chain Foundation: Make a slip knot and chain 5.
Nose Construction:
- Skip the first chain and work 3 SC in the following stitches.
- On the last stitch, work 3 SC into the same stitch to curve the row.
- Continue on the other side with 2 SC and finish with a slip stitch.
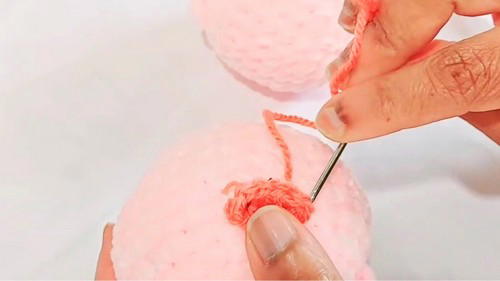
Sewing the Nose:
- Attach the nose securely to the face using an embroidery needle.
- Ensure it's placed slightly lower than the center of the head.
5. Adding the Facial Features
- Eyes:
- Use black embroidery thread to sew the eyes, ensuring they are symmetrically placed.
- Alternatively, cut black felt in circular shapes and glue them on as eyes.
- Blush Details: Sew small blush accents below each eye with pink thread.
6. Attaching the Keyring
- Insert your keyring at the top of the head.
- Ensure the piggy is securely fastened to avoid slipping.
Tutor’s Suggestions
- Practice Invisible Decreases: Invisible decreases create a seamless appearance for amigurumi designs.
- Use Smaller Hooks for Details: Switching to smaller hooks for finer features, such as the nose, avoids gaps.
- Symmetry is Key: Pay close attention to placement for ears, eyes, and other features to ensure your piggy looks balanced.
Uses of the Crochet Piggy Keyring
- Keyrings: Attach it to your keys for a cute, handmade charm.
- Bag Decorations: Use it as a fun embellishment for backpacks or purses.
- Gifts: Perfect as a thoughtful, handmade present for friends or family.
- Children’s Toys: Kids love these small, adorable creations as playful keepsakes.
Pro Tip
If you’re not confident embroidering small features like the eyes, use felt sheets or safety eyes as alternatives for a cleaner and quicker finish.
Conclusion
Creating a crochet piggy keyring is not only enjoyable but also a rewarding project for crocheters of all skill levels. The step-by-step pattern walks you through the process of crocheting a cute and functional amigurumi masterpiece while incorporating handy techniques like invisible decreases and decorative details. Whether used as a gift or a personal accessory, this handmade piggy adds a charming touch to your collection.