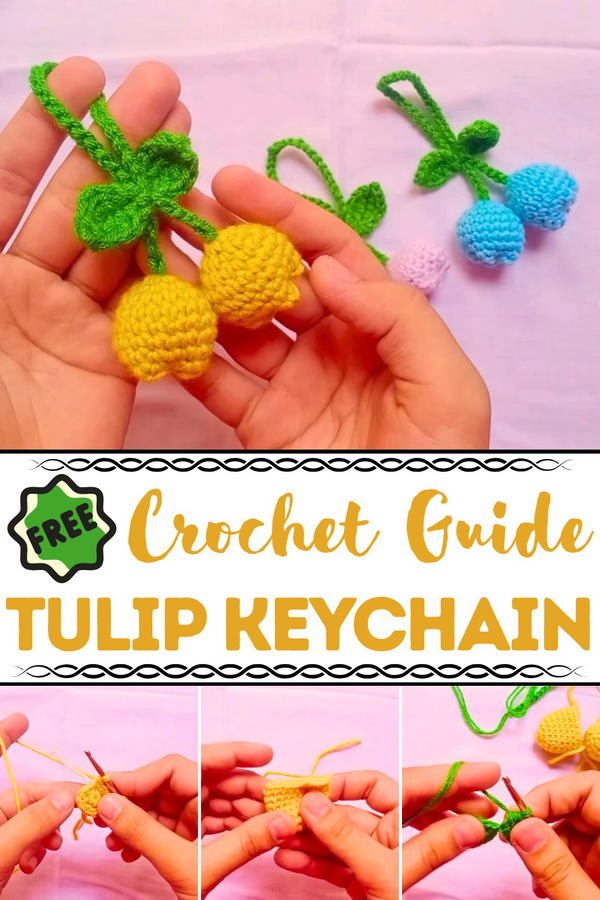
Celebrate spring everywhere with the Crochet Tulip Keychain pattern, a cheerful and charming accessory that keeps keys and bags stylish.
Sunlight filtered through a blooming garden, highlighting a single tulip that seemed to glow with vibrant energy. Inspired by this lively flower, the Crochet Tulip Keychain pattern brings a touch of spring’s charm into everyday life. Each keychain features a soft, textured tulip with delicately shaped petals, offering a tactile and visually appealing accessory that brightens keys, bags, or backpacks. Its compact size makes it practical while still catching the eye with cheerful elegance.
Chic Crochet Tulip Keychain to Brighten Bags and Keys
Durable yarn ensures the keychain maintains its shape and softness through daily use, while its lightweight construction allows it to travel effortlessly wherever needed. Perfect for gifting, it adds a whimsical and thoughtful touch to birthdays, holidays, or small tokens of appreciation. Working on this pattern provides a relaxing, hands-on activity that sharpens focus and dexterity while producing a functional and delightful item.
The Crochet Tulip Keychain pattern transforms a simple accessory into a charming keepsake, combining beauty and practicality. Its cheerful presence adds color, warmth, and personality to daily routines, turning ordinary items into small, joyful reminders of nature’s simple pleasures.
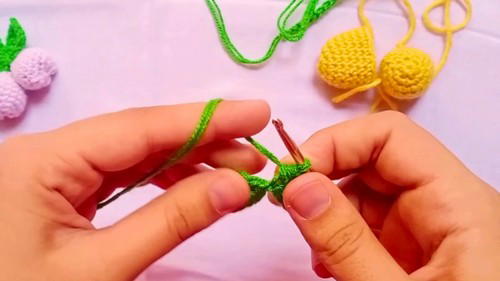
Materials Needed
- Yarn: Scrap yarn or any yarn of your choice for the tulip flowers, stems, and leaves.
- Crochet Hook: Pick a hook size compatible with your yarn; the tutorial suggests experimenting to achieve the desired size.
- Scissors: For trimming yarn ends.
- Yarn Needle or Crochet Hook: For attaching pieces and weaving in ends.
- Optional Stuffing: Scrap yarn is used in place of traditional fiberfill stuffing.
Special Features
- Eco-Friendly: Designed as a scrap yarn project, making it sustainable and cost-effective.
- Customizable: You can adjust the size and number of tulips by changing the yarn and hook size.
- Realistic Design: The separate stem and leaf sections give the tulips a lifelike appearance.
- No Stuffing Required: Scrap yarn can be used for filling, eliminating the need for separate stuffing material.
- Beginner-Friendly: Simple stitches like single crochet, half double crochet, and slip stitch make it accessible for beginners.
Level of Difficulty
Beginner-Friendly
- The project primarily uses basic crochet stitches such as single crochet, half double crochet, double crochet, slip stitch, and magic rings.
- Assembling and arranging the parts might require intermediate-level patience but involves no complex techniques, making it suitable for beginners.
Step-by-Step Instructions
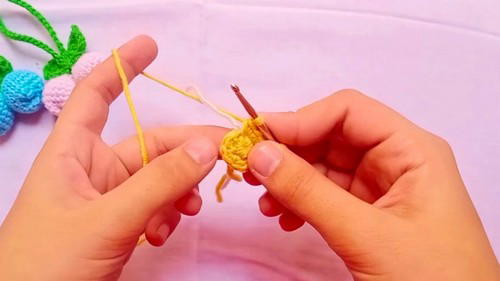
Part 1: Making the Tulip Cups
1. Start a Magic Ring
- Begin with a magic ring and adjust the yarn to make it secure.
2. Work 6 Single Crochets into the Magic Ring
- Insert your hook into the magic ring and crochet 6 single crochet stitches.
- Pull the yarn to close the ring firmly.
3. Work in Rounds Without Slip Stitches
- Work directly into the first stitch without using a slip stitch to join rounds.
4. Round 2: Increase Stitches
- Make an increase (two single crochets in one stitch) in every stitch around. You should now have 12 stitches.
- Use a scrap yarn or stitch marker to keep track of your rounds.
5. Round 3: One Single Crochet + One Increase
- Alternate between one single crochet and one increase (two single crochets in one stitch) all the way around to end up with 18 stitches.
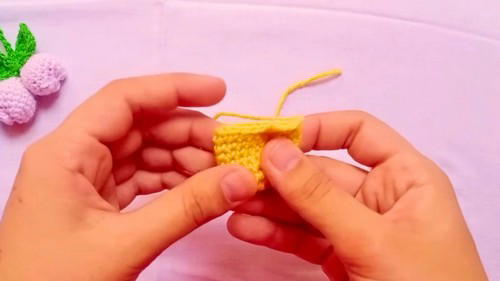
6. Rounds 4 to 8: Single Crochet
- Work single crochet stitches evenly in each stitch around without increasing. This creates the cup's height.
7. Cut and Finish the First Tulip
- Cut the yarn and chain one to secure it.
8. Make the Second Tulip Cup
- Repeat the above steps to create another tulip cup.
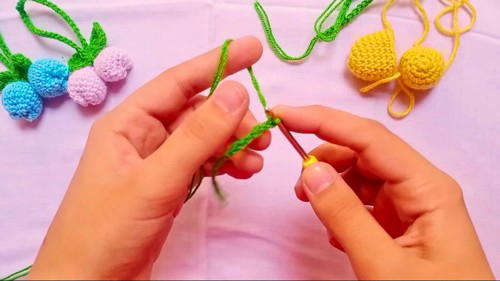
2: Crocheting the Tulip Stem
1. Start with a Slip Knot
- Leave a longer tail before the slip knot to make it easier to attach later.
2. Chain 45
- Create a chain of 45 stitches for the stem.
3. Chain One to Secure
- Chain one additional stitch and pull the yarn tight to secure the chain.
3: Creating the Tulip Leaves
1. Start with a Slip Knot and Chain 6
- Begin by chaining 6 stitches for the leaf base.
2. Work a Pattern for the Leaf Shape
- Work the following stitches sequentially:
- Single crochet in the first stitch.
- Half double crochet in the second stitch.
- Double crochet in the third stitch.
- Half double crochet in the fourth stitch.
- Single crochet in the fifth stitch.
3. Work on Both Sides of the Stitch
- Insert your hook into the same stitch but work on the opposite side. Pull the yarn through and repeat the stitch pattern to finish the leaf:
- Single crochet → Half double crochet → Double crochet → Half double crochet → Single crochet.
4. Slip Stitch to Finish the Leaf
- Add a slip stitch to end the leaf and cut the yarn.
5. Make a Second Leaf
- Repeat the entire process to create another leaf.
4: Assembling the Tulip
1. Attach the Tulip Stem
- Insert your hook or needle into the center of the tulip cup’s magic ring. Pull the longer tail of the stem yarn through to attach it. Tie a tight knot to secure the stem.
2. Add Scrap Yarn as Stuffing
- Fill the tulip cup with scrap yarn to give it a plump shape.
3. Close the Tulip Cup
- Using a yarn needle or crochet hook, identify the stitches on the tulip's edge and pull through repeatedly to close the gap. Tighten the yarn and weave in the ends to secure it.
4. Attach the Leaves
- Find the middle stitch between the two sections of the leaf and attach it to the tulip stem. Use a crochet hook or needle to pull the yarn through.
5. Adjust and Finalize
- Stretch or adjust the leaves and stem to ensure everything is aligned and neat.
Tutor's Suggestions
- Use Scrap Yarn: The instructor highlights scrap yarn as the best option for stuffing and crafting the tulips, making the project economical.
- Experiment with Size: The size of the tulip cups can be adjusted by using thicker yarn or smaller hooks.
- Mark Stitches With Scrap Yarn: If stitch markers aren’t available, scrap yarn works perfectly for keeping track of stitches.
- Don’t Panic While Stretching: While attaching the leaves, the yarn may stretch slightly, which can be easily fixed by adjustments.
Uses of the Tulips
- Home Decoration: Display the tulips in vases or pots for a charming aesthetic.
- Gifts: Handmade tulips make thoughtful gifts for loved ones.
- Craft Embellishments: Use them to decorate bags, hats, or other items.
- Event Decor: Perfect for weddings, birthdays, or parties with floral themes.
Tip for Success
When attaching the stem and leaves, ensure the knots are tight, and the ends are woven securely to prevent unraveling. For added durability, double-knot the connections.
Conclusion
Crocheting tulip flowers is a delightful and beginner-friendly project that allows creativity and innovation. With scrap yarn, simple stitches, and straightforward assembly, this eco-friendly project is both rewarding and practical. Whether used for personal decoration or a special gift, these tulips symbolize handmade love and care.


