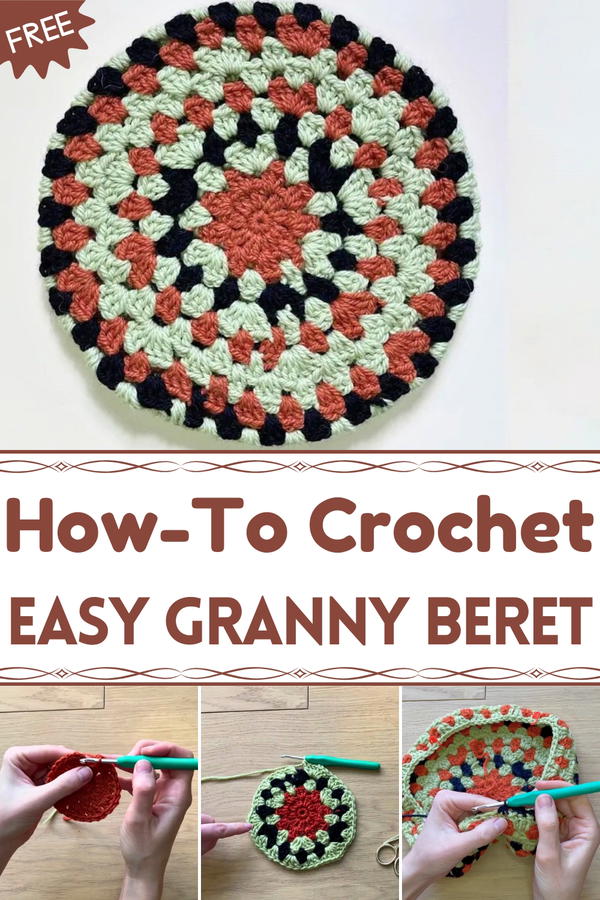
Frame your look with this Crochet Granny Beret pattern, a charming design that mixes vintage elegance with modern flair for any occasion.
The timeless charm of a beret has always been linked with elegance, and when combined with the colorful flair of granny motifs, it becomes something truly unique. The Crochet Granny Beret pattern captures that spirit by weaving tradition and style into a wearable piece that feels both classic and fresh. Each panel showcases vibrant motifs joined seamlessly, forming a lightweight yet cozy hat that adds character to any outfit. The soft texture of the yarn provides comfort, while the airy structure makes it suitable for year-round wear.
Trendy Crochet Granny Beret for Boho Outfits
Practical yet stylish, it protects gently from the sun or chill while doubling as a statement accessory that expresses individuality. Its versatility allows it to complement casual looks as easily as dressier ensembles, making it a go-to accessory for different occasions. Beyond personal use, it also makes a thoughtful handmade gift, carrying both sentiment and beauty for someone special.
Durable enough for everyday wear and expressive enough to stand out, it holds lasting value in both function and fashion. With its vibrant motifs, cozy feel, and timeless appeal, the Crochet Granny Beret pattern is more than a hat—it is a celebration of tradition, color, and style.
Materials Required
- Yarn: Three colors, chosen according to your preferences. The tutor used Drops Læpal Yarn, an Aran weight, washed yarn.
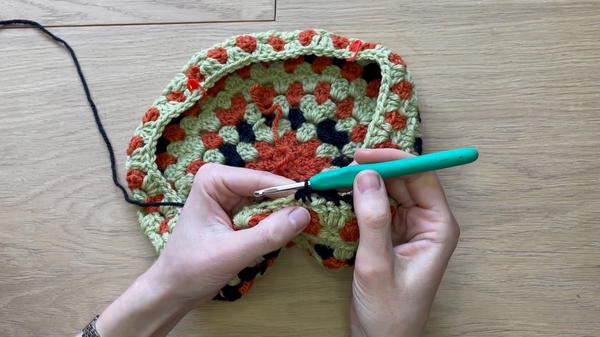
- Crochet Hook: 4.5mm (adjustable based on your tension – tutor uses this instead of the recommended 5mm due to loose crocheting).
- Yarn Needle: For weaving in the ends.
- Stitch Markers: Optional but useful for marking decreases on the ribbed brim.
- Scissors: For cutting yarn between color changes.
Special Features
- Customizable Color Placement: The tutor allows flexibility in determining where each color appears, ensuring you can make the beret uniquely yours.
- Granny Stitch Design: The beret is primarily built around granny stitches, making it visually intricate yet simple to execute.
- Flexible Sizing: The ribbed brim and the instructions for adding or omitting decreases allow for adjustments to fit different head sizes.
- Ribbed Brim Detail: The brim is finished with back-loop-only slip stitches for a refined and neatly textured edge.
- Multi-Color Transition: The planned transitions between three distinct colors create a striking and dynamic look.
Step-by-Step Instructions
1. Planning Your Color Placement
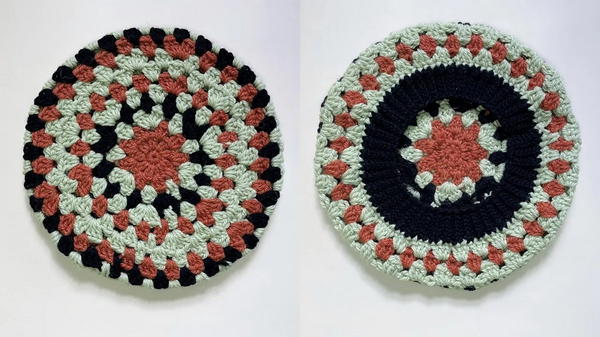
Before beginning, decide how you want the colors distributed. The tutor recommends deciding the color for the brim first (as it’s most visible when wearing the beret). Plan the central, midsection, and brim colors accordingly. In the tutorial, the tutor uses:
- Black for the brim and outermost color.
- Pistachio (Beige) for the midsection.
- Orange for the center.
2. Starting the Beret
Magic Circle and First Round:
- Create a magic circle by wrapping the yarn around your finger. Insert the crochet hook, pull through a loop, and chain one. Then make nine single crochet (SC) stitches into the circle.
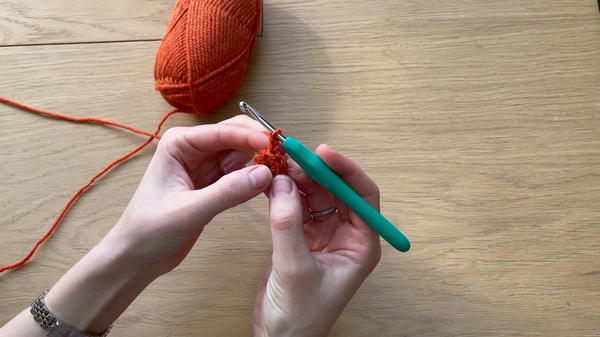
- Tighten the circle by pulling the small tail. Close the round with a slip stitch into the first SC.
- Create a magic circle by wrapping the yarn around your finger. Insert the crochet hook, pull through a loop, and chain one. Then make nine single crochet (SC) stitches into the circle.
Second Round (Increasing the Circle):
- Chain 2 (counts as the first double crochet (DC)). Make 1 DC into the same stitch.
- Make 2 DCs in each stitch from the first round (resulting in 18 DCs in total). Finish with a slip stitch.
Third Round (Adding Granny Stitches):
- Chain 2, add 2 DCs into the same space. Skip 2 stitches, and make a cluster of 3 DCs (referred to as granny stitches) into the next space.
- Repeat creating granny clusters all around, skipping 2 stitches between each cluster.

3. Color Changes and Growth of the Beret
Change colors by attaching the new yarn with a slip knot before slip stitching into the chain-2 from the previous round.
Always tie two knots on the back of the beret to secure the color change. The tutor often carries yarn tails forward to avoid weaving them in later.
Work successive rounds with alternating increases (where needed):
- For the 4th Round, work alternate spaces with two granny clusters separated by a chain (these are the “increases”).
- As you move to Rounds 5–9, the increases are spaced further apart (e.g., in Round 6, make an increase after 5 granny clusters; in Round 7, after 6 granny clusters, etc.).
- To maintain a circular shape, stagger the increases from one row to the next so they don’t stack directly on top of each other.
Continue until the beret reaches the desired width.

4. Finishing the Base
Once the desired width is achieved (after approximately 9 rounds), complete 4–5 more rounds with no increases. This creates the flat section of the beret.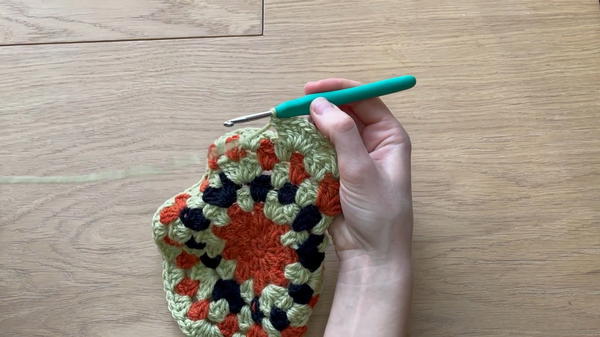
5. Creating the Ribbed Brim
- Change to the brim color (in the tutorial, black).
- Forming the Ribbing:
- Chain 7 (adjustable to your preferred brim width).
- Work slip stitches in the back loop into the first 6 stitches. Skip the turning chain.
- At the base of the brim, make 2 single crochets (SCs) into the next spaces to secure the edge.
- Turn your work and repeat, working slip stitches into the back loops as described.
- Adjusting for Size: If the beret is too large, add decreases along the brim. Use stitch markers to evenly distribute these decreases (e.g., decrease every 6th stitch).
6. Closing the Ribbing
- Once the ribbed edge is complete, bring the short edges together. Use slip stitches to join the edges, ensuring the seam is secure.
- Weave in any remaining ends before completing the project.
Tutor’s Suggestions
- Yarn Tension: Use a smaller hook size if you crochet loosely, as the tutor did by opting for a 4.5mm hook.
- Color Planning: Ensure the brim color complements the rest of your design as it’s the most prominent when wearing the beret.
- Carrying Yarn Tails: The tutor carries yarn tails forward to avoid weaving them in later, but this step can be skipped if you prefer neater edges.
- Decreases on the Brim: These are only necessary if the beret feels too loose. Using stitch markers will make it easier to evenly distribute decreases.
Uses of the Beret
- Fashion Accessory: A stylish addition to your wardrobe that pairs well with both casual and formal outfits.
- Customized Gifts: Make unique, personalized berets for friends and family using colors that suit them.
- Seasonal Wear: Great for keeping warm while looking chic during cooler weather.
Level of Difficulty
This beret pattern is beginner-friendly to intermediate. It involves basic crochet techniques like magic circles, granny stitches, slip stitches, and back-loop-only stitches. However, the incorporation of color changes and the ribbed brim offers enough challenge for slightly experienced crocheters.
Conclusion
The Grammy Beret is a stunning, versatile crochet project that allows you to showcase your creativity through colors and design. Whether you’re a beginner or someone looking to refine their skills, this tutorial provides everything you need to crochet a beret that’s both eye-catching and functional.
Tip
When working granny stitches, use stitch markers to keep track of your increases in each round. This will help ensure that your beret maintains its circular shape as it grows.


