Keep your glasses safe with the Crochet Teddy Glasses Holder pattern, a cute, soft, and practical companion for any desk or nightstand.
Misplaced pair of glasses can turn a simple routine into a frantic search. The Crochet Teddy Glasses Holder pattern offers a playful yet practical solution, turning a small piece of yarn into a helpful companion. This adorable teddy features soft, huggable limbs that securely hold glasses while adding a touch of charm to any desk, nightstand, or shelf. Its friendly expression and tiny details bring warmth and personality, making it more than just a functional accessory.
Handy Crochet Teddy Glasses Holder for Gifts or Home Use
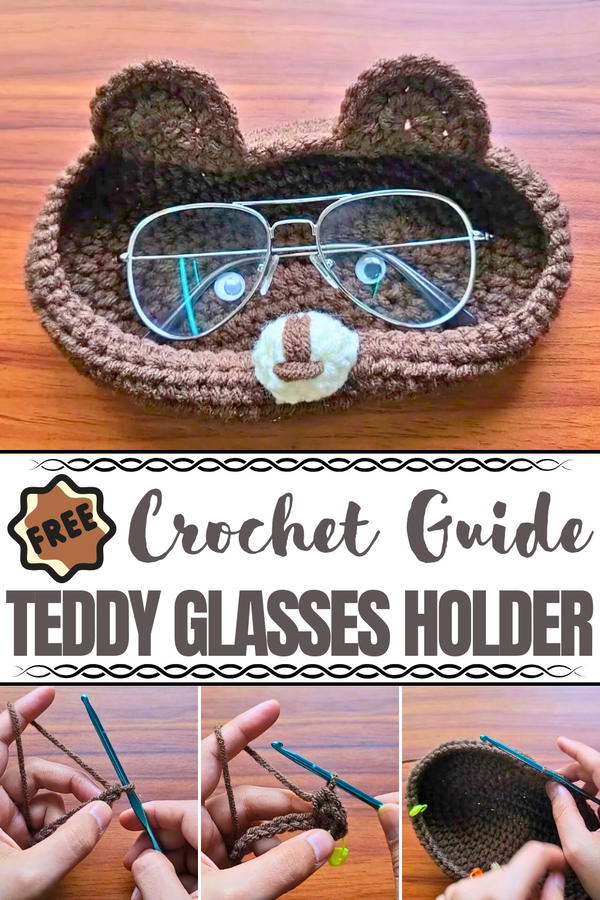
Ideal for children, adults, or gift-giving, the teddy keeps eyewear safe and within easy reach, reducing the risk of scratches or loss. Lightweight but sturdy, it holds glasses gently without bending or slipping, combining practicality with visual delight. The process of making this piece encourages focus, patience, and mindfulness, as each stitch contributes to a finished object that is both useful and endearing.
Beyond organization, the Crochet Teddy Glasses Holder adds a whimsical element to daily life, bringing smiles and a sense of comfort. This tiny companion transforms a mundane necessity into a source of joy, proving that even simple objects can carry personality, functionality, and charm, making every glance toward your glasses a moment of delight.
Materials Needed
To create the Teddy Bear Glasses Case, you will require:
- Yarn:
- Main color for the case body (e.g., light brown).
- Secondary color for the nose detailing (e.g., cream).
- Optional black yarn for the nose embroidery.
- Crochet Hook: 4mm crochet hook.
- Tapestry Needle: For sewing pieces together and weaving in loose ends.
- Scissors: For trimming yarn.
- Google Eyes: For the teddy bear’s face.
- Stitch Markers: To keep track of stitches during rounds.
- Glue Gun: For attaching the eyes (if they are not self-adhesive).
Special Features
- Unique Design: A teddy bear-inspired glasses case that's both practical and decorative.
- Customizable: The design can be tailored with different colors, eye designs, or nose detailing to fit your personal preferences.
- Viral Appeal: A trendy pattern that's popular on social media for its creativity and cuteness.
- Secure Fit: Designed to snugly hold glasses with a soft yet structured design.
Level of Difficulty
Intermediate:
- Combines basic stitches like the half-double crochet (HDC) and slip stitch with shaping and assembly techniques.
- Beginners familiar with essential crochet techniques or looking for practice with increasing rounds and adding decorative details can also attempt this project.
Step-by-Step Instructions
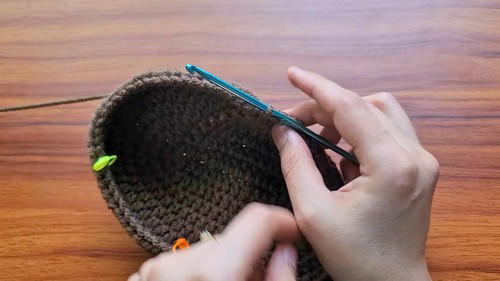
Part 1: Creating the Base (Glasses Case Body)
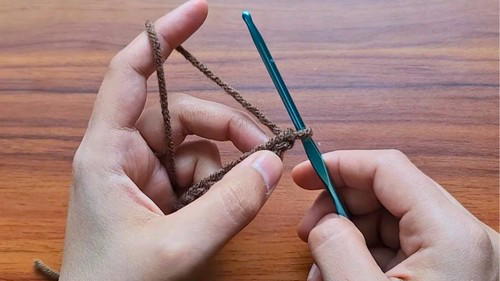
Foundation Chain
- Slip Knot and Chains:
- Start with a slip knot and chain 14.
- Turn and Start Half Double Crochets (HDC):
- Place 3 Half Double Crochets (HDCs) into the second chain from the hook.
- Mark the first and last stitches of this set using stitch markers.
Work Across the Chains
- Next 11 Chains:
- Work one HDC into each of the next 11 chains, ensuring consistency in stitch tension.
- Ending the Row:
- In the last chain, place 3 HDCs, and mark these stitches as well.
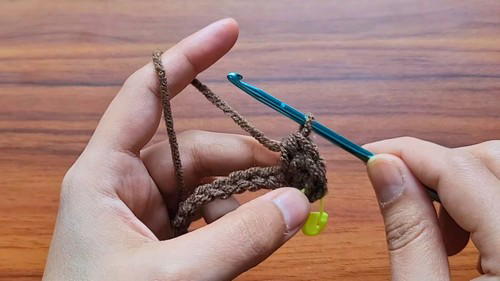
- In the last chain, place 3 HDCs, and mark these stitches as well.
Creating the Oval Shape
- Other Side of the Chain:
- Turn and crochet along the opposite side of the foundation chain.
- Work 11 HDCs, and slip stitch to the first stitch of the round to join.
- Chain 1 and Begin Round 2:
- Continue increasing in marked stitches (2 HDCs in each marked stitch for the increases).
- Continue increasing in marked stitches (2 HDCs in each marked stitch for the increases).
Building the Height
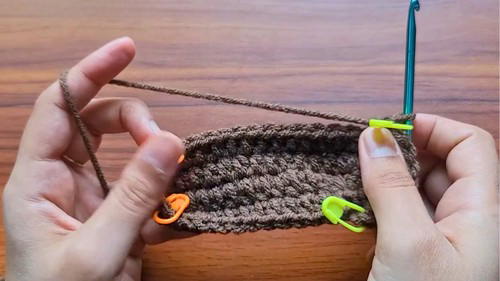
- Work in Rounds:
- For the following rounds, alternate between increases and regular HDCs.
- The increase pattern changes with each round, adding additional regular HDCs between increases (e.g., increase every 2nd stitch in Round 3, every 3rd stitch in Round 4, and so on).
2: Shaping and Adding a Border
- Finalize Case Shape:
- Crochet until the piece reaches the desired height to fit your glasses.
- Create one round of single crochets (SC) for a clean border.
- Fasten Off:
- When the base is done, slip stitch, chain 1, and fasten off.
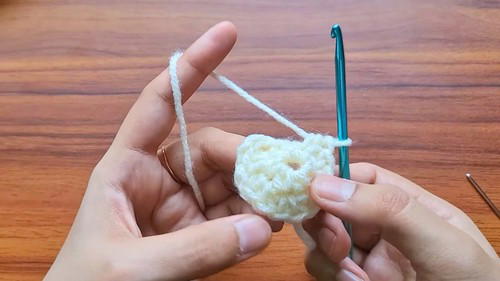
3: Crocheting the Ears
- Start the Ears:
- Make a slip knot and chain 2.
- In the first chain, work 6 HDCs to form the base.
- Increase in Rounds:
- Chain 2, turn your work, and place 2 HDCs in each stitch for a total of 12 stitches.
- Fasten Off and Weave Ends:
- Leave a long tail for sewing the ears onto the case.
- Make Two Ears:
- Repeat the above steps to craft the second ear.
4: Crocheting and Attaching the Nose
- Start the Nose:
- Using cream-colored yarn, create a slip knot and chain 2.
- In the first chain, make 6 HDCs and slip stitch to join the round.
- Increase the Nose:
- Chain 2, and work 2 HDCs in each stitch for a total of 12 stitches.
- Slip stitch to join and fasten off, leaving a long tail for sewing.
- Add Detailing:
- Use black or brown yarn to embroider the vertical and horizontal details of the nose.
- Use black or brown yarn to embroider the vertical and horizontal details of the nose.
5: Assembly and Final Details
- Attach the Ears:
- Sew the ears symmetrically onto the top edges of the case using the long yarn tails. Secure tightly.
- Attach the Nose:
- Center the nose on the front of the case, just below the ears. Sew in place.
- Add Google Eyes:
- Position the eyes on either side of the nose and glue them securely.
- Final Shaping:
- Gently press and shape the case to enhance the teddy bear appearance.
Tutor’s Suggestions
- Use Stitch Markers: Place markers where increases occur to avoid mistakes.
- Customize Aspects: Change the yarn colors, eye sizes, or even replace the safety eyes with embroidery if desired.
- Ensure Proper Stitch Tension: Keep even tension for a polished look.
- Double-Check Placement Before Gluing: Before attaching the eyes with glue, test their placement using light-hand positioning to ensure symmetry.
Uses of the Teddy Glasses Holder
- Glasses Holder: Safely store and protect glasses.
- Cute Accessory: Use as a decorative item for travel or home.
- Gift Idea: A handmade and thoughtful gift for crochet or bear lovers.
Tip for Success
When assembling the components, use safety pins or stitch markers to temporarily position the ears and nose. This allows you to adjust their placement before permanently sewing them on.
Conclusion
The Teddy Bear Glasses Holder is a fun and practical project that allows you to practice shaping, detailing, and assembling crochet pieces. Its adorable design and functional use make it a great gift or accessory.