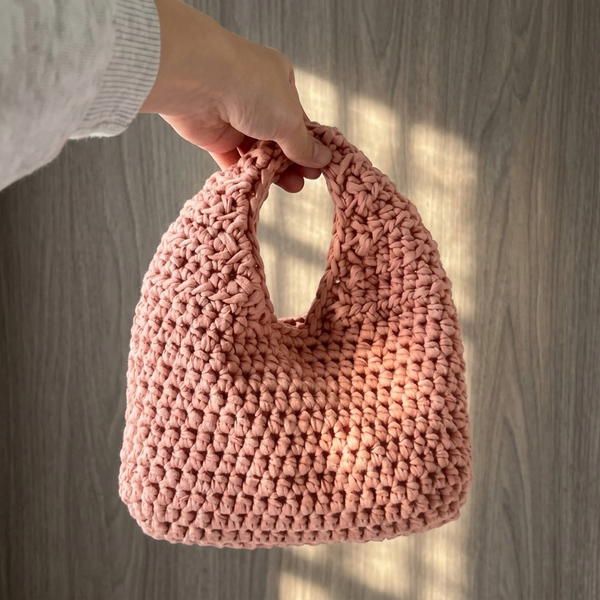
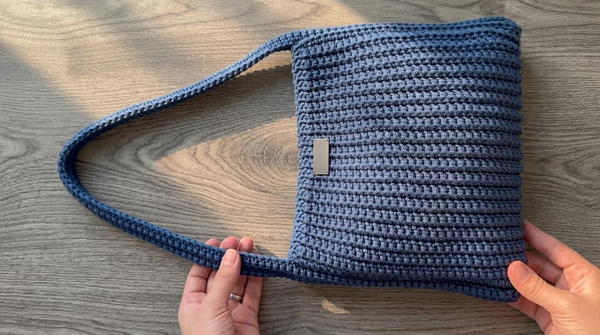
Open up the charm of handmade style with this free crochet bag pattern, perfect for your daily needs while adding a touch of elegance to every outfit.
Carrying something that’s not only useful but also stylish and personalized. A crochet bag pattern brings this idea to life, offering the chance to create a beautiful and functional accessory. With textured stitches and unique designs, the bag stands out in its appearance, giving a handcrafted touch that’s hard to ignore. This free pattern allows you to experiment with colors, sizes, and shapes to suit your needs, whether it’s for casual outings, shopping trips, or daily essentials.
Crochet Storage Bag Free Pattern to Keep Things Tidy

Its lightweight design and customizable features make it convenient to carry while ensuring durability for everyday use. The pattern combines beauty and practicality, showing how simple yarn can turn into something stunning. Adding personal touches, like decorative handles or embellishments, makes it even more special. Whether you prefer bold color contrasts or soft pastel tones, this crochet bag becomes a stylish statement that’s as useful as it is attractive.
Crochet Bag - Step-by-Step Pattern
Materials Needed
Yarn:
- 3 mm polypropylene nautical rope, approximately 425 grams (used in the example).
- Recommended color: Terracotta. Feel free to use other sturdy twisted yarn or rope for a similar effect.
Hook: 4.5 mm crochet hook.
Other Tools:
- Measuring tape.
- Stitch markers (recommend at least 4).
- 18 mm magnetic button (or optional zipper for closure).
- Scissors.
- Lighter for burning rope ends and preventing fraying.
- Nylon thread (0.30 mm) – for sewing closure.
- Tapestry needle (optional) or a standard sewing needle for sewing.
Gauge
- Gauge is approximately 18 stitches = 10 cm (4 inches) across the base chain.
- Ensure consistent tension throughout the project. You can adjust your hook size if needed to match the finished dimensions.
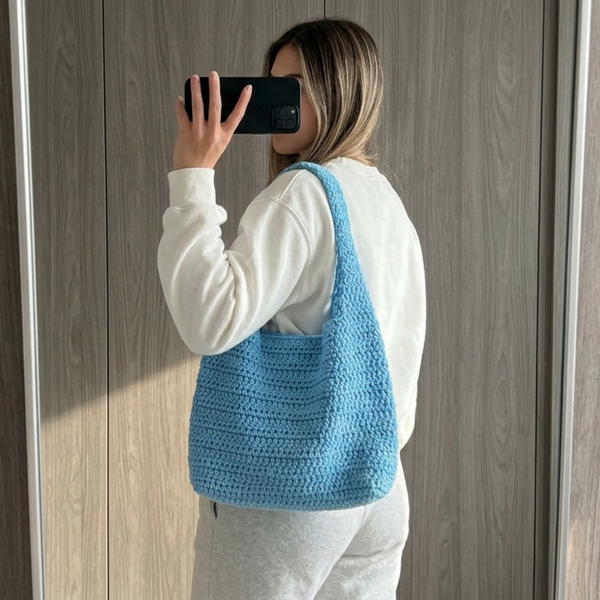
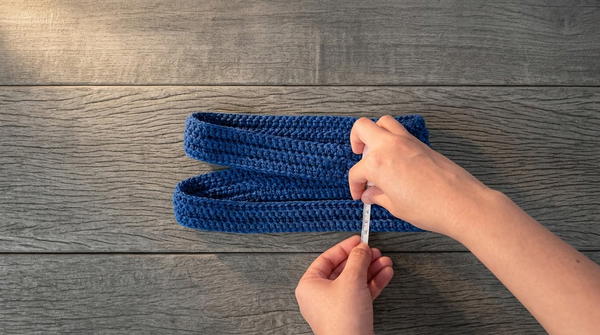
Finished Size
- Body of the bag:
- 47 cm (18.5 inches) long × 24.5 cm (9.5 inches) wide.
- Strap:
- 105 cm (41.3 inches) long × 3 cm (1.2 inches) wide.
Skill Level
- Intermediate: Basic stitches like slip stitch, single crochet, and basic sewing techniques are required.
Abbreviations (US Terms)
- ch: Chain
- sl st: Slip Stitch
- sc: Single Crochet
Special Notes and Techniques
Customizing Dimensions:
- To make a wider/longer bag, modify the foundation chain or add rows.
- Similarly, extend the chain for the strap if you want it longer.
Stitch Placement:
- Work stitches into the back loops of the foundation chain for a cleaner, more polished base edge.
Integrated Look:
- The strap and bag body are designed with the same stitch pattern to maintain a consistent and cohesive look.
Burning Rope Ends:
- To seal and prevent fraying, briefly burn the ends of the rope with a lighter.
Pattern Instructions
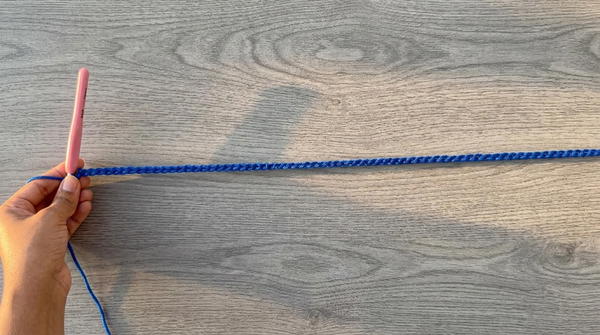
Step 1: Foundation Chain
- Begin with a slip knot on your hook.
- Chain 69 to form the bag's base.
- This length measures 48 cm (18.9 inches).
- To make the bag larger, increase the number of chains.
Step 2: Base of the Bag
The base is worked along the chain in single crochet (sc), with slip stitches in key sections for structure.
Row 1:
- Identify the back loops of the chain.
- Skip the first loop.
- Insert your hook into the second back loop, make a sl st.
- Repeat this for the next loop, making another sl st.
- Important: Place a stitch marker in the second slip stitch to indicate this edge for consistency.
- Continue by making 1 sc in each back loop until you reach the last two loops of the chain.
- In the last two loops, make 2 sl st.
- Place a stitch marker in the second slip stitch.
Rows 2–32: Build the bag body with rows of single crochets.
- Ch 1, turn work.
- Insert your hook into the center of the base stitch, rather than the top of the stitch, to create a unique texture.
- Work 2 sl st in the first two stitches of each row.
- Make 1 sc in each stitch across the row.

- End each row with 2 sl st in the last two stitches.
- Move your stitch marker to the second slip stitch of the row to track placement.
- Continue for a total of 32 rows.
Tip: If you want a taller bag, add more rows beyond the 32 specified.
Step 3: Bag Handle (Strap)
Foundation Chain for Strap:
- Make a slip knot and chain 141.
- Strap length measures approximately 105.5 cm (41.3 inches).
- Adjust chain length for longer or shorter straps.
Work the Strap:
- Turn the chain over and work along the back loops.
- Row 1: Skip the first loop, sc 1 sc in each back loop across.
- Total: 140 sc.
- At the end of the row, ch 1, turn, and work back across the strap.
Rows 2–4:
- Continue working 1 sc in each stitch across the row.
- Insert the hook into the center of the base stitch, similar to the bag body.
- Work a total of 4 rows for the strap.
Note: The strap width measures 3 cm (1.2 inches) after completing 4 rows.
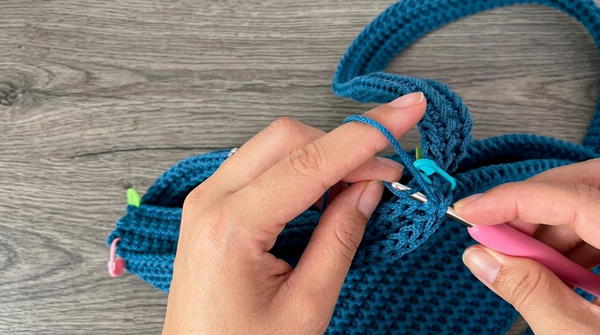
Step 4: Attaching the Strap to the Body
- Use stitch markers to clearly define the attachment points on the bag body.
- Divide each side into three sections:
- 32 stitches on one side, 4 stitches in the middle for strap width, and 32 stitches on the other side.
- Mark these boundaries with stitch markers.
- Divide each side into three sections:
- Align the strap ends with the 4 stitches in the middle on each side of the bag.
- Use additional markers to secure the strap in place before sewing.
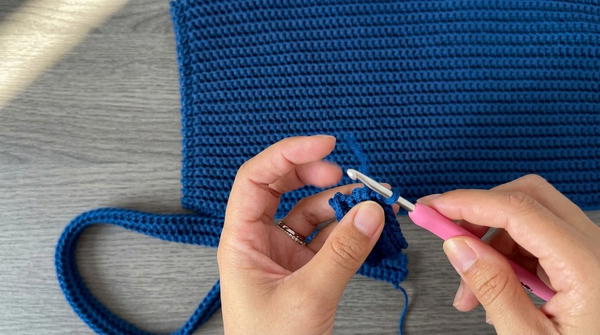
Sew the Strap:
- Choose a method: Use the crochet hook (with sl st) or a tapestry/sewing needle with nylon thread.
- With the wrong side of the bag facing you:
- Match each stitch from the strap with its corresponding stitch on the bag.
- Work sl st or sew neatly, ensuring no gaps.
- Repeat for the other side of the strap.
Step 5: Adding a Closure
- Use an 18 mm magnetic button (or install a zipper, if preferred).
- Sew the button with nylon thread using a sewing needle.
- Attach one side of the button on the inside of the bag flap and the other to the opposite side.
Step 6 (Optional): Add a Lining
- Sew a fabric lining inside the bag for durability and aesthetics.
- You may reference tutorials if unfamiliar with adding linings.
Customization Ideas
- Color Choices:
- Use contrasting colors for the bag body and strap for a bolder look.
- Stripes or color blocking can add character.
- Tassels:
- Add a tassel or charm to the strap for a decorative finish.
- Tutorial for tassels is available as per the video.
Conclusion
The Vitória Bag is simple yet functional. The integrated strap design creates a seamless effect, making it unique and elegant. This bag is perfect for daily use, beach outings, or gifting. Adding optional elements like linings or zippers enhances both utility and aesthetic.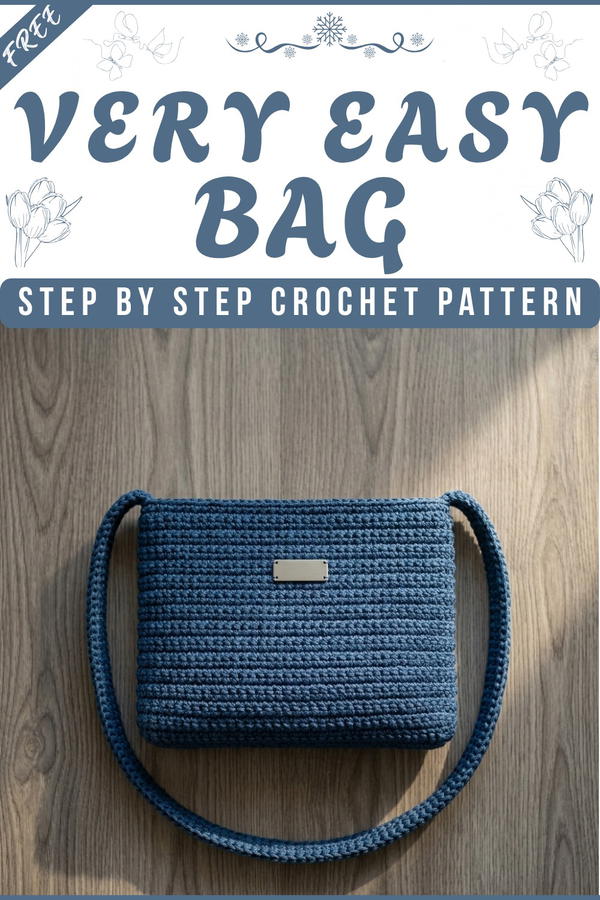
Tips for Success
- Tension: Maintain even tension throughout to ensure consistent dimensions.
- Finishing: Always hide ends securely and burn polypropylene ends to prevent fraying.
- Dimension Modifications: Adjust the chain length and rows as desired for customized sizes.