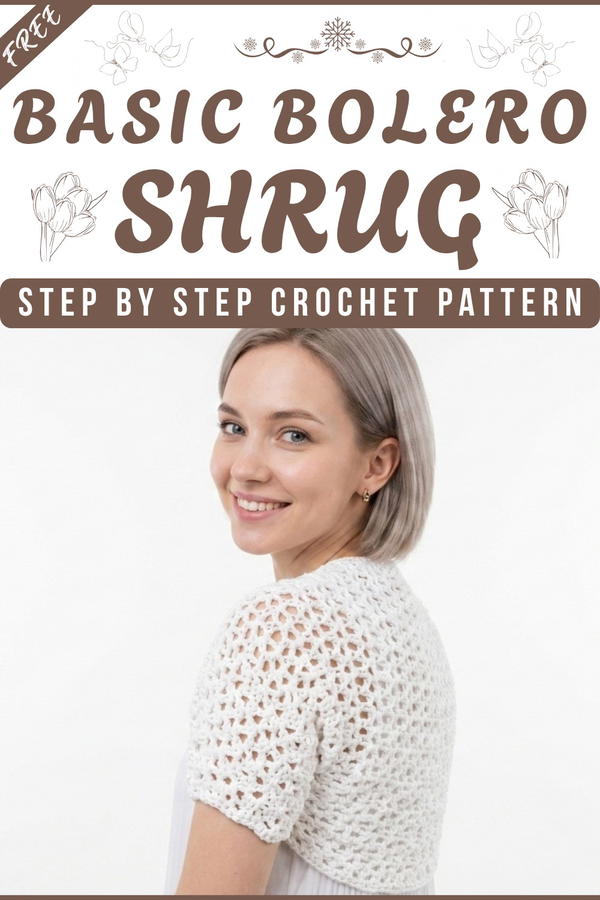
Accentuate your look with Free Crochet Bolero Shrug Pattern, adding soft handmade charm, light layering comfort, and elegant everyday wear for outfits.
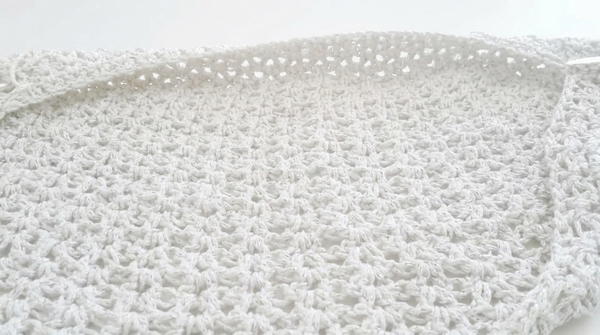
A light layer that can instantly change a simple outfit into something stylish often starts with only basic stitches and a clear, easy shape. A Free Crochet Bolero Shrug pattern begins with making a wide rectangle using simple repeating stitches, where each row builds the same pattern to keep the work even and smooth. After the rectangle is completed, the edges are joined in a simple way to form arm openings, turning it into a wearable shrug without complex shaping or cutting. This step-by-step structure keeps the making process easy to understand and follow.
Free Crochet Bolero Shrug Pattern Stylish Handmade Cover Up
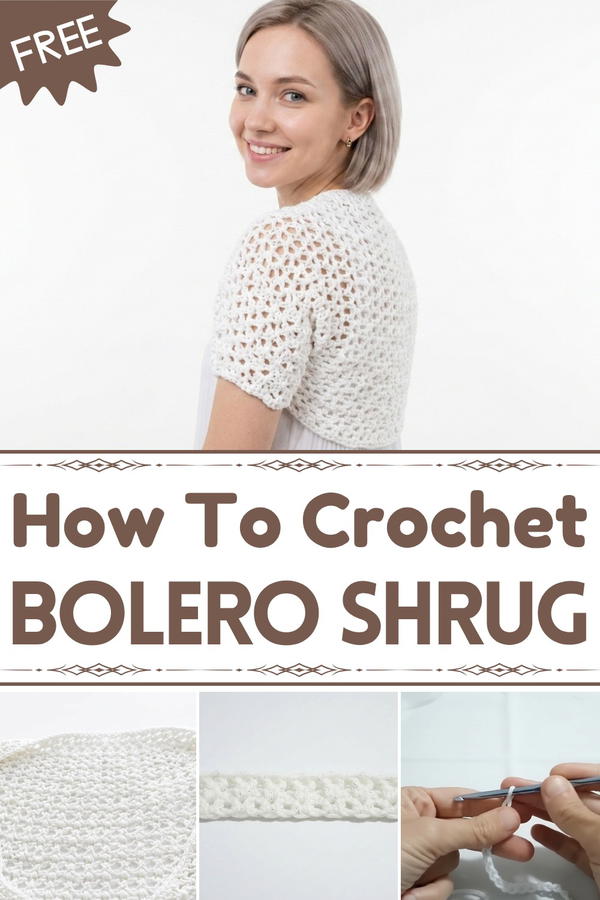
The Free Crochet Bolero Shrug pattern gives a short, open-front jacket look that sits lightly over the shoulders and arms. Its appearance is airy or slightly textured depending on the stitch style, creating a neat and graceful finish. The beauty comes from its delicate structure, open design, and the way it adds elegance to any dress or top without feeling heavy. It is used for layering in different seasons, offering light coverage for warmth or style during outings, parties, or casual wear. Its simple shape, flexible fit, and handmade charm make it a timeless piece that suits many outfits with ease.
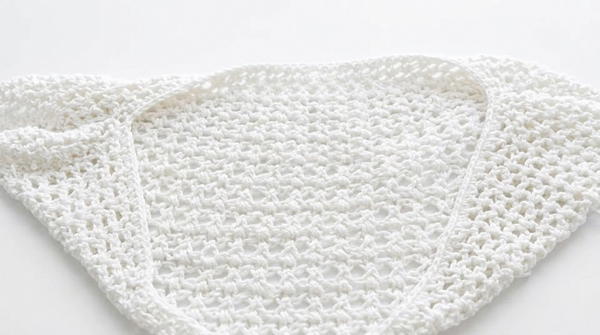
Crochet Elegant Bolero with Shiny Cotton Yarn
Materials Needed
- Yarn: 3 skeins of "Stella" shiny cotton yarn (50g each, 120 meters per skein). Off- White or other preferred colors with lurex accents work well for a refined look.
- Hook Size: Crochet hook size 5mm (US H/8).
- Tapestry Needle: For seaming and weaving in ends.
- Scissors: For cutting yarn.
Special Techniques
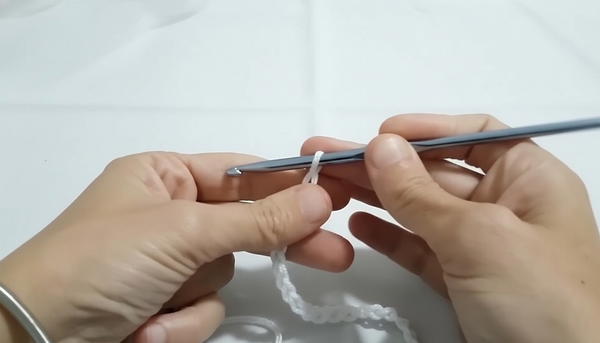
- Double Crochet (dc): Yarn over, insert hook into stitch, yarn over, pull through stitch, yarn over, pull through two loops twice.
- Slip Stitch (sl st): Insert hook into stitch, yarn over, pull through both loops.
- Single Crochet (sc): Insert hook, yarn over, pull through, yarn over, pull through both loops.
Skill Level
Beginner-friendly. Simple stitch patterns and repetitive techniques make this bolero accessible to all crocheters.
Finished Size
- Width (across the back): Approximately 56cm (22 inches).
- Height: Approximately 32cm (12.5 inches).
- Sleeves: Short, seamless sleeves extend just below the shoulders.
Note: Adjust the width and height based on your measurements for a perfect fit.
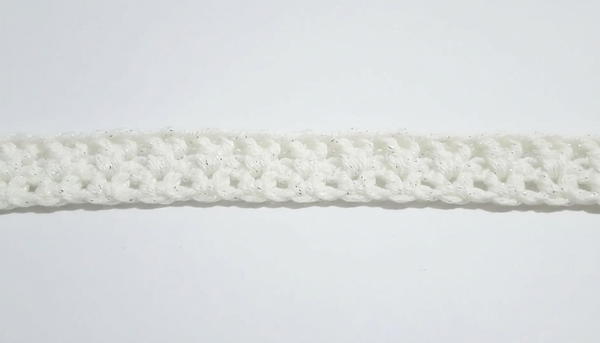
Gauge
- 10 squares of the main pattern = 10cm x 10cm (4 inches by 4 inches).
- Gauge is essential to ensure the bolero fits well.
Pattern Instructions
Step 1: Start with the Foundation Chain
- Begin by making 70 chains with a 5mm crochet hook for the width of the bolero.
- Add 3 chains (total 73 chains) to represent the first double crochet of Row 1.
Step 2: First Row
- Skip the first 2 chains from the hook. In the 3rd chain, work 1 double crochet (dc).
- Work another double crochet into the same chain.
- Skip the next chain and make 2 double crochet into the following chain.
- Repeat the pattern: Skip 1 chain, work 2 dc into the next chain across the entire row.
- At the end, chain 1 and turn your work.
Step 3: Second Row
- Work 1 dc, chain 1, 1 dc into each space between the "arch" created in Row 1.
- Skip the "central stitch" (where the double crochets meet) and repeat: 1 dc, chain 1, 1 dc into each space.
- At the end of the row, chain 1 and turn.
Step 4: Continuing Rows
- Repeat the Second Row pattern (dc, chain 1, dc in each arch) until the piece measures approximately 32cm (12.5 inches) in height.
- Ensure the edges of each row are consistent by working a chain to turn.
Step 5: Joining the Sleeves
- Fold the finished rectangular piece in half, aligning the edges to create the sleeve openings.
- Use slip stitches to join the sides for 10 stitches at each sleeve edge. (Insert the hook into the first stitch of both edges, yarn over, pull through both edges and loop on the hook.)
- Repeat for the other sleeve opening. Slip stitches create a seamless join.
- Fasten off and weave in the ends.
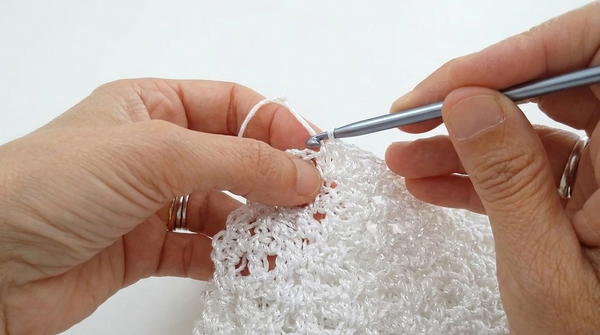
Step 6: Adding a Perimeter Border
- Reattach yarn to any edge. Work 1 single crochet (sc) into each stitch around the bolero's perimeter. This gives a neat and polished finish.
- At sleeve edges, ensure clean transitions by evenly spacing single crochets along the curved edges.
- Slip stitch to join when you return to the starting point. Fasten off and weave in ends.

Finishing the Project
- Inspect the seams to ensure they’re smooth and even.
- Use the tapestry needle to hide loose ends and trim excess yarn.
- Lightly block the finished bolero to refine its shape and soften the fabric.
Tips for Crocheting and Maintaining the Bolero
- Adjusting Size: To customize width, add or reduce chains in the foundation chain. For more length, increase the number of rows worked.
- Gauge: Check gauge frequently to ensure the bolero fits as intended.
- Working Loosely: Use relaxed tension when crocheting to create softer arches and a more flowing drape. If needed, switch to a 5.5mm hook.
- Yarn Options: Substitute "Stella" shiny cotton with other cotton or acrylic-blend yarns containing lurex for a similar effect.
- Blocking: Light blocking enhances the bolero’s structure and texture. Lay flat and pin, spritz lightly with water, and let air dry.
Final Words
This elegant bolero is a delightful addition to any wardrobe — perfect for summer evenings or formal events. With its refined, perforated design and shimmering yarn, it combines simplicity and sophistication. Beginners will find this pattern achievable, while experienced crocheters can enjoy its straightforward yet charming construction.