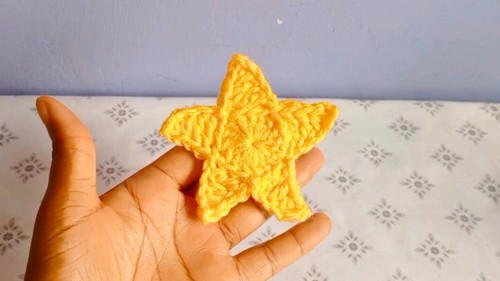
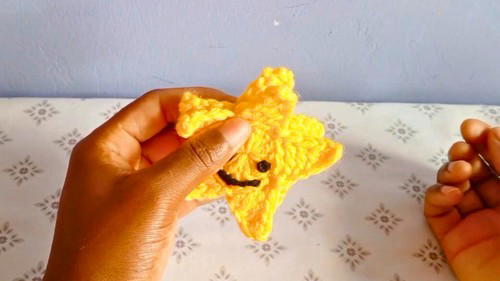
Brighten your day with a Free Crochet Happy Star Amigurumi, a charming and easy project perfect for gifts, decor, and spreading joy in every stitch.
Amigurumi, the Japanese art of crocheting small, stuffed yarn creations, brings a unique charm to any space, and few items compare to the cheerful aura of a Free Crochet Happy Star Amigurumi. Shimmering with simplicity and warmth, this adorable star is a delightful project to brighten your day while enhancing your crochet skills. Perfect as a heartfelt gift, nursery decoration, or cheerful desk companion, it adds a soft, whimsical touch wherever it rests.
Free Crochet Happy Star Amigurumi Pattern

The allure lies in its beautiful shape, delicate texture, and the sense of joy it radiates. Its soft, puffy form paired with a cheerful smile makes it hard to resist—ideal for spreading happiness in small, meaningful ways. What’s more, this project is budget-friendly and accessible, as it uses free crochet patterns with minimal materials, perfect for beginners and experienced crocheters alike.
With simple techniques and a touch of careful stitching, you can crochet an accessory that celebrates creativity and charm. It’s also a soothing way to unwind, as the repetitive process frees the mind while keeping hands busy. Whether you’re seeking a fun weekend project or a thoughtful keepsake, the Free Crochet Happy Star Amigurumi is an irresistible choice for adding bursts of joy in every stitch.
Headings and Details
Materials You’ll Need
- Yarn of your choice (any color you prefer)
- Crochet hook (compatible with your yarn weight)
- Scissors
- Tapestry needle
Step-by-Step Instructions
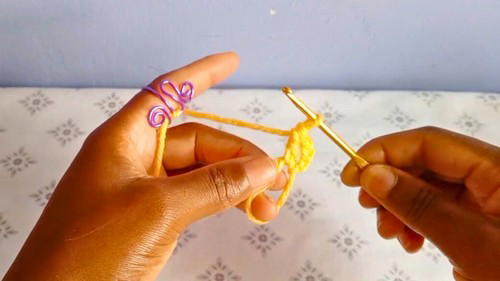
1. Start with the Magic Ring
- Begin by making a magic ring.
- Chain 3 to start your first layer.
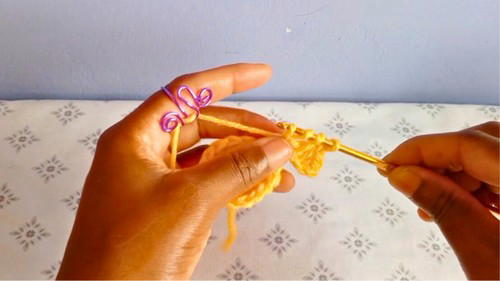
2. Create Double Crochets (Base of the Star)
- Work 15 double crochets into the magic ring.
- Use the “yarn over, pull through” process to complete each double crochet.
- After completing the round, pull the loose thread to close the ring tightly.
3. Slip Stitch to Finish the Round
- Slip stitch into the third chain from the starting chain 3 to close the round.
4. Form the Star Points
Repeat the following steps for each of the star’s five points:
- Chain 5.
- Work single crochet into the second chain from the hook.
- Work a half-double crochet into the next chain.
- Work a double crochet into the next chain.
- Work a treble (triple) crochet into the final chain.
5. Attach Each Star Point
- Skip two stitches on the base circle, then slip stitch into the next stitch to secure the star point.
- Repeat the process 4 more times to complete all five points of the star.
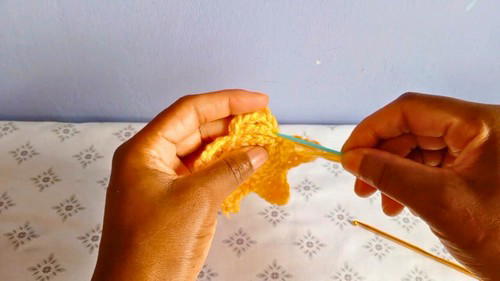
Finishing One Star
- Once all five points are complete, tie off the ends, and weave them to the back.
Make a Second Star
- Repeat the entire process to create a second star.
Joining the Stars Together
- Place the two stars back-to-back, aligning them carefully.
- Use slip stitches to stitch them together around the edges, leaving a small gap open if you want to add stuffing (optional).
- Close the gap completely with slip stitches, then tie off and weave in the loose ends.
Special Features
- Adorable Shape: Once completed, the Happy Star has a puffy, well-defined texture.
- Versatile Use: It can be used as a decorative keychain, a gift, or as part of home or nursery decor.
Difficulty Level
- Beginner-Friendly: This tutorial is suitable for crocheters with basic skills in creating magic rings, chaining, and working double crochets.
Tutor’s Suggestions
- Pay close attention to counting stitches to ensure the star is symmetrical.
- Use a contrasting yarn color to make the star’s details stand out.
Final Tip
Make your star more vibrant by using multi-color yarns or adding embellishments like safety eyes or embroidery for a personalized touch!
Conclusion
This beautiful project highlights the charm of amigurumi with its simple yet elegant design. Whether you use it as a gift or decor piece, the "Happy Star Amigurumi" is a fun and rewarding creation that spreads joy. By following the steps and tips in this tutorial, you’ll master the art of star crocheting in no time.


