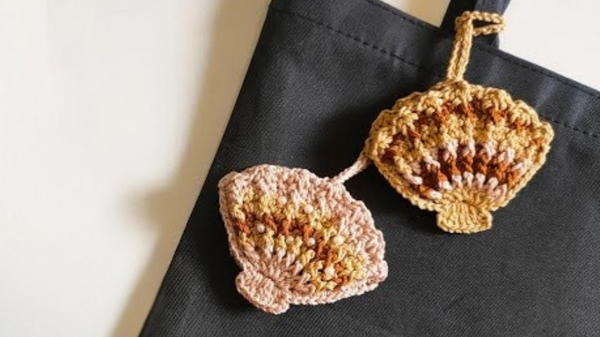
Splash playful vibes with the Free Crochet Shell Keychain Pattern, turning keys or bags into a cute seaside accessory full of charm and whimsy.
A walk along the beach often reveals how tiny treasures can bring lasting joy—a smooth pebble, a delicate shell, or a keepsake that sparks memories of sunlit days. The Free Crochet Shell Keychain pattern captures that charm in a functional accessory, offering a whimsical way to carry a touch of coastal beauty wherever you go.
Trendy Crochet Shell Keychain for Ocean-Lover Accessories
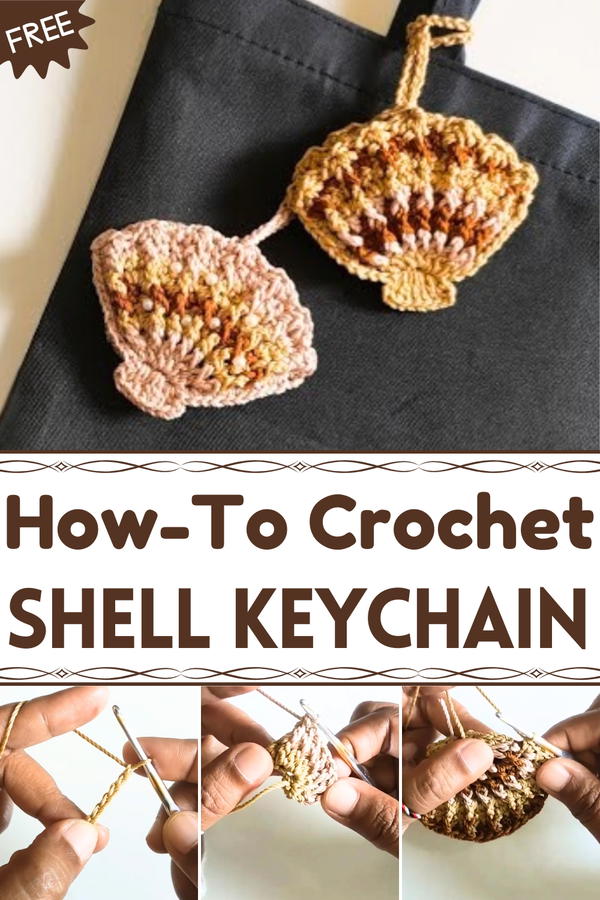
This keychain features a textured shell motif that feels lightweight yet durable, perfect for securing keys, clipping onto a bag, or adding a playful accent to a zipper pull. Its compact size makes it easy to carry without bulk, while the intricate stitching showcases fine craftsmanship that is both eye-catching and tactile. Whether created in soft pastels, vibrant summer hues, or classic neutrals, each shell adds personality and style to everyday items.
The Free Crochet Shell Keychain pattern offers practical benefits along with aesthetic appeal. It helps keep keys organized, makes a thoughtful handmade gift, and introduces a cheerful decorative touch to bags, backpacks, or home spaces. Quick to complete and adaptable in color, this project blends functionality with beauty, turning a simple accessory into a small treasure that carries a hint of the beach, a splash of joy, and a reminder of moments spent enjoying sun, sand, and serenity.
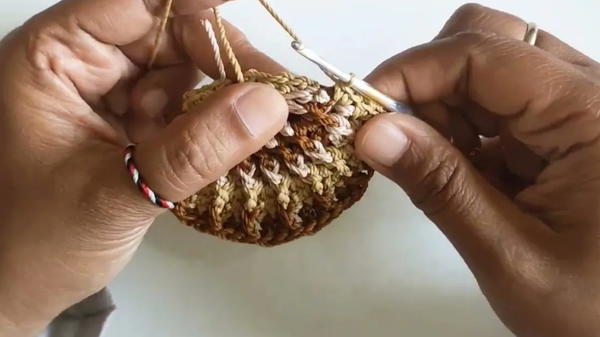
Special Features
- Shell Shaped Design: The intricate pattern beautifully mimics the elegant contours of a seashell.
- Textured Pattern: Includes puff stitches, front post stitches, back post stitches, and double crochet increases to create a dynamic texture.
- Two-Part Assembly: The project involves creating two identical parts and combining them seamlessly.
- Multi-Color Finish: The design uses different yarn colors across rows to highlight its eye-catching detail.
- Optional Decoration: You may adorn the final product with pearls or beads for a customized look.
Materials Needed
- Yarn: Onitsuga polycherry thread in multiple colors (or your favorite yarn for a sturdy yet soft finish).
- Crochet Hook: Size 4/0 hook by Tulip.
- Scissors: For trimming excess yarn.
- Lighter/Matchstick: To seal the thread ends.
- Sewing Accessories (Optional): Needle and thread for attaching pearls or other decorative elements.
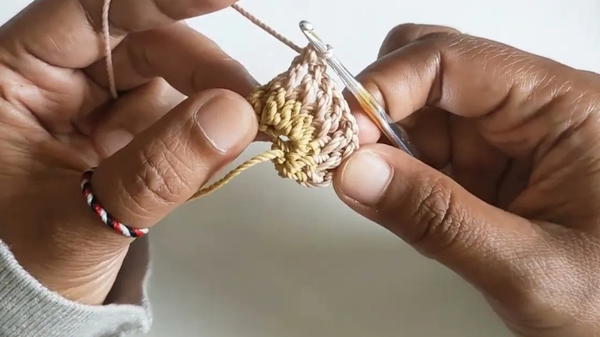
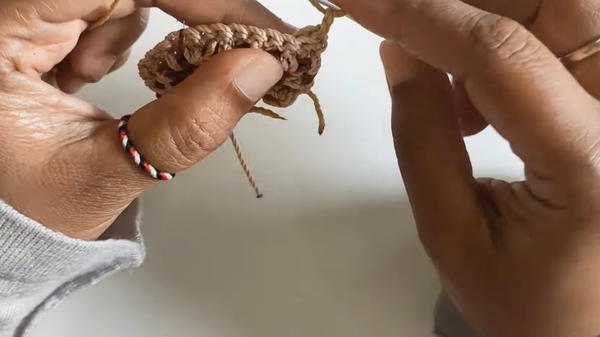
Step-by-Step Guide
1. Beginning the Foundation
- Start with a slip knot and chain 6 stitches.

- Skip three chains from the hook. Into the fourth chain:
- Work 2 double crochets (dc) into the same stitch.
- Into the next chain, make 3 dc in one hole.
- Continue into the next chain and make 3 dc in one hole again.
- Chain 1, cut the yarn, and use a lighter to secure the thread end. Twist the piece to face the correct side.
2. Row 2: Introducing a New Color
- Create another slip knot with a different thread color.
- Insert it into the last stitch of the previous row and chain 2 stitches.
- Work 6 front post double crochets (fpdc) in the next rows and chain 1 stitch.
- For the last stitch, work 1 fpdc and 1 half double crochet (hdc).
- End with chain 1 and secure the thread with a lighter.
3. Row 3: Back Post Technique
- Change thread color. Start with a slip knot and insert it into the last stitch of the previous row.
- Chain 2 and make a pattern of:
- 1 back post double crochet (bpdc) and 1 regular double crochet (dc) six times.
- Finish the row with 1 bpdc and 1 hdc in the last stitch.
- Chain 1 and secure the thread by burning the end.
4. Row 4: Building Front Post Details
- Turn your work and attach the new thread with a slip knot. Chain 2.
- Follow a pattern of:
- 1 front post double crochet (fpdc) and 1 regular dc, six times.
- Complete the row with 1 fpdc and 1 hdc in the last stitch. Chain 1 and secure the thread.
5. Row 5: Adding Width with Increases
- Change color and tie a new slip knot. Chain 2.
- Use these stitches:
- 1 bpdc and 2 dc increases in the next space for width expansion.
- Maintain this pattern and finish with 1 bpdc, 1 hdc at the end.
- Break the thread and seal the end.
6. Row 6: Textural Variation
- Attach a new thread and chain 1.
- Crochet the following sequence:
- 1 fp hdc, 2 sc, and 1 fp hdc.
- Proceed with 2 hdc, 1 fp dc, and 2 dc.
- Repeat twice, then finish with 1 fp hdc, 2 sc, and 1 fp hdc.
- End with chain 1 and cut the yarn, securing the thread.
7. Creating & Combining Parts
- Repeat the entire process to create a second matching shell piece.
- To join the shells together:
- Insert a slip knot into a single crochet stitch at the top.
- Use 2 single crochets (sc) over five pairs of holes.
- Slip stitch to secure rows into one piece.
8. Decorative Lace and Puff Stitches
- Begin the lace detailing with chain 1 and add puff stitches on front posts:
- Between puff stitches, chain 2 and slip stitch into the edge for a delicate finish.
- Continue the lace around the top edge, creating elegant loops.
9. Final Rope Attachment
- Chain 45 stitches to form the hanger’s rope.
- Slip stitch it back into the initial hole, tightening securely.
Tutor’s Suggestions
- Check the Shell Shape: Periodically analyze the completed sections to ensure symmetry and alignment.
- Experiment with Colors: Use contrasting yarn for a dramatic or subtle effect to match the aesthetic of your space.
- Seal Ends Properly: Use a lighter or matchstick to prevent yarn from fraying. However, ensure you work carefully to avoid accidents.
Level of Difficulty
This project is suited for intermediate crocheters due to the variety of stitches used (fpdc, bpdc, puff stitches, etc.) and the meticulous assembly process. However, with patience and careful attention to detail, even enthusiastic beginners may enjoy giving it a try!
Uses
- Decorative Hanger: This shell crochet design adds an elegant, beachy touch to your space.
- Home Organization: Ideal for hanging accessories, small hand towels, or lightweight items.
- Gift Idea: A handmade and thoughtful gift for friends, family, or anyone who loves coastal themes.
Tip
To make the design sturdier, consider using a slightly thicker yarn or crocheting with tighter tension.
Introduction
Crochet lovers will enjoy creating this beautiful shell-shaped hanger—a practical and decorative project inspired by seaside aesthetics. This intermediate-level crochet design brings together fun techniques like front and back post stitches, puff stitches, and artistic color transitions to create a stunning piece that’s functional and stylish.
Conclusion
The crochet shell hanger is the perfect blend of elegance and practicality. With its soft texture, intricate details, and beach-inspired design, it’s a standout piece to brighten up any space. Whether you make it for yourself or as a gift, this crochet hanger is sure to impress.


