Enjoy a fun and easy crochet wave top that feels super comfy, looks stylish, and is perfect for sunny days or casual hangouts with friends.
Soft curves and delicate textures come together to create a lightweight and breezy top that’s perfect for sunny days. Its wavy design flows naturally, giving it a playful and stylish charm that stands out. Easy to pair with jeans, shorts, or skirts, it works beautifully for casual outings or relaxing days at home. The airy and breathable material keeps you feeling cool and comfortable, while the wave-inspired pattern adds a fresh and unique touch to your wardrobe.
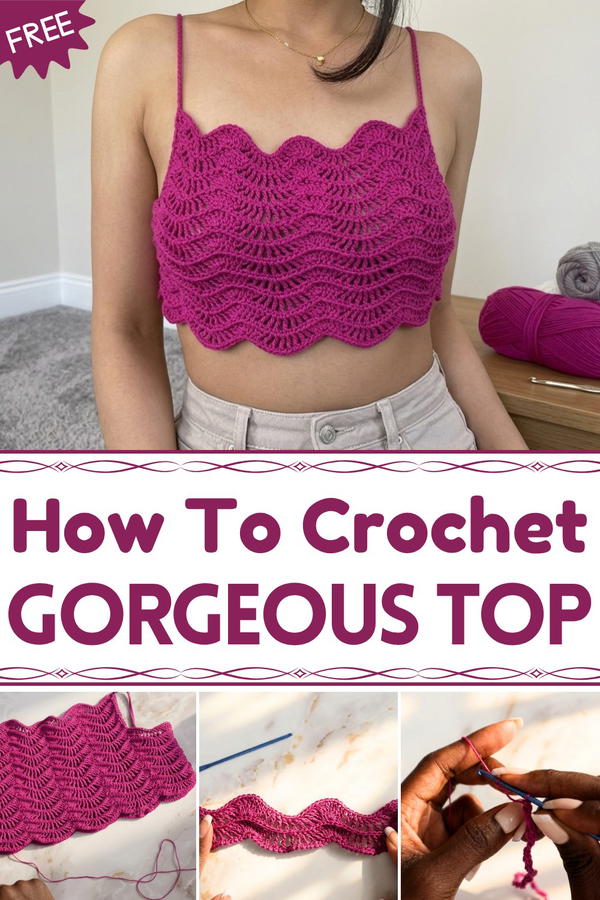
Free Crochet Wave Top Pattern for Casual & Beachy Looks

Its gentle flow and elegant look make it a perfect fit for those who love simple yet eye-catching outfits. This top isn’t just clothing—it’s a beautiful piece that combines comfort with effortless style, making it ideal for any occasion where you want to look and feel amazing.

Crochet Top Pattern Step-By-Step Guide
Finished Size
- Default sizing: Small (Bust 32 inches).
- The pattern can easily be resized by adjusting the number of chains for the foundation row and rows for the desired length.
Materials Needed
- Crochet Thread: Size 10 (or yarn of your preference).
- Crochet Hook: 2.5 mm.
- Scissors.
- Measuring Tape.
- Stitch Markers (optional).
Gauge
- Foundation row: Single crochet gauge across chain multiples of 19.
- Check that your scallops form properly without being too stretched or slack.
Tips for Customization
- Adjust the foundation chain length to match your body measurement.
- Adjust the number of repeat rows for a cropped or full-length top.
- Experiment with ombre or multicolored yarns for added flair.
- Add adjustable straps or decorative borders for personalized styling.
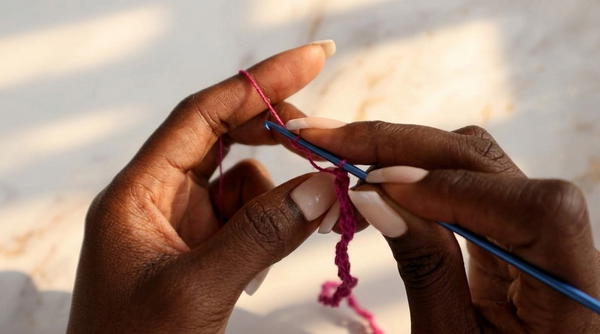
Pattern Instructions
Front Panel Instructions
Row 1: (Foundation Row)
- Create a foundation chain in multiples of 19 (e.g., 114 chains for Small). Ensure this is slightly longer than half your bust measurement to allow for the scalloped shape.
- Place 1 single crochet (sc) in each chain across. Turn.
Row 2: (Wave Pattern Begins)
- Chain 4 (counts as first treble crochet), turn.
- In the first chain of the row, place 4 treble crochets (tr).
(This creates a group of 5 trebles, including the starting chain 4).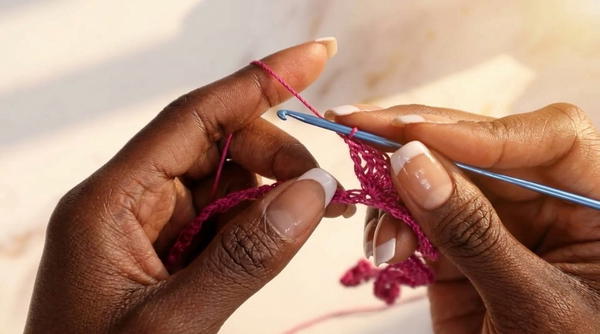
- Begin the scallop repeat:
- Place 1 treble crochet in the next chain, then skip 1 chain.
- Repeat this step until you complete 9 treble crochets (counting the first one).
- In the next chain, place 5 treble crochets in one stitch.
- Repeat the sequence across the row:
- 9 trebles (skipping a chain in between each), followed by 5 trebles in one stitch, until the row ends.
- Finish the row with 5 trebles in the final stitch.
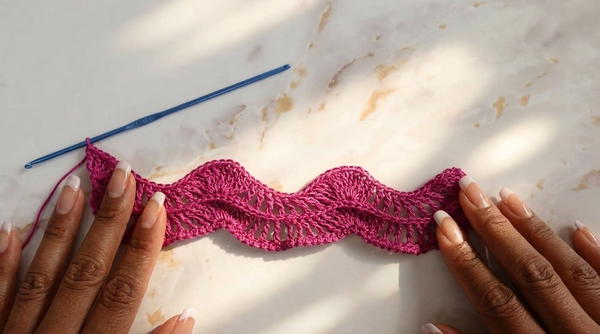
Row 3: (Return Row with Border)
- Chain 1, turn.
- Work 1 Front Post Single Crochet (FPSC) around each stitch from the previous row.
- Continue across, ensuring each post from the row below has a front post single crochet.
- Finish the row, ensuring you crochet around the chain-4 from the previous row.
Rows 4–15 (or desired length): Repeat Rows 2 and 3.
- Continue repeating the wave design and return row until reaching the desired front panel height.
- Example: For a small size crop top, work a total of 14 pattern rows (Row 2 and Row 3 combined).
Decreasing for the Chest/Strap Section
Setup for Decrease:
- Once the front panel height is complete, chain 1 and secure the yarn.
- Reattach the yarn after skipping multiples needed to create the decrease.
- Example: Skip the first 19 stitches before starting the next wave section.
- You will now continue the scallop pattern across the narrower center section.

Rows 16–23 (Chest Repeat):
- Attach the yarn and follow the regular wave pattern:
- 5 trebles, 9 trebles (skipping chains), repeat.
- End the row with 5 trebles.
- Turn and work Row 3 (FPSC) across.
Work these decrease rows until the top of the front panel measures sufficiently to cover your bust.
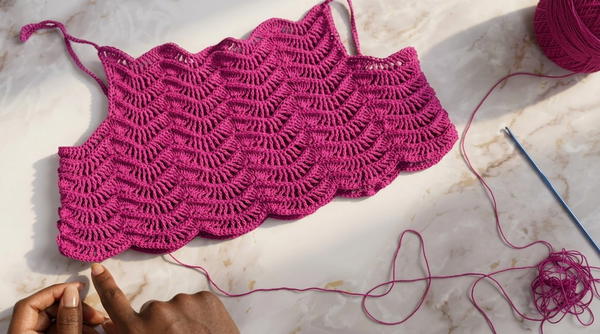
Back Panel
- Repeat the same pattern as the front panel, Rows 1–15, without decreasing.
- The back panel is a straight rectangular piece matching the width and height of your front panel before the chest decrease section.
Assembling the Panels
- Align Panels: Place the front and back panels together with the right sides facing inward.
- Seam the Sides:
- Attach yarn at one bottom corner.
- Chain 4 and use slip stitches to join the panels along the bottom of each treble crochet group, working up to the top edge.
- Repeat for the other side.
Adding Straps
Step 1: Attach Yarn
- Hold the top on your body and decide strap placement based on your preference.
- Example: Attach straps to the outer corners of the chest panel.
- Attach the yarn to the first chain near the corner of the chest.
Step 2: Create Chain for Strap
- Chain your desired length for the strap (e.g., 75 chains for small).
- Attach the chain to the corresponding edge on the back panel with a slip stitch.
Step 3: Strengthen Strap
- Single crochet across every chain of the strap to reinforce it.
- Add a single crochet border around the neckline, working evenly along the edges of the treble crochets.
Final Touches
- Weave in all loose ends for a clean finish.
- Block the top to smooth out the scallops and ensure proper fit.
- Pair with outerwear or accessories and enjoy your wave-patterned crochet crop top!
Conclusion
This Wave Crochet Crop Top is endlessly customizable, making it a versatile addition to your wardrobe. By highlighting rows and providing counts, this pattern equips crocheters of all levels to create their own perfectly fitting top.