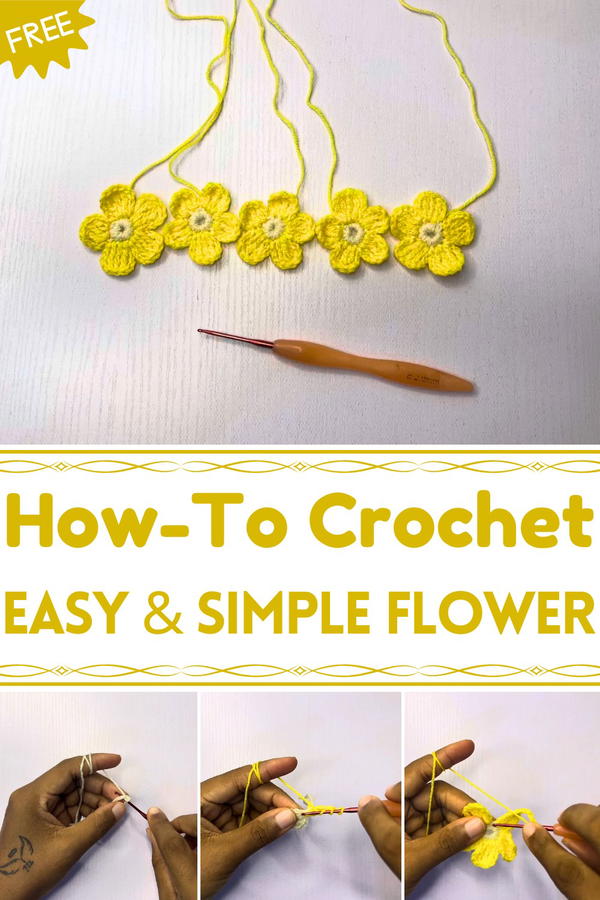
Brighten your projects with flair using this Free Crochet Flower Pattern, a chic accent that adds modern charm and playful style to any creation.
Even small decorative elements can bring life and personality to clothing, accessories, or home décor, turning simple items into visually appealing highlights. Adding texture and dimension enhances both appearance and tactile interest, creating pieces that feel unique and inviting. The Crochet Flower pattern transforms yarn into delicate blooms that elevate everyday projects with subtle charm.
Sweet Crochet Flower Pattern Ideal for Handmade Projects
Each petal contributes depth and visual rhythm, making hats, bags, blankets, or table linens more engaging and appealing. Lightweight and flexible, these flowers attach easily without adding bulk, allowing versatility across a wide range of applications. The repetitive stitching process provides a calming, meditative experience for beginners and seasoned crocheters alike, while the finished flowers showcase skill, patience, and attention to detail.
Beyond personal use, they make thoughtful gifts, bringing a personal and memorable touch to recipients. Options in color, size, and placement give each flower a unique and individualized character. Durable yet soft, they retain shape and appeal over time, enhancing both functional and decorative items. By combining creativity, practicality, and visual beauty, this crochet flower pattern allows simple yarn to transform ordinary projects into charming, textured accents that bring warmth, personality, and elegance to any space.

Special Features of the Tiny Crochet Petals
- Versatile Use: The petals can be sewn or glued onto various crochet or fabric projects like tops, skirts, or accessories.
- Minimal Material Requirement: They require only scrap yarn and a small crochet hook, making them a beginner-friendly and budget-friendly pattern.
- Customizable Design: You can adjust the size of the petals by changing the weight of the yarn or the size of the crochet hook.
- Light and Decorative: These petals add an elegant, handcrafted touch to any project without overwhelming the original design.
Level of Difficulty
This pattern is suitable for beginners familiar with basic stitches like the single crochet, slip stitch, and treble (or tripouble) crochet. The tutor emphasizes using simple techniques, making it an excellent practice project for crocheters of all levels.
Materials Needed
- Yarn: Scrap yarn will work perfectly for this project.
- In the video, the tutor uses a lightweight 2-ply yarn, but you can use any yarn of your choice.
- A finer yarn will create smaller, more delicate petals, while thicker yarn creates larger ones.
- Hook Size: A 2mm crochet hook is ideal for this lightweight yarn. Adjust your hook size to match your chosen yarn weight.
- Scissors: To cut the yarn at the end of the project.
- Optional: Sewing needle or glue if you’ll be attaching the petals to a project.
Step-by-Step Crochet Instructions
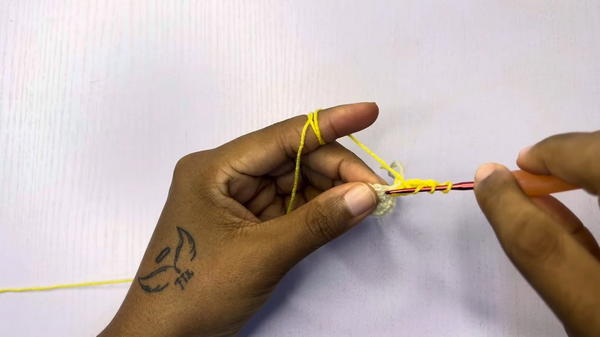
Step 1: Create the Foundation (Magic Ring and Row 1)
- Start by making a magic ring (also called a magic circle). This forms the base of the petals.
- Chain 1 (does not count as a stitch).

- Inside the magic ring, work 16 single crochets (SC).
- Count your stitches carefully to ensure you meet the total of 16.
- Count your stitches carefully to ensure you meet the total of 16.
- Close the magic ring by pulling gently on the loose end.
- Slip stitch into the first stitch of your round to close Row 1.
- Chain 1 and cut off the yarn.
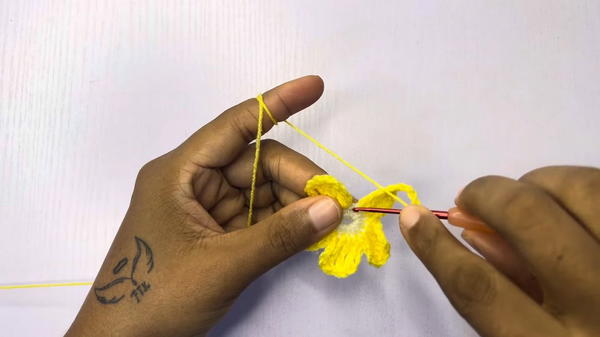
Step 2: Begin Row 2 (Switch Colors and Start Petals)
- Choose your second color (e.g., yellow). Make a slip knot with it.
- Reattach this yarn to the same stitch where you ended Row 1.
- Chain 4. This first chain will act as the top of your treble crochet (tripouble crochet).
- In the same stitch:
- Make 1 tripouble crochet (trtr) (a double treble crochet in US terms).
- Move to the next stitch:
- Work 1 tripouble crochet (trtr).
- Move to the next stitch:
- Again, make 1 tripouble crochet (trtr).
- Chain 4.
- Slip stitch into the same stitch where your last tripouble crochet was worked.
- You now have one completed petal!
Step 3: Continue Making Petals
- Chain 4 to start the second petal.
- Repeat the same process:
- Work a total of 4 tripouble crochets (3 stitches and 1 chain-4 as the first stitch), ending with a slip stitch.
- Continue this process until you have made 5 petals in total.
- Repeat chaining, working treble crochets, and slip stitching for each petal.
- Repeat chaining, working treble crochets, and slip stitching for each petal.
Step 4: Complete the Petals
- After making the fifth petal, chain 1 and leave a long tail of yarn (this will be used if you want to sew the petals onto a project).
- Tie off and secure the last stitch by pulling the yarn end through the loop.
Tutor’s Suggestions
- Choice of Yarn: Use scrap yarn for experimentation. The tutor used a lightweight 2-ply yarn but encouraged viewers to use whatever they feel comfortable with.
- Attachment to Projects:
- Petals can be sewn onto your projects using the leftover tail.
- Alternatively, craft glue can be used if you prefer a no-sew method (though the tutor recommends sewing for durability).
- Customization: Adjust the size of your petals by experimenting with larger hooks and thicker yarns to create bold, statement petals.
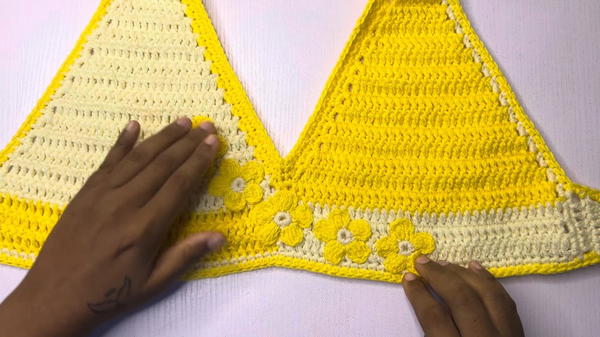
Uses of the Crochet Petals
- Enhance Crochet Tops: Use these petals to decorate plain crochet tops and make them eye-catching.
- Skirts and Dresses: Add these for floral details on skirts or dresses.
- Accessories: Use them to embellish bags, scarves, or even as applique on hats.
- Home Décor: Attach them to cushions, table runners, or small decorative pieces.
Conclusion
Crocheting tiny petals is a simple yet charming way to add personality to your projects. This design’s versatility allows you to customize it to suit any size or style, making it a handy pattern to add to your crochet repertoire. With just a few basic stitches, scrap yarn, and creativity, you can transform plain projects into beautiful, floral-inspired creations!
Bonus Tip
When switching colors, leave a slightly longer tail on each color to make tucking in loose ends or sewing onto other projects easier. A neat finish will make your petals look even more professional.


