Purr up cozy style with the Free Crochet Cat Beanie Pattern, adding a playful and adorable touch to chilly days, casual outings, or fun gift ideas.
A chilly evening often calls for accessories that combine warmth with playful charm, turning ordinary outings into delightful experiences. The Free Crochet Cat Beanie pattern brings that whimsy to life, offering a cozy, functional hat that doubles as a fun statement piece for both children and adults.
Fun Crochet Cat Beanie Pattern for Handmade Winter Gifts
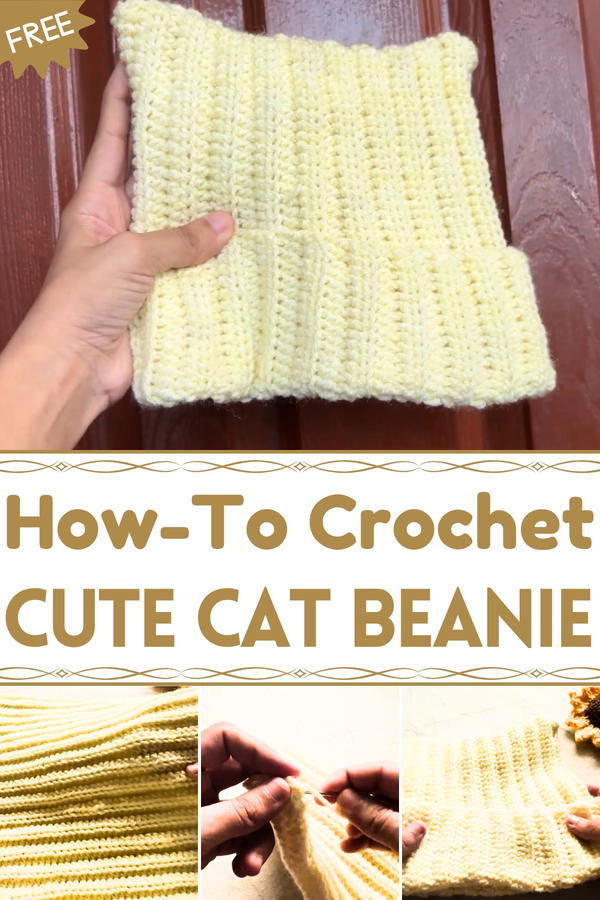
This beanie features soft, breathable yarn that keeps the head comfortably insulated while maintaining a snug, flexible fit. Tiny cat ears perched atop add a touch of personality, making it an adorable choice for casual wear, outdoor activities, or themed events. Its lightweight yet durable texture ensures long-lasting use without compromising comfort, and it adapts well to different colors, allowing the wearer to match it with various outfits or express individual style.
Beyond aesthetic appeal, the Free Crochet Cat Beanie pattern provides practical benefits. It protects from cold, helps hair stay in place, and introduces a cheerful accent to daily attire. Quick to finish and enjoyable to assemble, it encourages hands-on creativity and can be given as a thoughtful, handmade gift. This beanie demonstrates how a small accessory can blend functionality with charm, turning a simple cold-weather necessity into a cozy, whimsical, and eye-catching piece that brightens everyday moments. 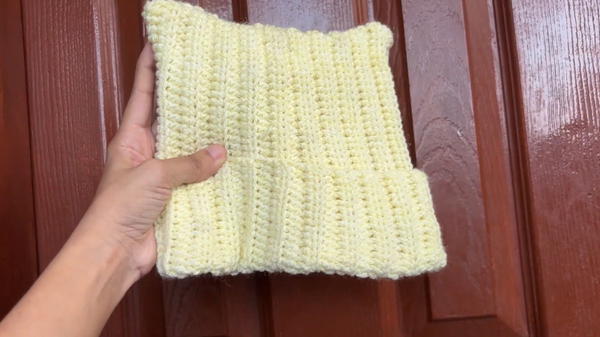
Special Features
- Stretchy Fit: The beanie is a bit stretchy, providing a snug and comfortable fit.
- Detailed Instructions: The tutorial goes step-by-step, making it easy to follow along.
- Half Double Crochet: Utilizes the half double crochet stitch, which adds texture and warmth to the beanie.
- Customizable: You can adjust the size of the beanie to fit different head circumferences by modifying the number of chains and rows.
Materials Needed
- Yarn: Light-colored yarn recommended for beginners, so the stitches are visible.
- Crochet Hook: 3mm crochet hook.
- Scissors: For cutting the yarn.
- Yarn Needle: To weave in the ends and join parts together.
Step-by-Step Instructions
1. Starting the Beanie
Make a Slip Knot:
- Create two loops with the yarn.
- Pass the second loop through the first loop to form a slip knot.
Chain 55:
- Keep your hook on the upper side.
- Yarn over and pull through the loop to create each chain.
- Continue this until you have a chain of 55 stitches (or adjust according to head circumference).
2. Creating the Foundation Row
Chain One and Turn:
- Chain an additional stitch and then turn your work.
Half Double Crochet Stitches:
- Yarn over, insert the hook into the second chain from the hook.
- Yarn over again, pull through the chain (you have three loops on the hook).
- Yarn over once more and pull through all three loops on the hook.
- Repeat this process for each stitch across.
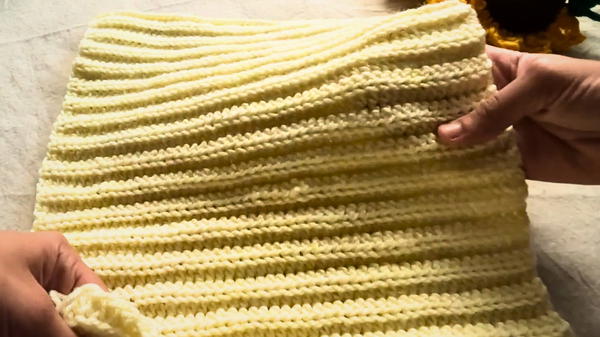
3. Working in the Back Loop
Chain One and Turn:
- After completing the first row, chain one and turn your work.
Half Double Crochet in the Back Loop:
- Identify the front loop and back loop of each stitch.
- Yarn over and insert your hook into the back loop only.
- Continue with the half double crochet stitch (as described earlier) in the back loop through the row.
Repeat Rows:
- Continue working in the back loops only, repeating this pattern until the piece can wrap around your head comfortably (total of 22 rows is used as a reference in the tutorial).
- Continue working in the back loops only, repeating this pattern until the piece can wrap around your head comfortably (total of 22 rows is used as a reference in the tutorial).
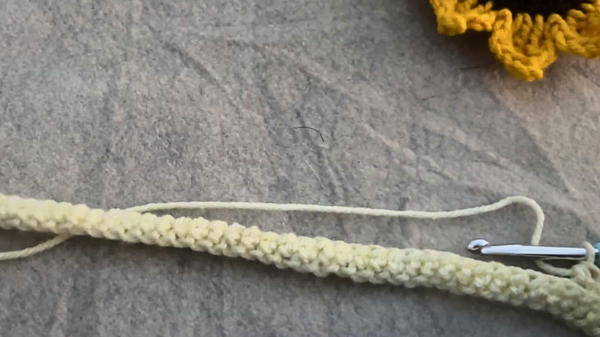
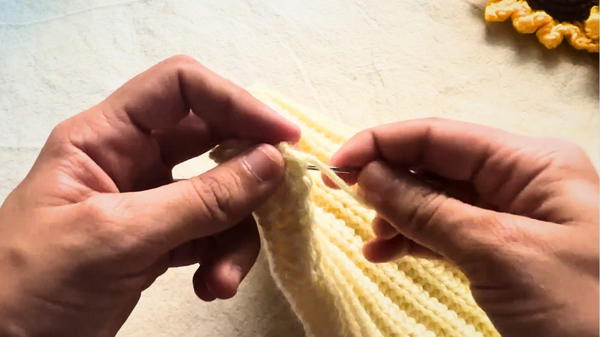
4. Joining the Sides
Align the Ends:
- Place one end on the back side and the other on the front.
Slip Stitch to Join:
- Insert the hook under the V of the first stitch from both ends.
- Yarn over and pull through both stitches.
- Slip stitch till the end to join both sides.
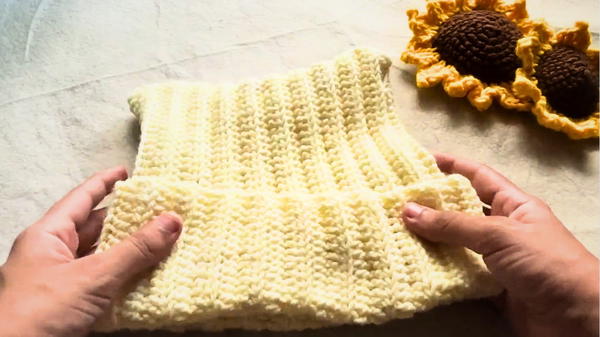
5. Closing the Top
Slip Stitch the Top:
- Continue with the slip stitch, starting from the last stitch to the other end.
- Pull the yarn tight, fastening the top part together.
Finish with a Yarn Needle:
- Cut the yarn, leaving a long end.
- Use a yarn needle to weave in any remaining loops and secure the stitches.
Tutor’s Suggestions
- Gauge and Fit: Make the beanie slightly smaller than your head circumference to accommodate the stretch.
- Consistency: Maintain consistent tension to ensure even stitches throughout.
- Practice Half Double Crochet: Familiarize yourself with the half double crochet stitch before starting the project for a smoother experience.
- Count Rows: Keep track of the number of rows to ensure you reach the desired size (22 rows as suggested).
Level of Difficulty
This project is beginner to intermediate level. It is accessible for beginners due to the clear instructions and repetitive stitch pattern, but also offers intermediate crocheters an opportunity to practice consistency and tension in their stitches.
Uses
- Winter Accessory: Keeps your head warm and cozy during the cold months.
- Fashion Statement: Adds a handmade touch to any outfit.
- Gifts: Perfect handmade gift for friends and family.
- Charity: Great project for making donation items.
Tip
When joining the beanie's sides and top, ensure stitches are tight but not too tight to cause bunching. Consistent slip stitches create a neat seam for a polished finish.
Conclusion
Crocheting this stretchy beanie is a fun and rewarding project for anyone looking to create their own headwear. With its clear, step-by-step instructions and customizable fit, you'll have a versatile beanie ready for use or gifting in no time.


