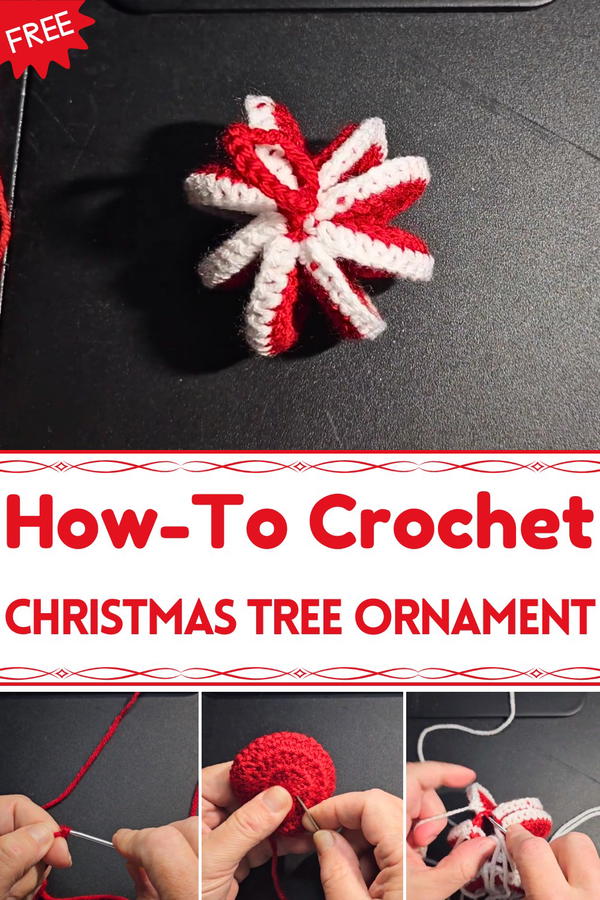
Spark holiday cheer with this Free Crochet Christmas Tree Ornament Pattern featuring charming décor pieces ideal for festive décor or gifting.
Twinkling lights reflected softly on a festive mantel, where tiny ornaments added charm and warmth to the holiday setting. Among them, handcrafted pieces brought a personal touch, turning simple decorations into lasting memories. The Free Crochet Christmas Tree Ornament pattern captures this spirit, allowing small yet meaningful creations to enhance holiday décor. Lightweight and durable, these ornaments hang gracefully on branches, mantels, or garlands, adding texture and color that complement traditional holiday elements.
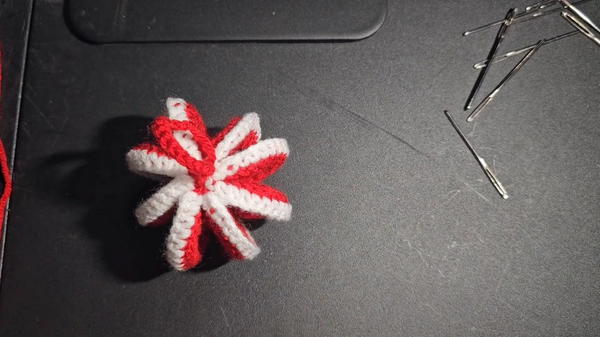
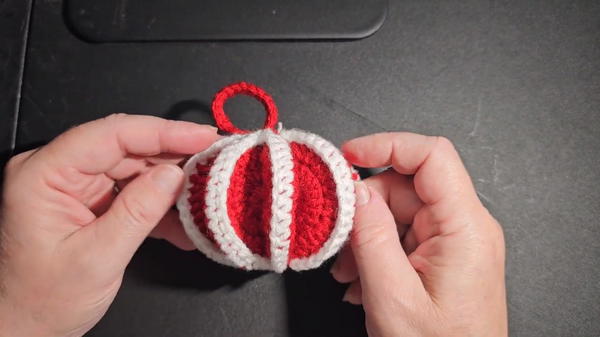
Bright Crochet Christmas Tree Ornament for Festive Tables
Each crochet tree ornament can be customized in shades, size, and embellishments, offering a unique flair while maintaining a cohesive festive theme. Beyond their visual appeal, they serve as thoughtful gifts, stocking stuffers, or keepsakes that carry sentimental value year after year. The tactile texture invites admiration and interaction, making them delightful for children and adults alike.
Easy to store and reuse annually, these ornaments provide a sustainable alternative to mass-produced decorations, encouraging a personal and eco-conscious touch during celebrations. Handmade with care, the Free Crochet Christmas Tree Ornament pattern fosters creativity while producing charming, functional décor that enhances the festive atmosphere. From cozy home displays to thoughtful presents, these ornaments combine elegance, durability, and cheerful holiday spirit, turning simple yarn into cherished symbols of warmth and togetherness.
Special Features
- Beginner-Friendly: The pattern is simple and uses basic stitches, making it accessible for those just starting with crochet.
- Customizable Colors: While the tutorial uses white and red yarn, the color combinations are endless, allowing for personalized creations to match any theme.
- One Project, Many Skills: This bauble teaches foundational techniques such as the magic circle, double crochets, and simple crochet seaming, which are valuable skills for future projects.
- Lightweight and Durable: The discs and borders are tightly secured, ensuring a finished ornament that will last for years.
Materials Needed
- Hook: A 2.75mm Clover hook (adjustable if you want to scale the bauble’s size).
- Yarn: “I Love This Yarn” by Hobby Lobby in white and red (or colors of your choice).
- Darning Needle: Essential for weaving in the ends and assembling the bauble.
- Stitch Marker: A helpful tool to keep track of your rounds.
Level of Difficulty
- Beginner to Early Intermediate: The project is simple enough for beginners, yet it provides a great opportunity to refine techniques such as the magic circle, double crochet increases, and single crochet joining.
Step-by-Step Instructions
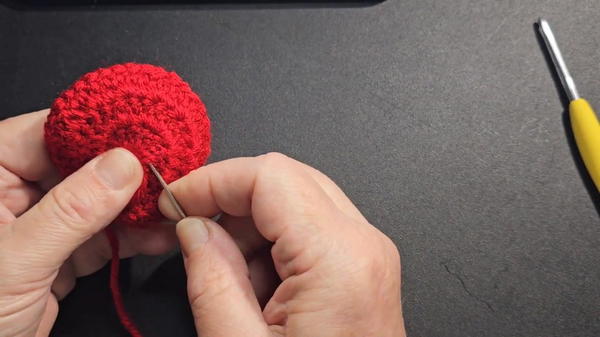
1. Creating the Discs
- Start with a magic circle (or chain 3 and slip stitch to form a ring).

- Chain 2 (this does not count as a stitch).
- Work 12 double crochets (DCs) into the ring. Pull the ring tight, and slip stitch into the first DC for a seamless finish.
- Round 2: Chain 2, and place 2 DCs in each stitch around for a total of 24 stitches. Slip stitch to join.
- Round 3: Chain 2, then alternate between 2 DCs in the first stitch and 1 DC in the next stitch. Repeat until you have completed the round, ending with 36 stitches. Slip stitch to join, and fasten off.
- Create 8 identical discs in total.
2. Weaving in the Ends
- Use a darning needle to weave in the loose ends of the white yarn. While this doesn’t need to be done perfectly, ensure the tails are secure as they’ll be on the inside of the bauble.
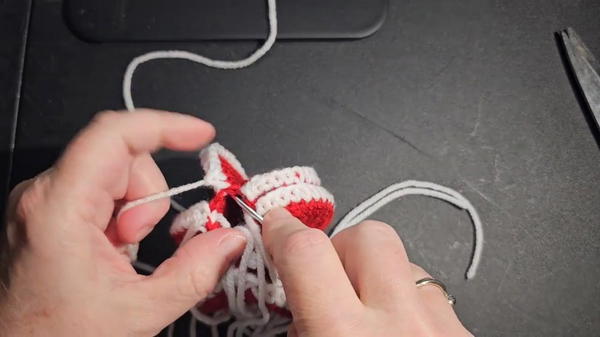
3. Joining the Discs
- Take two discs and place their back sides together.
- Attach the border yarn (red or any color of choice) a few stitches before the joining seam for better alignment.
- Single Crochet (SC) across half the edge (18 stitches), ensuring you are stitching through the edges of both discs.
- Cut the yarn and secure the end.
- Repeat this process for the other edges and discs, working in halves. Once all 8 discs are joined partially, you’ll have a chain-like structure.
4. Final Assembly
- After joining all the discs, bring the first and last halves together to close the circle, creating a complete bauble.
- Secure the edges with single crochets, ensuring the stitch consistency remains neat.
- Knot any remaining ends together to tighten the structure. Tuck the knots and ends securely into the bauble.
5. Adding the Hanging Strap
- To create a hanging loop, chain about 18 stitches (or your preferred length).
- Secure the loop to the top of the bauble by sewing or using single crochet.
- Adjust the discs, ensuring they sit evenly and the bauble maintains its round shape.
Tutor’s Suggestions
- Magic Circle Alternative: If you're not comfortable with a magic circle, begin with chain 3 and slip stitch to form a small loop.
- Secure Ends: While weaving in the ends on the white discs, be thorough, as secure ends will ensure a durable ornament.
- Custom Colors: Experiment with color combinations, such as gold for a luxurious look or vibrant greens and reds for a classic theme.
- Child-Friendly Project: If teaching children crochet, this project is an excellent way to introduce them to basic stitches.
Uses of the Christmas Bauble
- Holiday Décor: Perfect as ornaments for your tree or garlands.
- Gifting: Share these handmade pieces as thoughtful holiday gifts.
- DIY Projects: Use as embellishments for wreaths, table centerpieces, or even gift wrapping.
Tip for Success
When joining the discs, ensure your stitches are consistently tight and secure. This will help the bauble achieve a clean, polished look without gaps between the joined sections.
Conclusion
The Crochet Christmas Tree Bauble is not just a project but an opportunity to bring warmth and creativity into your holiday preparations. With its simple design, versatility, and festive charm, it’s an excellent addition to your holiday crochet repertoire.


