Bring ocean charm home with this Free Crochet Amigurumi Octopus Pattern, creating a playful handmade companion perfect for décor, gifts, or cuddly fun.
Ocean life inspires endless fascination, and few sea creatures are as captivating as the octopus with its graceful tentacles and playful charm. A Free Crochet Amigurumi Octopus pattern captures that spirit in a soft, huggable form perfect for children, ocean enthusiasts, or anyone who loves whimsical décor. This delightful companion can brighten a nursery shelf, bring comfort as a bedtime buddy, or serve as a cheerful desk ornament.
Playful Pal Crochet Amigurumi Octopus Pattern Kids Will Adore

Working each rounded body and coiled limb encourages a calming, repetitive rhythm, helping the maker relax while shaping a toy that feels both fun and meaningful. Its gentle texture and lightweight design make it safe for little hands, while the option to choose a variety of colors allows for endless personalization, from classic sea tones to vibrant shades that spark joy.
Compact yet eye-catching, the finished octopus travels easily, making it a charming gift or a playful accessory for themed parties and ocean-inspired events. Whether used as a keepsake, a thoughtful present, or a decorative accent, this small sea creature brings a touch of aquatic wonder to everyday spaces. A Free Crochet Amigurumi Octopus pattern offers both creative enjoyment and a lovable finished piece that will be treasured for years to come.

Materials Needed
- DIY Crochet Kit Includes all necessary tools and materials.
- Crochet Hook
- Stitch Markers
- Dacron (for stuffing)
- Plastic safety eyes
- Blush (optional)
Special Features
- Beginner-Friendly Design: The tutorial uses basic crochet techniques, making it suitable for beginners.
- Multi-Purpose Kit: The DIY kit enables users to create multiple projects beyond just the octopus.
- Compact and Cute: The octopus is small, portable, and perfect for decoration or gifting.
- Step-by-Step Guidance: The detailed instructions ensure even those new to crocheting can follow with ease.
Step-by-Step Process
1. Starting the Octopus Body
- Begin by creating a magic ring, an essential base for most Amigurumi projects.
- In the magic ring, crochet 6 single stitches.

2. Building the Foundation Rows
- Second Row: Increase all around—this involves crocheting 2 single stitches in each hole, ensuring a total of 12 stitches.
- Third Row: Crochet 1 single stitch, then place a marker to track the first hole. Follow this with one increase (2 stitches in the same hole). Repeat 6 times around.
- Fourth Row: Release the marker, start with 1 single stitch followed by another marker placement. Continue by crocheting 1 single stitch, then increase, and repeat this step 6 times for a total.
- Continue increasing stitches in subsequent rows with this pattern:
- Fifth Row: 3 single crochets, then increase. Repeat 6 times.
- Sixth to Eleventh Rows: Crochet single stitches all around.
3. Shaping the Octopus
- Twelfth Row: Crochet 3 single stitches, then combine two single crochets into one stitch (decrease). Continue alternating single stitches and decreases 6 times.
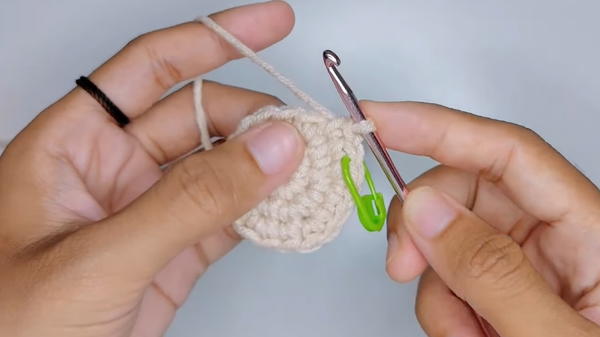
- Insert the safety eyes between Rows 7 and 8, placing them securely using the locks provided in the kit.
- Skip five single crochets to position the second eye symmetrically.
4. Final Rows of the Body
- Row Thirteen: Work only in the back loops (the V-shaped part of the stitch facing away from you). Crochet 2 single stitches in the back loop, then decrease. Repeat 6 times.
- This step creates a textured edge for the octopus body.
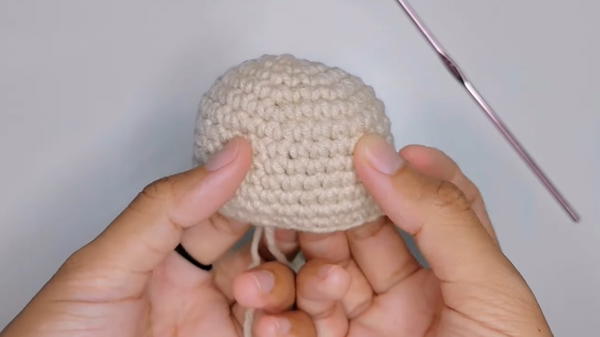
- Row Fourteen: Insert the stuffing material (dacron) and continue knitting, alternating decreases as you move to the edges until closed fully.

5. Making the Tentacles
- Start by making a slip knot and work from the first hole of the octopus base.
- Crochet slip stitches in the initial hole to secure your work. Move to the second hole and create 4 double crochets in the same hole.
- Slip stitch into the following hole to secure the tentacle. Repeat this process 12 times, ensuring the tentacles surround the octopus evenly.
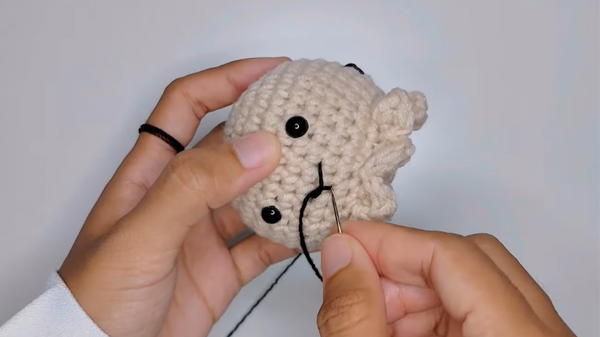
6. Adding Final Details
- Sew the mouth to the octopus face using embroidery thread or yarn.
- If desired, add blush to the cheeks for a playful touch.
Tutor's Suggestions
- Follow each step carefully, especially when increasing or decreasing stitches, to maintain symmetry.
- Place markers while working on larger rows to keep track of your first stitch and avoid mistakes.
- The project is beginner-friendly, but intermediates can enhance it with additional decorative features like multicolor yarn or added accessories.
Level of Difficulty
- Beginner-Friendly: Basic stitches like single crochet, slip stitch, double crochet, increase, and decrease are used.
- Moderately Easy: Although suitable for beginners, careful tracking of stitches is required to build a symmetrical body.
Uses
- Decorative Piece: Display in a child’s room, workspace, or living area.
- Gift: A handmade toy perfect for birthdays or special occasions.
- Toy: Adds charm as a soft toy for kids.
- Stress Relief: Crocheting helps relax the mind while creating something beautiful.
Tip
When crocheting the tentacles, keep your tension consistent to ensure uniformity. Additionally, use stitch markers to easily identify the starting points of rows, preventing errors as you increase or decrease stitches.
Conclusion
The Amigurumi octopus is a delightful and versatile project that seamlessly pairs functionality with creativity. Whether you’re crocheting for fun, learning new skills, or gifting your creations, this step-by-step tutorial provides all the guidance you need. With limited tools and materials required, it’s easy to complete, even on a time constraint.


