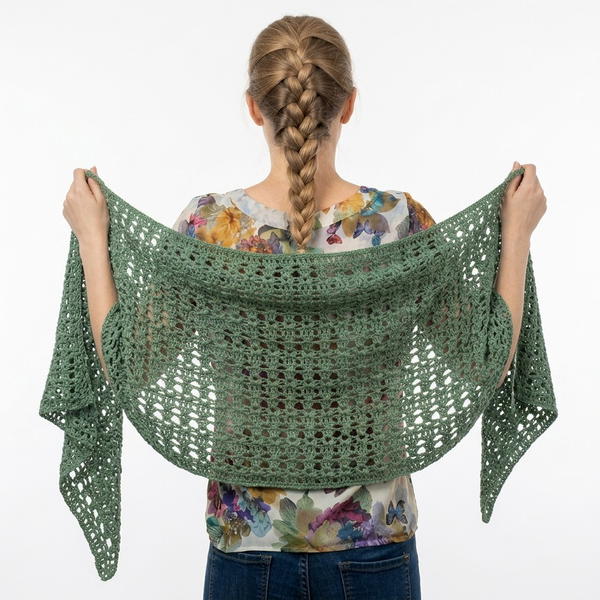
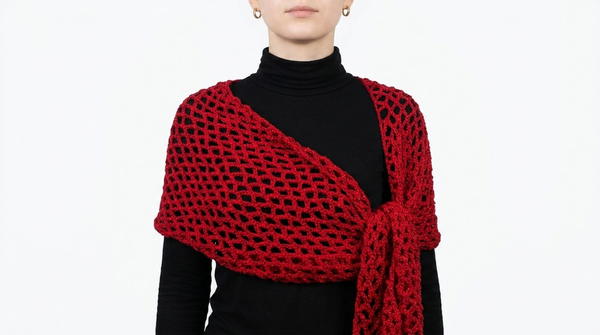
Create a stunning handmade accessory with this Free Crochet Net Stitch Stole Pattern, perfect for any season and guaranteed to add elegance to your wardrobe.
Sometimes finding the right accessory to complement your outfit feels like an impossible task. That’s where the Free Crochet Net Stitch Stole pattern comes to the rescue, offering the perfect solution to elevate any look with ease. With its delicate and breathable open weave design, this stole is not just beautiful but incredibly practical. It can be worn over the shoulders to add a touch of elegance on cooler evenings or styled as a lightweight scarf during warmer days.
Free Crochet Net Stitch Stole Pattern for a Stylish Look
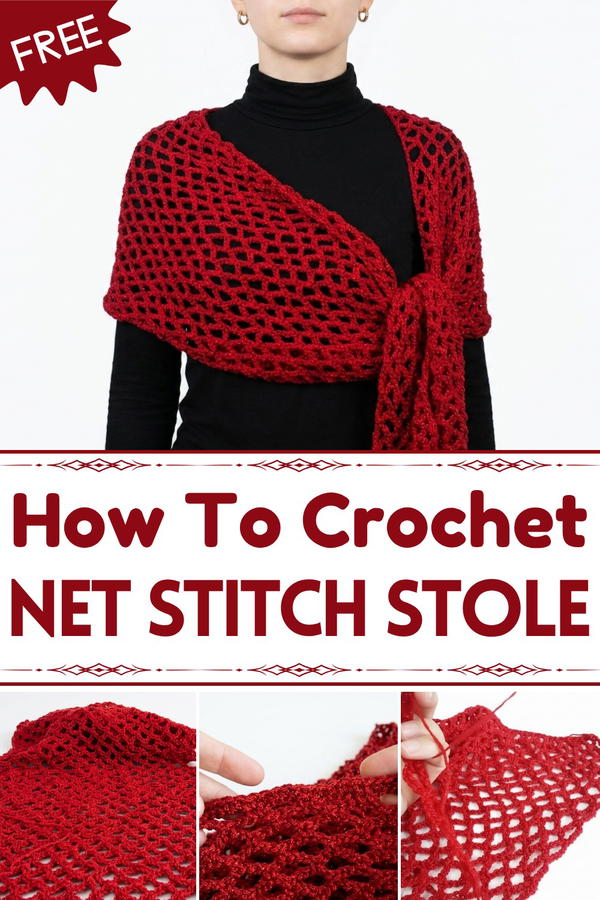
The intricate net stitch creates a graceful, flowing appearance, turning simple yarn into an exquisite handmade piece. Ideal for casual outings or formal events, this pattern is a wonderful option for those who enjoy crocheting something both stylish and useful. Whether kept for yourself or made as a heartfelt gift, it’s a timeless accessory that showcases creativity and care. For beginners, it’s easy to follow, and experienced crocheters will enjoy making something truly beautiful while exploring their talents.
Crochet Festive Stola with Lurex Yarn
Materials Needed
- Yarn: 2 skeins of Lurex-accented wool yarn (100g/skein, approximately 250m per skein). Choose a festive color with a subtle shimmer like gold, silver, or red.
- Hook Size: Crochet hook size 5mm (US H/8).
- Note: If you have a tighter tension, you may benefit from a 5.5mm hook.
- Tapestry Needle: For weaving in ends.
- Scissors: For cutting yarn.
Gauge
- 10 chain loops x 8 rows of mesh stitch = 10cm x 10cm (4 inches by 4 inches).
Note: Although gauge is not crucial, measurements will vary if tension or hook size differs drastically.
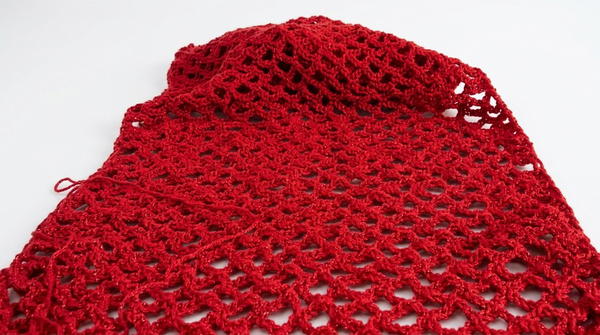
Finished Size
- Length: Approximately 145cm (57 inches)
- Width: Approximately 33cm (13 inches)
Note: The finished size can be adjusted based on personal preferences (see customization tips below).
Skill Level
- Beginner-friendly.
- Stitches to know:
- Chain Stitch (ch): Yarn over, pull through loop.
- Slip Stitch (sl st): Insert hook, yarn over, pull through both loops.
- Single Crochet (sc): Insert hook, yarn over, pull through, yarn over, pull through both loops.
Special Techniques
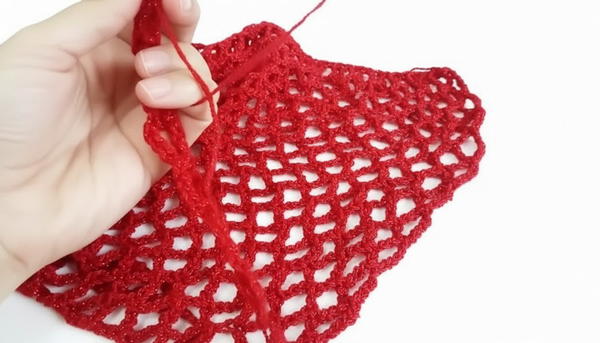
- Mesh Stitch: A combination of chain and single crochet stitches to create a lacy, openwork pattern. This stitch is used throughout the main body of the stola.
- Turning Chain: At the end of each row, turn your work after creating the specified number of chains (6).
Pattern Instructions
Step 1: Start with the Foundation Chain
- Using the 5mm crochet hook, chain 60 stitches. This will determine the width of your stola.
- To create the turning chain, add 6 more chains (total of 66 chains at the start).
Step 2: First Row
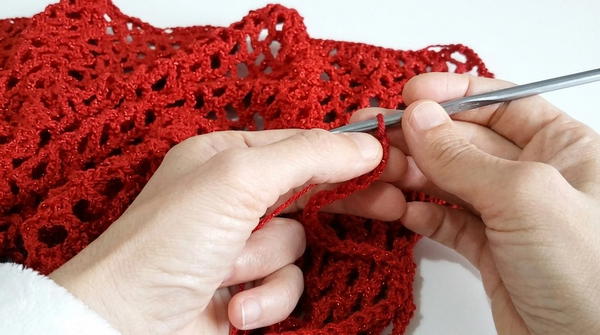
- Begin by skipping 5 chains from the hook. Work 1 single crochet (sc) into the 6th chain from the hook.
- Chain 5 and, skipping the next 2 chains, insert your hook into the 3rd chain and make another single crochet (sc).
- Repeat the above step (chain 5, skip 2 chains, single crochet in the next chain) across the entire row until you reach the end of the foundation chain. Each group of chains and single crochet creates a mesh arch.
- At the end of the row, chain 6 to turn your work.
Step 3: Building Rows of Mesh
- Begin each row with 6 chains to create a turning chain.
- Insert your hook into the third chain from the turning chain of the previous row, work 1 single crochet.
- Repeat: Chain 5, skip the next 2 stitches, and insert the hook into the next single crochet or chain space for another single crochet.
- Continue in this pattern until the end of the row.
- Remember: At the end of each row when you turn your work, always create 6 chains for the turning chain.
Step 4: Repeat Rows
- Follow the mesh stitch pattern (chains and single crochet) until the stola reaches a length of 1.45m (57 inches) or your preferred size.
- Once you’ve reached your desired length, stop crocheting the mesh arches and move to the border.
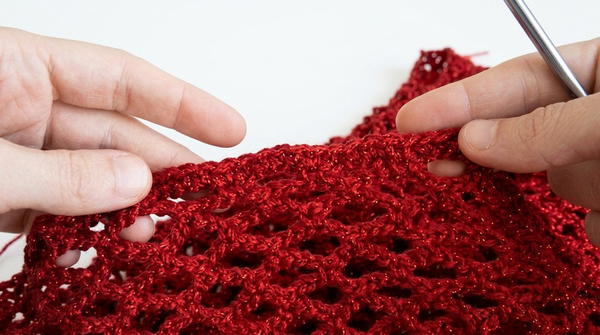
Step 5: Finishing Border
- At the final turning point of your last row, make 1 chain to turn your work.
- Start crocheting a row of single crochet (sc) along the edges of your stola for a clean, polished finish.
- Make 1 sc in the top of every single crochet from the arch below and 1 sc in each chain stitch along the row.
- This stabilizes the arches, giving the edge a neat and professional look.
- Repeat the same process along the opposite side for the other long edge if desired (optional).
Tips & Customization Ideas
- Adjusting the Size:
- For a wider stola, add more chains to the foundation chain. Every extra 3 chains will add another mesh loop to your width.
- To change the length, add or subtract the number of rows you crochet before finishing the piece.
- Different Yarn Options: If you don't have Lurex yarn, substitute with any wool or acrylic-blend yarn of similar weight (especially festive or sparkly yarns).
- Matching Accessories: Pair the stola with a crocheted purse, earrings, or other matching items using the same yarn to create a coordinated holiday set.
- Blocking: For a more polished finish, lightly block the stola to help flatten the mesh pattern.
Conclusion
This festive stola is lightweight, elegant, and simple to create. Its meshwork and sparkling yarn make it an ideal choice for holiday gatherings or as a thoughtful handmade gift. Even beginners can achieve stunning results with this project due to its straightforward pattern and repetitive technique. The addition of the single crochet border enhances its appearance, giving it a neat and professional finish.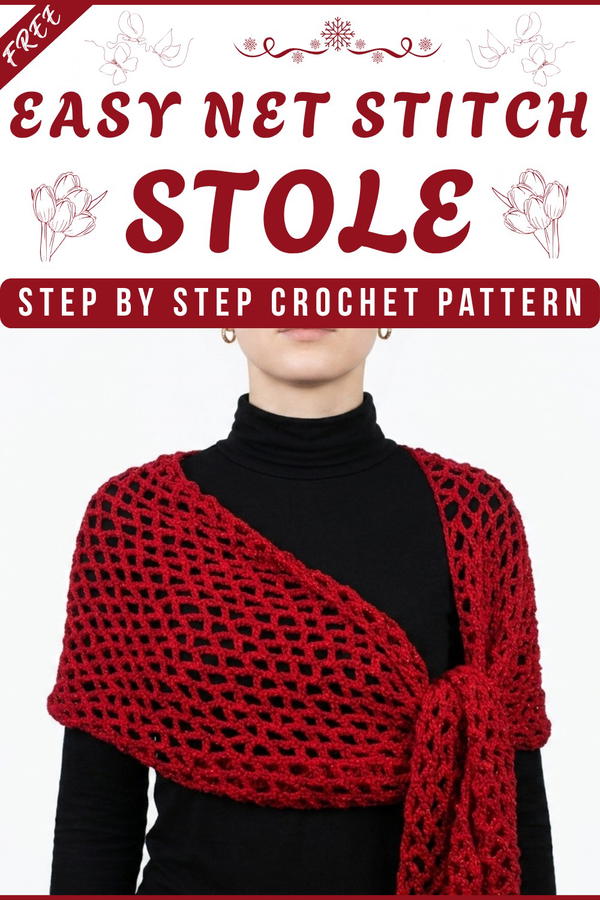
Important Remarks
- Always check your gauge before starting to ensure the dimensions remain accurate.
- Keep your tension loose for a more flowing and airy stola. Consider using a slightly larger hook if needed.
- The open mesh design makes this project fast to complete and economical in yarn use.
- This is a versatile pattern and can be customized for various occasions by altering the yarn and size.