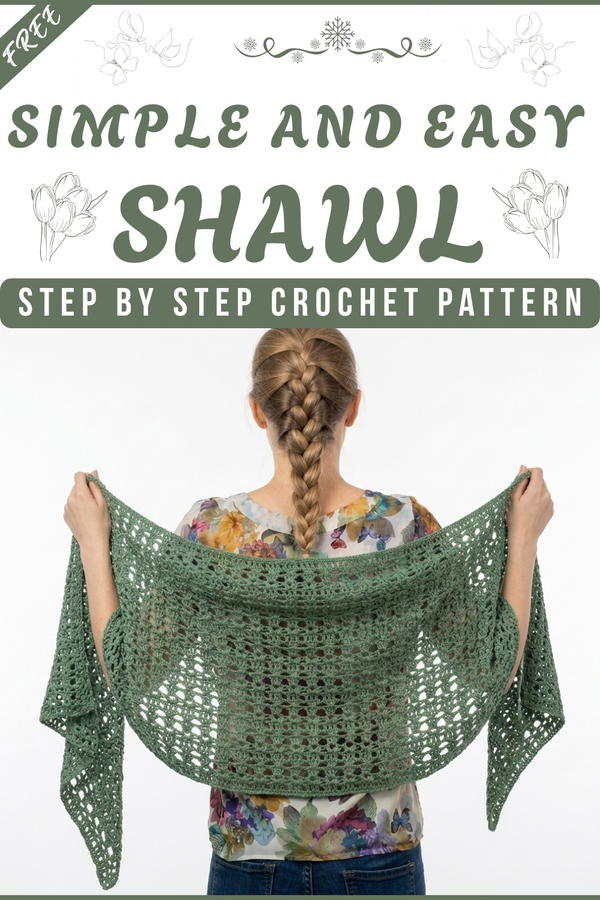
Wrap yourself in elegance with Free Crochet rectangular shawl Pattern, a cozy handmade piece adding charm, warmth, and everyday style for all seasons
A simple thread can turn into a long, graceful wrap that feels warm on the shoulders and looks elegant with very little effort. A Free Crochet rectangular shawl pattern starts with a straight foundation chain that sets the width, then basic stitches are worked row by row in a steady rhythm to build a long rectangle without complex shaping. Each row follows the same easy steps, making it simple to continue without confusion, and the fabric slowly grows into a smooth and even piece.
Free Crochet Rectangular Wrap Pattern for Daily Use Comfort
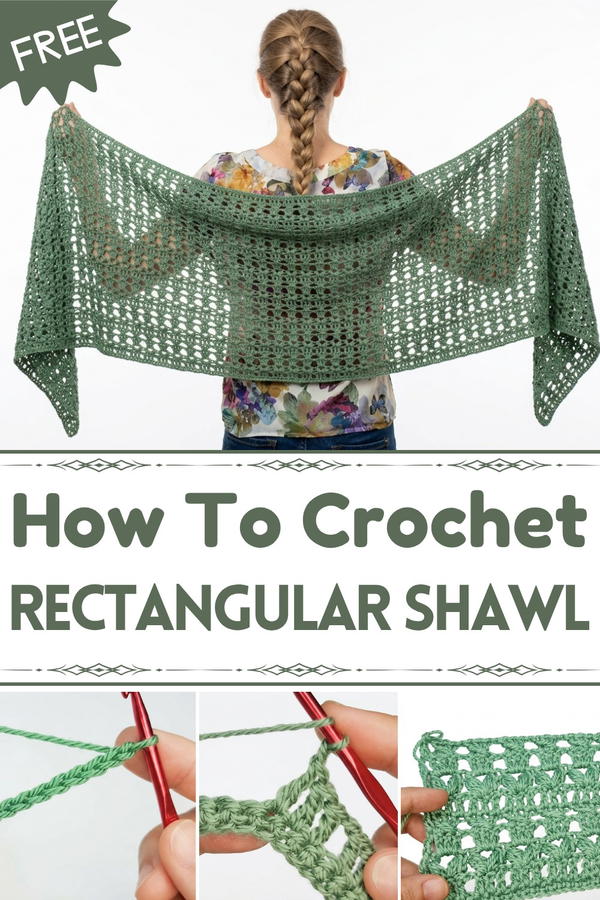
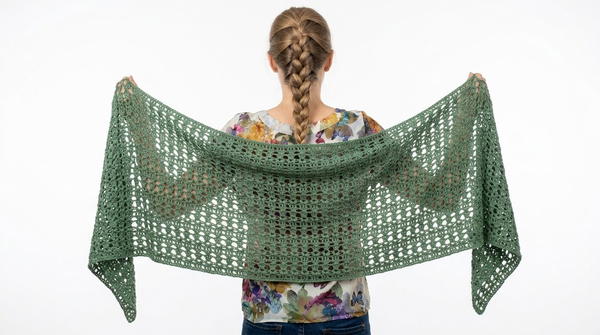
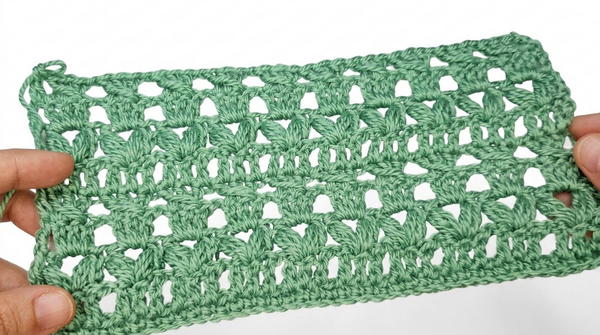
The Free Crochet rectangular shawl pattern shows how repeating stitches can create a flowing design that drapes naturally. Its appearance is long, flat, and gentle, falling neatly over the body like a light cover. The beauty comes from its texture, which can be airy with open spaces or thicker for extra warmth depending on the thread and stitch choice.
It is used for warmth, comfort, and style, making it suitable for daily wear or special moments. This shawl can be placed over the shoulders or wrapped around easily without effort. Its clean rectangular shape, smooth feel, and calm design give it a timeless and graceful look that suits many outfits.
Crochet Simple Rectangular Shawl
Materials Needed
- Yarn:
- Medium-weight yarn (such as wool blend, DK).
- Example: Use approximately 300-400 grams, depending on the shawl’s size.
- Crochet Hook:
- A 4mm crochet hook (or a size appropriate for your selected yarn).
- Scissors for cutting yarn.
- Tapestry Needle: For weaving in loose ends.
Gauge
- Not critical for this project as sizing can be customized.
- As a reference:
- 4 puff stitches x 4 rows = 4 inches x 4 inches (10cm x 10cm).
Finished Size
The shawl is designed to measure approximately:
- Length: 150cm (59 inches)
- Width: 50cm (20 inches)
You may adjust the dimensions based on personal preference.
Skill Level
Beginner to Intermediate
- Familiarity with basic stitches (single crochet, double crochet, chain stitches) and puff stitches is required.
Abbreviations (US Crochet Terminology)
- ch = chain
- sc = single crochet
- dc = double crochet
- puff st = puff stitch (explained below)
- sl st = slip stitch
- sp = space
Special Techniques
Puff Stitch (puff st):
- Yarn over, insert hook into designated space, yarn over, pull up a loop (3 loops on the hook).
- Yarn over again, pull up a loop (5 loops on the hook).
- Yarn over once more, pull up a loop (7 loops on the hook).
- Yarn over, pull through all 7 loops on the hook.
- Chain 1 to secure the puff stitch.
Pattern Instructions
Step 1: Foundation Chain
- Start by making a chain of multiples of 4 until you reach your desired length.
- Example: For a shawl length of 150cm, chain approximately 180 chains.
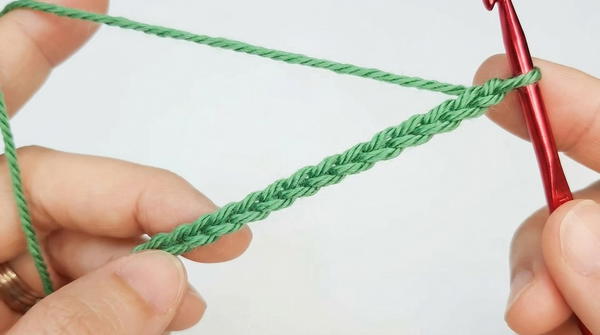
- Example: For a shawl length of 150cm, chain approximately 180 chains.
- Add 2 additional chains to complete the foundation chain.
Step 2: Row 1 - Single Crochet Base
- Skip the first chain. Insert your hook into the second chain and work 1 sc.
- Continue working 1 sc into each chain across the row.
- At the end of the row, chain 1 and turn your work.
Step 3: Row 2 - Double Crochet Rows
- Chain 3 to begin the row (counts as the first dc).
- Skip the first sc and work 1 dc into the second sc.
- Continue to work 1 dc in each stitch across the row.
- At the end of the row, ensure the last 4 stitches are dc stitches for a clean finish.
- Chain 3 and turn your work.
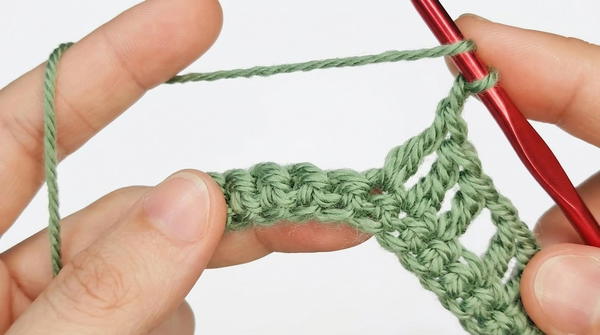
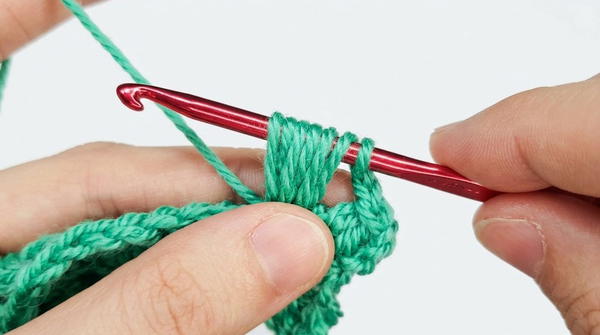
Step 4: Row 3 - Puff Stitches with Chains
- Chain 3 to start the row. Skip the first dc and work the first puff stitch in the second dc.
- Chain 2 and work another puff stitch in the next dc stitch.
- Skip the next dc and continue alternating puff stitches separated by chains as you move across the row.
- Ensure the last stitch of the row is a dc or puff stitch atop the final chain. Chain 1 and turn your work.
Step 5: Row 4 - Double Crochet Between Puff Stitches
- Work 1 chain to start the row.
- Begin working 3 dc into the space between two puff stitches.
- Chain 1 and continue working 3 dc in each chain space between puff stitches across the row.
- End the row with 3 dc stitches. Chain 3 and turn your work.
Step 6: Continue the Pattern
- Repeat the sequence of rows:
- Row 2 (double crochet row).
- Row 3 (puff stitch row with chains).
- Row 4 (double crochet between puff stitches).
- Continue alternating these rows until the shawl reaches your desired width (approximately 50cm).
Step 7: Finishing the Shawl
- After completing the final row, securely fasten off the yarn.
- Use the tapestry needle to weave in all loose ends.
- Lightly block the shawl to even out any tension inconsistencies and define the stitches.
Customization Options
- Size Adjustments:
- Increase or decrease the foundation chain length to customize the shawl length.
- Add or subtract rows to adjust the width.
- Borders:
- Add single or double crochet rows along the edges of the shawl for a polished look.
- Color Changes:
- Use multiple yarn colors and change colors at the start of each puff-stitch row for a striped effect.
Tips to Maintain the Shawl
- Washing: Hand wash with mild detergent in cool water. Lay flat to dry.
- Storage: Fold and store flat to maintain shape and avoid stretching.
- Blocking: Regular blocking enhances the stitch definition and structure.
Conclusion
This simple yet elegant rectangular shawl is perfect for beginners exploring texture and intermediate crocheters seeking a versatile and customizable project. Using easily repeatable stitch patterns and thoughtful design choices, this shawl works up quickly yet provides a refined and stylish finish.