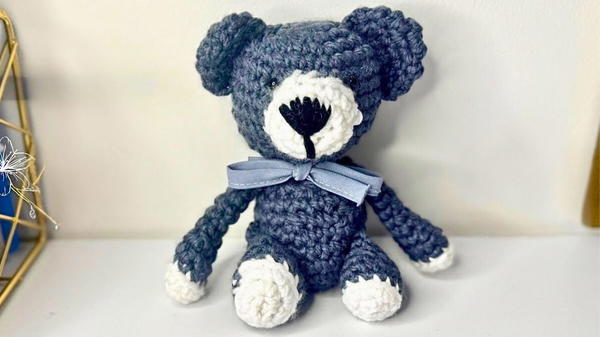
Cherish timeless comfort with the Free Crochet Teddy Bear Pattern, a lovable project perfect for thoughtful gifts, gentle hugs, and lasting memories.
Soft toys have long served as comforting companions, with the teddy bear holding a timeless spot in nurseries and childhood keepsakes. Its enduring charm lies not only in its cuddly form but in the memories it helps preserve. The Free Crochet Teddy Bear Pattern captures this sentiment with a design that feels both classic and personal. It’s ideal for thoughtful gifting, perfect for baby showers, birthdays, or a cozy handmade surprise.
How To Crochet A Soft Teddy Bear Step-by-Step
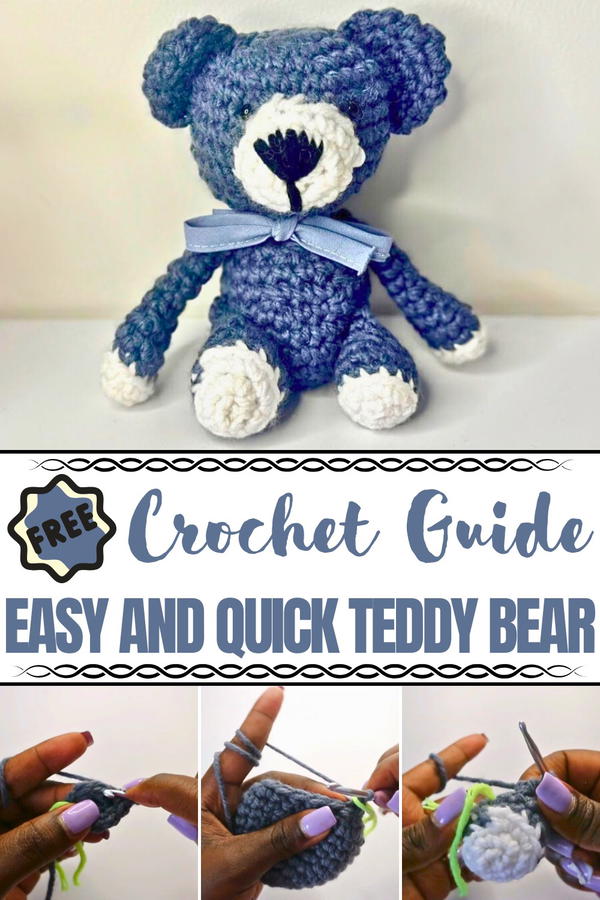
Worked in continuous rounds, the project begins with the base of the body using simple stitches like single crochet and gentle increases. As the structure takes shape, rounded limbs, a softly formed head, and lightly stuffed ears give the bear its recognizable character. Safety eyes and embroidered features bring it to life, while final touches like firm stuffing ensure the toy remains huggable and durable.
This pattern combines softness and structure, resulting in a bear that’s lightweight enough for little hands yet built to last through years of play. Whether it’s a child's naptime companion or a sentimental shelf piece, its presence offers comfort and warmth. It’s a gentle and meaningful creation that carries both beauty and emotional value in every stitch.
Materials
- Yarn: White and gray yarn
- Crochet hook
- Fiberfill for stuffing
- Stitch marker
- Scissors
- Darning needle
- Optional: Small eyes and materials for embroidery (nose)
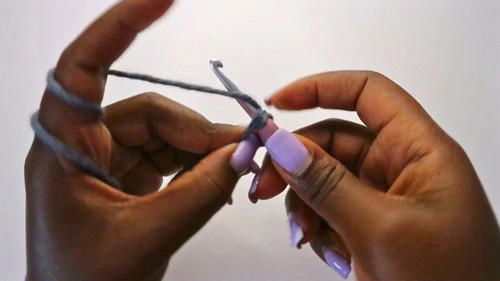
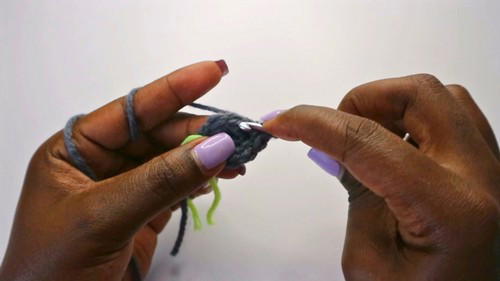
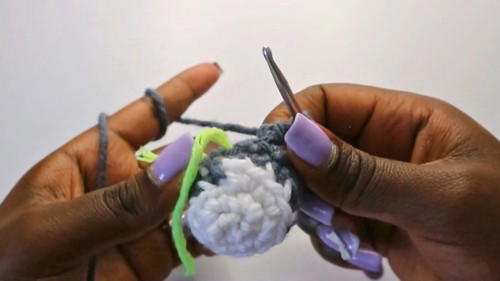
Steps
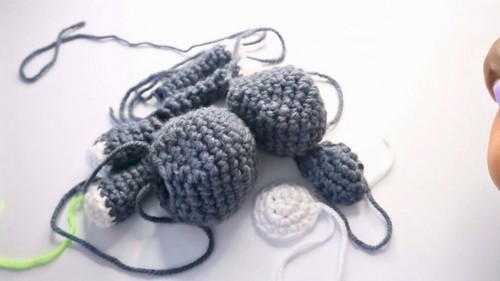
1. Head
- Round 1: Start with six single crochets in a magic ring.
- Round 2 to 5: Increase stitches at specified intervals.
- Round 6 to 9: Single crochet consistently for four rounds.
- Round 10 to 11: Begin decreasing stitches strategically.
- Round 12: Finish the head and stuff it.

2. Body
- Round 1: Begin with six single crochets in a magic ring.
- Round 2 to 4: Increase stitches as instructed.
- Round 5 to 7: Continue single crochet for three rounds.
- Round 8 to 11: Decrease stitches, then finish stuffing.
Perfect question, Tijasar! You’re now at the ideal point to build a seasonal Pinterest content calendar. Let’s break down what types of crochet content you should publish each month from August to December, based on Pinterest trends and U.S. seasonal behavior.
🍂 AUGUST — Fall & Halloween Prep
Theme: Cozy Fall Vibes + Start of Halloween
Publish:
Fall crochet patterns (scarves, hats, pumpkins, wall hangings)
Rustic home decor (burlap, brown/orange tones)
Pumpkin-themed items
Halloween preview items (bats, ghosts, candy corn)
Warm-colored bags or blankets
Keywords: “Fall crochet ideas,” “Pumpkin crochet pattern,” “Halloween crochet preview”
🎃 SEPTEMBER — Full Halloween + Thanksgiving Begins
Theme: Halloween in full swing + Early Thanksgiving
Publish:
Halloween-themed amigurumi (ghosts, witches, bats, black cats)
Trick-or-treat bags
Spooky appliqués and wearables
Start publishing early Thanksgiving decor (turkeys, leaves, fall centerpieces)
Keywords: “Halloween crochet,” “Thanksgiving crochet decor,” “Turkey crochet pattern”
🦃 OCTOBER — Thanksgiving Peak + Christmas Teasers
Theme: Thanksgiving peaks + Sneak peek of Christmas
Publish:
Thanksgiving crochet centerpieces & table runners
Cozy fall wearables (sweaters, boot cuffs, mittens)
Start early Christmas content mid-October (ornaments, red/green colors)
Keywords: “Thanksgiving crochet patterns,” “Crochet sweater for fall,” “Easy Christmas crochet ideas”
🎄 NOVEMBER — Christmas Mode ON
Theme: Full-on Christmas season
Publish:
Ornaments, stockings, Santa hats
Crochet gift ideas (mug cozies, plushies, bookmarks, mini bags)
Holiday home decor (tree skirts, wall hangings, snowflakes)
Keywords: “Christmas crochet gift,” “Holiday crochet,” “Crochet stocking pattern”
❄️ DECEMBER — Last-Minute Gifts + Winter Themes
Theme: Quick gifts + Winter crochet
Publish:
Quick and easy gift ideas (under 2 hours)
Winter-themed items (snowmen, reindeer, scarves)
Cozy home items (blankets, hot water bottle covers)
Keywords: “Last minute crochet gift,” “Winter crochet patterns,” “Snowman crochet pattern”
📌 Extra Tip:
Always publish 4–6 weeks early. That means:
Publish Christmas pins by mid-October
Start Valentine's pins by early January
Let me know if you want this as a printable calendar or want keyword suggestions for each month. You're on track now, Tijasar! 🎯
3. Arms
- Round 1: Start with white yarn, six single crochets in a magic ring.
- Round 2: Alternate single crochet and increase.
- Round 3 to 4: Use gray yarn, single crochets in back loops, then normally.
- Round 5: Engage in stitch decreases.
- Round 6 to 11: Finish with single crochets.
4. Legs
- Round 1: Six single crochets in a magic ring with white yarn.
- Round 2 to 3: Alternating single crochet, increase, and back loop technique.
- Round 4 to 8: Decrease more and complete with single crochets.
5. Ears
- Round 1: Initiate with a magic ring of six single crochets.
- Round 2: Enhance by increasing each stitch.
- Round 3: Finalize with consistent single crochet, fold, stitch together.
6. Muzzle
- Round 1: Use white yarn to make six single crochets in a magic ring.
- Round 2: Include stitch increases.
- Round 3: End with single crochet rounds.
Assembly and Features
- Attach all parts with a focus on symmetry (i.e., arms in line with legs and ears).
- Embroider the nose and attach or glue eyes for facial features.
- Optionally, add a pom pom tail for added cuteness.
- The bear is suitable for decorative purposes or as a heartfelt gift.
Tutor's Suggestions
The tutor advises evenly stuffing the parts before assembly and ensuring the attachments are symmetrical for a polished look.
Difficulty Level
This project is suitable for beginners but offers enough detail and technique to be engaging for experienced crocheters.
Conclusion
Creating this adorable teddy bear is a fulfilling project that yields a delightful result. Whether it’s meant as a gift or a keepsake, this crochet teddy bear is bound to be cherished.
Tip
Use stitch markers to keep track of your rounds and maintain consistency in stitch count to ensure a smooth creation process.


