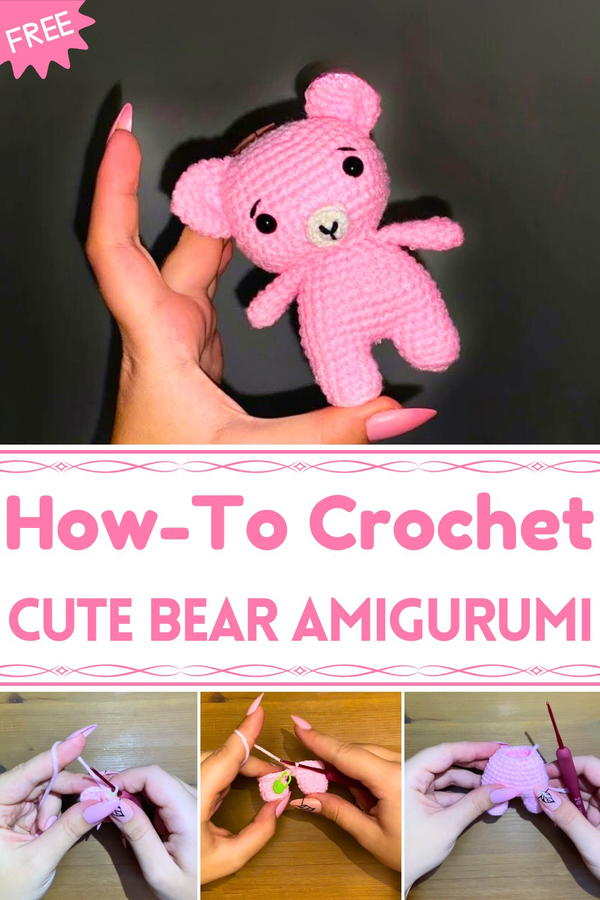
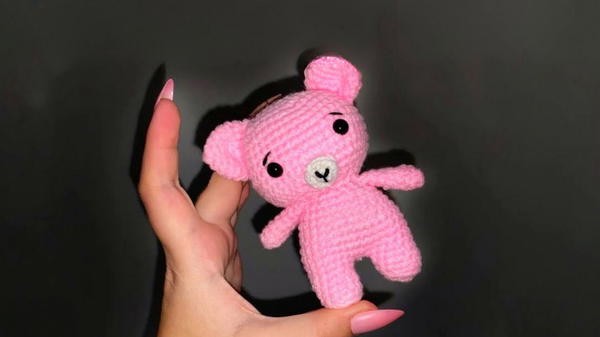
Cuddle up with this Free Crochet Bear Pattern, ideal for creating adorable handmade plushies that bring warmth, charm, and joy to any space.
For centuries, teddy bears have held a special place in homes, offering comfort, companionship, and a sense of security to children and adults alike. The Free Crochet Bear Pattern captures that timeless appeal in a handmade form, turning soft yarn into a cuddly companion that radiates warmth and charm. Its rounded features, gentle expression, and huggable size make it instantly endearing, offering a tangible connection that can be cherished for years.
Soft Crochet Bear Pattern for Cuddly Companions
This bear goes beyond being a simple toy. Its softness and durable construction make it ideal for play, snuggling, or even as a comforting presence during bedtime. For collectors or fans of handmade creations, it serves as a decorative piece that brings personality and warmth to shelves, desks, or nurseries. The lightweight size ensures it is portable, perfect for gifting or carrying along as a reassuring companion.
Additionally, working on this crochet project provides a satisfying crocheting experience, offering both relaxation and the reward of a finished piece full of character. The Free Crochet Bear Pattern combines functionality, charm, and sentimental value, resulting in a creation that appeals to all ages. With its playful yet comforting presence, this bear brings joy, tactile comfort, and a sense of handmade warmth to any home or collection.
Materials Required
- Yarn: Soft acrylic yarn (pink is used in the tutorial, but you can choose any color).
- Crochet Hook: A 2mm crochet hook.
- Scissors: For cutting yarn.
- Yarn Needle: To sew and weave in loose ends.
- Stitch Marker: Helps track your place while crocheting.
- Safety Eyes: To add an adorable finishing touch to the bear’s face.
- Stuffing (Hollow Fiber): To fill the bear’s body for a soft and plush look.
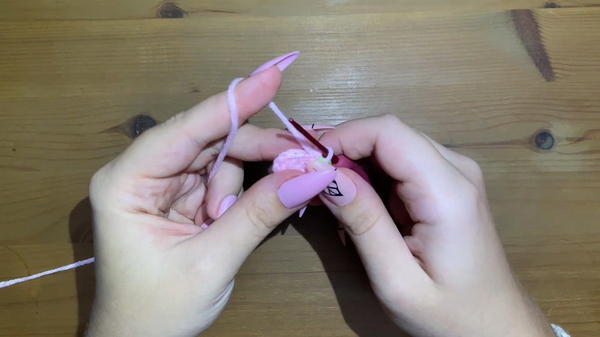
Step-by-Step Instructions
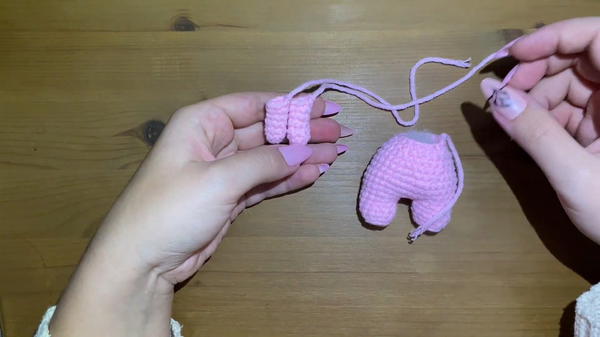
1: Making the Legs
- Create a Magic Ring: Form a magic ring and work 6 single crochet stitches into it.
- Tighten the ring after completing the stitches.
- Tighten the ring after completing the stitches.
- Add Stitch Marker: Place a stitch marker into the last loop to track the end of rounds.
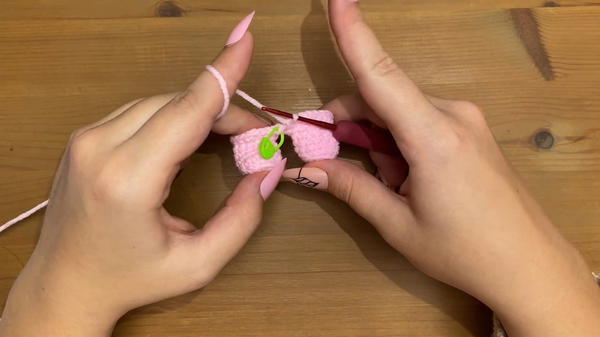
- Round 2: Increases
- Perform 6 increases (2 single crochet stitches in each of the previous round’s stitches).
- At the end of this round, there should be 12 stitches.
- Round 3: Back Loop Stitches
- Crochet 12 single crochets but work into the back loops only to provide texture.
- Rounds 4–6: Consistent Stitches
- For the next three rounds, make 12 single crochets, working in regular loops.
- End the First Leg
- After completing round 6, cut the yarn, pull the end firmly, and fasten off.
 Repeat for Second Leg
- Make another leg following the same steps, but do not cut the yarn on the second leg as it will be joined to the first leg to start the body.
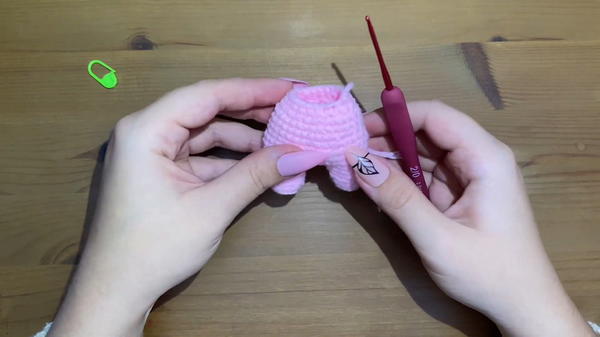
2: Joining the Legs and Starting the Body
- Chain Two: Starting from the second leg, chain two stitches to join both legs.
- Work Around the Legs:
- Crochet 12 single stitches into one leg.
- Crochet 2 single stitches into the chains between the legs to secure them.
- Work 12 single stitches into the second leg.
- Continue crocheting increases into the chain stitches to form a seamless join.
- Rounds 7–8:
- Round 7: Work with increases to expand the bear’s body.
- Round 8: Alternate between 4 single crochet stitches and 1 increase, repeating the pattern until the round is complete.
- Rounds 9–11:
- Crochet 36 single stitches (no increases or decreases) for three rounds to build the body’s height.
- Crochet 36 single stitches (no increases or decreases) for three rounds to build the body’s height.
3: Shaping the Body
- Round 12: Begin decreasing:
- Alternate between 4 single crochet stitches and 1 decrease, using an invisible decrease (front loop method).
- Rounds 13–15:
- For three rounds, crochet 30 single stitches with no decreases or increases.
- Round 16: Shape the body for the top:
- Alternate between 1 single crochet stitch and 1 decrease, repeating the pattern until the end of the round (20 stitches remain).
- Final Round: Work 8 single crochet stitches and 1 decrease, repeating this twice. Cut the yarn and secure it tightly.
- Stuff the Body: Fill the bear’s body with hollow fiber stuffing to give it a plush shape.
4: Making the Arms
- Create a Magic Ring: Form a magic ring and crochet 7 single stitches into it, tightening the ring afterward.
- Rounds 2–7:
- Maintain the size by crocheting 7 single stitches across for six more rounds (no increases or decreases).
- Maintain the size by crocheting 7 single stitches across for six more rounds (no increases or decreases).
- Finish Each Arm:
- Cut the yarn, leaving a long tail for sewing.
- Repeat the process to create the second arm.
Special Features
- Amigurumi Technique: This project uses the widely loved amigurumi method for creating small, 3D crochet toys.
- Magic Ring Foundation: Ensures a tightly closed center for the bear’s legs and arms.
- Invisible Decreases: Creates smooth transitions when shaping the body.
- Unique Texture: Working into back loops adds a subtle design detail to the bear’s legs.
Level of Difficulty
Beginner-Friendly to Intermediate:
- The tutorial uses basic stitches (single crochet and chains), making it accessible for beginners.
- However, techniques like the magic ring and invisible decrease may require extra patience and practice for those less experienced.
Tutor’s Suggestions
- Use a Stitch Marker: To avoid losing track in the rounds, the tutor emphasizes placing a stitch marker at the end of each round.
- Tighten Your Magic Ring: Ensure the ring is securely tightened to avoid gaps in the bear’s structure.
- Count Your Stitches: Regular stitch counting ensures accuracy and avoids missing or adding accidental stitches.
Uses
- Soft Toy: Perfect for children as a plush toy.
- Decorative Item: A wonderful handmade piece to display in nurseries or craft showcases.
- Gift: A thoughtful, personalized gift that anyone will appreciate.
- Practice Project: Helps beginners build skills with crochet techniques like the magic ring and invisible decreases.
Final Tip
When stuffing the body and arms with hollow fiber, shape the pieces gently to ensure the structure looks symmetrical. Avoid overstuffing, as this may stretch the stitches and distort the toy’s appearance.
Conclusion
This tutorial offers a fun and rewarding crochet project to make a cute bear that can delight people of all ages. The step-by-step approach ensures accessibility for beginners, and the result is a soft, personalized toy that carries both warmth and creativity.


