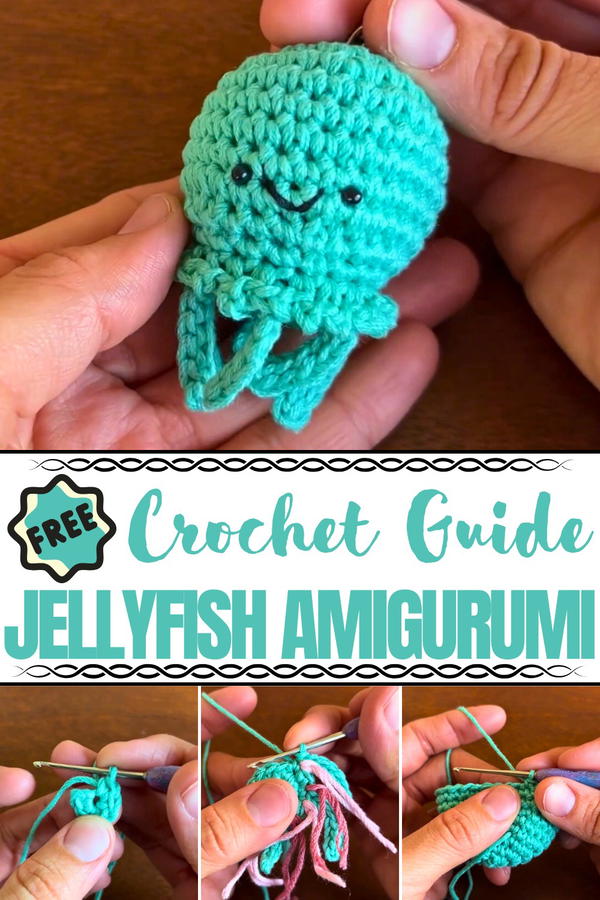
Cherish with this Crochet Jellyfish Amigurumi pattern that brings soft, flowing charm and playful elegance to any space or gift.
Under the gentle sway of ocean currents, the jellyfish drifts with grace, capturing attention with its flowing tentacles and delicate silhouette. The Crochet Jellyfish Amigurumi pattern brings this mesmerizing sea creature to life in soft yarn, transforming a simple project into a charming companion. Its round, domed body and dangling tendrils are both visually appealing and tactile, making it perfect for display, gifting, or even as a playful addition to a child’s room.
Cheerful Crochet Jellyfish Amigurumi for Nautical Charm
This pattern stands out with its detailed textures and soft, plush feel, offering a satisfying sense of accomplishment for anyone who works on it. It encourages patience and focus, while the finished jellyfish can brighten any shelf, nursery, or desk. Beyond being decorative, it can serve as a stress-relief toy, a whimsical accessory, or a thoughtful handmade gift that shows care and creativity. The vibrant colors and flowing form capture attention instantly, bringing charm to every corner it inhabits.
Whether displayed alongside other sea-themed creations or cherished as a standalone piece, the Crochet Jellyfish Amigurumi combines fun, artistry, and gentle elegance. Its versatility and approachable technique make it suitable for both beginners and experienced crocheters seeking a joyful, soft, and captivating project.
Materials Used
- Yarn of any kind, tailored to your aesthetic preferences
- 3mm safety eyes
- Black thread for detailing the smile
- Crochet hooks suitable for your yarn
- Stitch markers
- Scissors
- A needle for weaving and securing
- Stuffing material
- Lightweight chains or rings (optional for keychain use)
Special Features
- Customizable Details: The design allows for flexibility in color choices, tentacle length, and even eye placement.
- Beginner Friendly: Clear instructions and repeated explanations make this project accessible for amateur crocheters.
- Practical Use: The finished jellyfish can be used as a keychain, bag charm, or even a decorative piece for rooms.
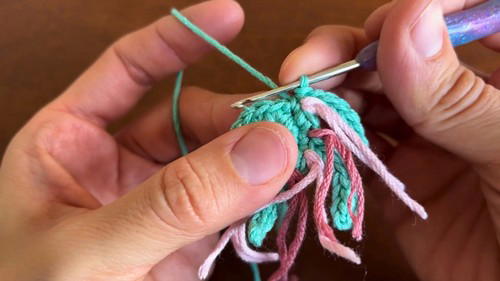
- Detailed Tentacles: The standout feature is the inclusion of crochet tentacles shaped with chains and slip stitches, enhancing the jellyfish’s visual appeal.
Step-by-Step Process
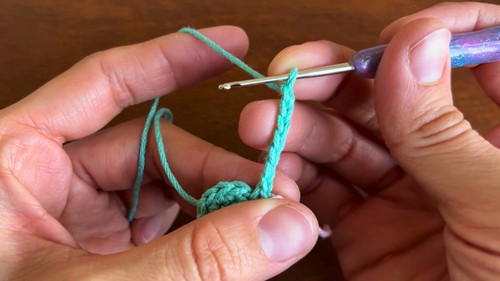
1. Creating the Jellyfish Bottom
- Begin with a magic ring and crochet 6 single crochets into it.
- Pull the starting thread to close the ring.
- Round 2: Make 8 increases by crocheting 2 single crochets into each stitch, yielding 12 stitches.
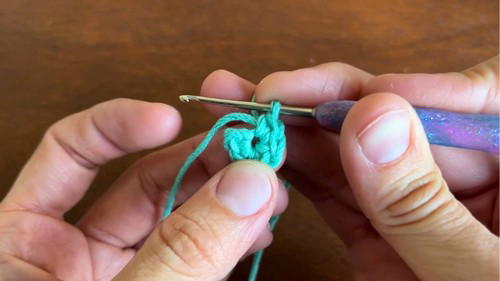
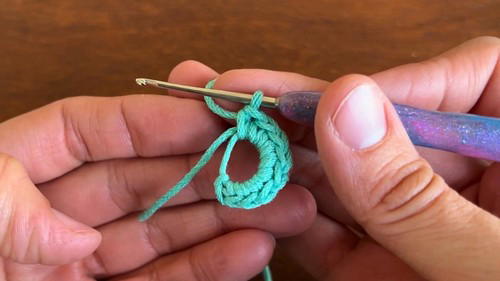
- Round 3: Introduce the tentacles. Repeat the sequence:
- 1 single crochet
- Chain 7, then create 6 slip stitches along the back loops of the chain, and secure them.
- 1 increase in the next stitch.
Repeat this process 6 times, ensuring that the tentacles stay evenly distributed. You’ll finish with 18 stitches (excluding tentacle counts).
2. Making the Jellyfish Top
- Start with a magic ring and make 8 single crochets to form the base.
- Round 2: Create 8 increases for a total of 16 stitches.
- Round 3: Alternate between 1 single crochet and 1 increase for 8 repetitions, yielding 24 stitches.
- Round 4: Follow a pattern of 3 single crochets, 1 increase, repeated 6 times to achieve 30 stitches.
- Rounds 5–9: Work single crochets continuously for a uniform shape.
3. Adding Eyes & Smile
- Attach safety eyes on round 8 of the top piece, ensuring even spacing of 4 stitches between them.
- Secure the eyes by melting the backs or using washers (if included).
- Use black thread to embroider a happy smile below the eyes.
4. Joining the Two Pieces
- Stuff the jellyfish with lightweight material before closing.
- Align the top piece with the bottom.
- Crochet together the stitches of both sections repeatedly in the sequence:
- 1 single crochet (joining both parts)
- 2 chains (to leave room for movement)
Continue this process until the body is entirely closed. The tentacles should be uniformly positioned around the jellyfish’s perimeter.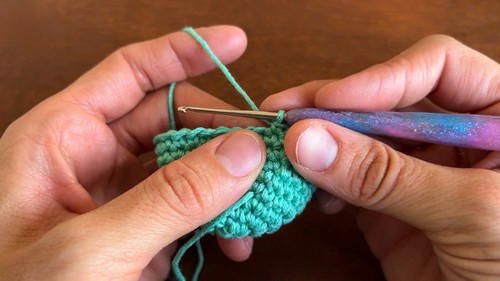
5. Optional Keychain Ring Attachment
- Loop a lightweight chain or ring through the top of the jellyfish to transform it into a keychain or charm.
Tutor’s Suggestions
- Use stitch markers, especially if you find it challenging to keep track of your stitches.
- Tentacle length can be adjusted by increasing or decreasing the chain length.
- Ensure proper tension while stitching to maintain a polished and professional look.
- For safety eyes, carefully secure or melt them, keeping the jellyfish neat and durable.
Level of Difficulty
The project is beginner-friendly, with clear instructions and guidance throughout. New crocheters may find it a good opportunity to practice skills like the magic ring, slip stitches, and increases. For advanced crocheters, it provides room for creativity and customization.
Uses
- Gifts: Ideal for birthdays, baby showers, or as a thank-you token.
- Personal Accessories: Add it to keychains, bags, or car rearview mirrors for a unique touch.
- Decorative Purpose: Create several jellyfish to use as ornaments or hangings in kids' rooms.
Conclusion
This crochet jellyfish is more than just a fun project—it’s an opportunity to turn simple materials into a delightful creation that radiates charm. With its interactive design, playful tentacles, and friendly face, it promises to bring smiles wherever it goes. Whether you’re making it for your own collection or as a heartfelt gift, this jellyfish is a perfect example of how crocheting can be both relaxing and rewarding.
Pro Tip
To give the tentacles extra character, experiment with variegated yarns or add beading for a whimsical look. For beginners, take breaks to ensure your final stitches remain consistent and well-shaped.


