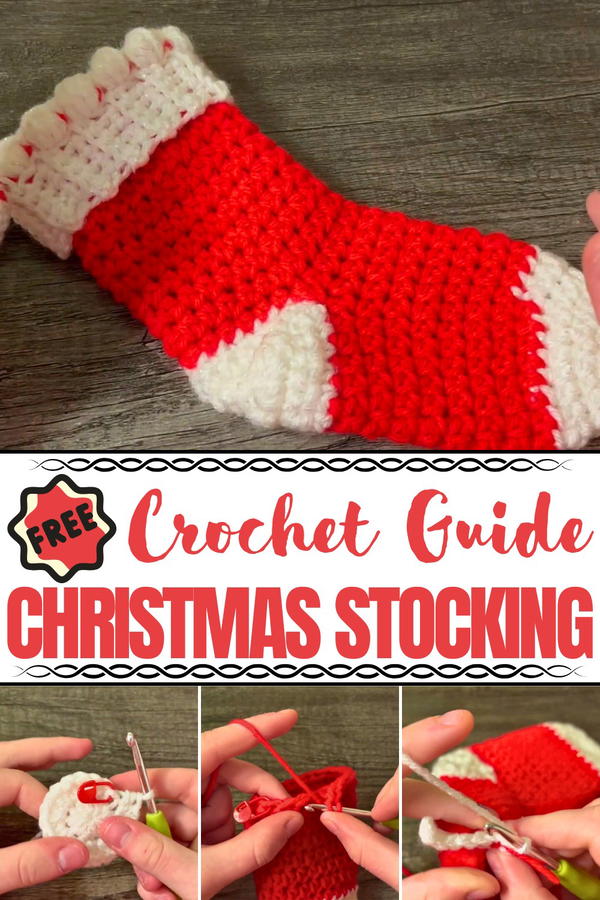
Unwrap holiday joy with this Crochet Christmas Stocking pattern, a festive design to bring cozy charm and timeless cheer to your celebrations.
Christmas traditions often feel incomplete without the sight of stockings hanging with anticipation, carrying both nostalgia and festive joy. The Crochet Christmas Stocking pattern captures that timeless spirit in a warm and lasting form, made to be treasured year after year. With its soft texture, intricate stitches, and spacious body, it not only enhances holiday décor but also serves a practical purpose, holding small gifts, sweets, and keepsakes for loved ones. Unlike mass-produced stockings, this piece reflects care and artistry, adding a personal touch that brings charm to mantels, stair rails, or festive displays.
Dreamy Glow Crochet Christmas Stocking with Winter Warmth
Its durability ensures it remains part of family celebrations for many seasons, becoming a keepsake passed through generations. Lightweight yet sturdy, it is easy to hang and versatile in use, whether as a decorative accent or a thoughtful gift in itself. The rich colors and cozy feel instantly enhance the holiday atmosphere, evoking warmth and cheer.
Beyond its beauty, it offers convenience by being reusable, eco-friendly, and long-lasting. With its blend of tradition, function, and timeless appeal, the Crochet Christmas Stocking pattern stands as a cherished symbol of festive spirit, ready to brighten holiday celebrations with meaning and elegance.
Materials Needed
- Yarn Colors:
- Primary Color (Red in this tutorial) for the main body of the stocking.
- Secondary Color (White in this tutorial) for accents like the toe, heel, and top cuff.
- Crochet Hook: 4.5 mm hook.
- Stitch Marker: Helps track your rounds.
- Crochet Needle: For sewing and finishing.
- Scissors: To cut yarn as needed.
Special Features of the Crochet Stocking
- Compact and Festive Design: The pattern helps you create a small, decorative Christmas stocking that can be used as ornaments, gifts, or holiday décor.
- Custom Colors: You can choose any two colors to customize your stocking to match your personal style or holiday palette.
- Fun Techniques: The pattern includes key techniques such as the half-double crochet, magic ring, and bobble stitch.
- Personal Touch: The final product is a wonderful handmade piece that looks professional and festive!
Level of Difficulty
This project is suitable for beginners to intermediate crocheters. The techniques used include chaining, single crochet, half-double crochet, slip stitches, increases, and decreases. If you’re new to the magic ring, Alexia suggests checking out her linked tutorial for additional guidance. The pattern is repetitive and simple to follow, but the shaping (like the heel construction) may require a bit of practice for beginners.
Step-by-Step Instructions
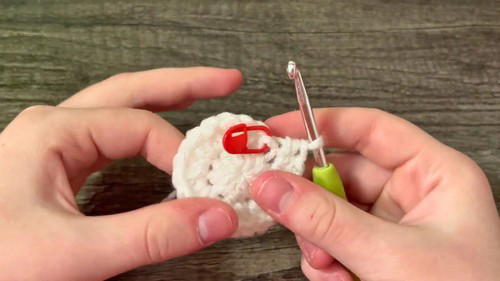
1. Making the Toe Section (White Yarn)
- Begin with a magic ring and chain 2 (this counts as the first half-double crochet).

- Create 11 half-double crochets (HDC) into the magic ring. Tighten the ring by pulling the tail.
- Place a stitch marker on the loop to track your beginning.
Round 2: Increasing
- Work 2 HDC into each stitch around (total: 24 stitches).
Rounds 3 & 4: Building Width
- In each of the next two rounds, make 1 HDC in each stitch (no increase).
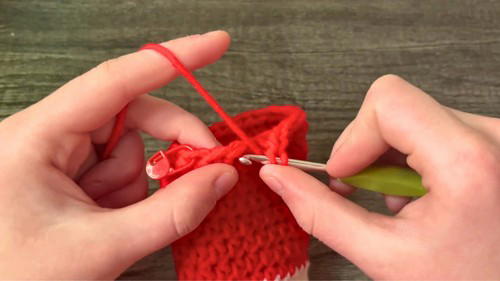
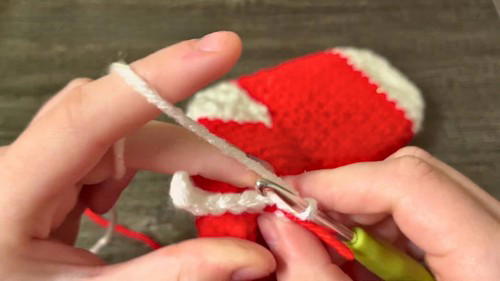
2. Shifting to the Upper Body (Red Yarn)
- On the last stitch of Round 4, begin a color change to Red:
- Start the HDC as usual (yarn over, pull through, 3 loops on the hook).
- Attach the Red yarn and complete the stitch with this new color.
- Cut the White yarn, leaving a small tail.
Next 8 Rounds
- Continue working HDC stitches in every stitch to build the stocking’s length.
- Optionally, crochet the White tail into your stitches to secure it.
3. Forming the Heel (White Yarn)
- Attach the White yarn at the center back of the stocking bottom (count and mark the center 12 stitches).
- Single crochet in the marked 12 stitches, working back and forth.
Heel Shaping
- On each row, decrease the first and last stitch while single crocheting evenly in the middle stitches:
- Row 1: Decrease, SC 8, Decrease.
- Row 2: Decrease, SC 6, Decrease.
- Continue decreasing until 2 single crochets remain.
Work Back Up
- Start increasing again in the first and last stitch of each row:
- Increase, SC 4, Increase.
- Continue until you’re back to SC 12 across.
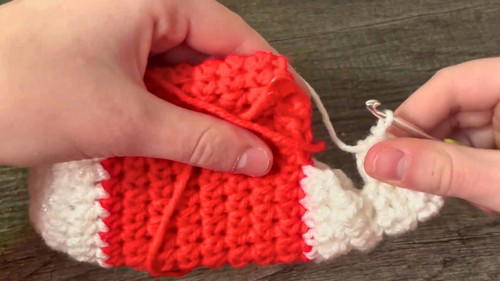
Folding and Sewing the Heel
- Fold the heel in half and sew the sides together using the crochet needle. Avoid over-tightening. Tie a secure knot and weave in the tail.
4. Completing the Upper Body (Red Yarn)
- Reattach the Red yarn to where you left off, and continue working 10 rounds of HDC to build the upper body.
- Use slip stitches to close any gaps between the Red and White sections as needed.
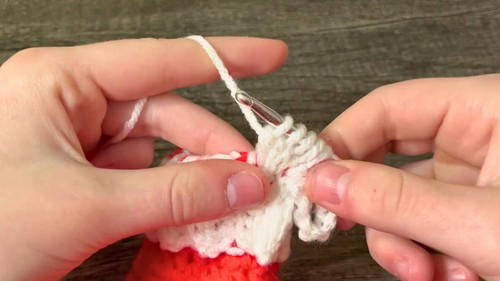
5. Adding the Cuff and Loop (White Yarn)
Cuff Rounds – Using White Yarn
- Attach the White yarn near the top edge of the stocking.
- Chain 6 and crochet into the back loops only to form the perpendicular ribbing:
- Skip the first stitch of the row.
- Single crochet in the back loops of the next 5 stitches.
- Use slip stitches to attach the ribbing to the top edge of the stocking.
Loop
- Chain 10 and slip stitch the chain onto the stocking to create a hanging loop.
Final Touch – Bobble Stitches (Optional)
- Add playful bobble stitches on the top cuff for texture!
- To create a bobble stitch: Yarn over, pull up a loop 4 times, then pull through all loops on the hook.
- Chain 1 to close each bobble and slip stitch into the next stitch.
- Repeat for a decorative edge around the stocking’s top.
Tutor’s Suggestions
- Master the Basics First: Ensure you’re comfortable with half-double crochet, increases, and decreases. Use Creator linked magic ring video if needed.
- Take it Slow: The heel assembly may feel tricky at first, but the video walks you through it patiently.
- Custom Colors: Experiment with festive color combinations like green and white or blue and silver for variety.
Uses of the Crochet Stocking
- Holiday Décor: Use as ornaments, garlands, or fireplace decorations.
- Gifting: Fill the stocking with small presents or treats for loved ones.
- Personalized Touch: Add initials, pom-poms, or embellishments to give each stocking a unique flair.
Pro Tip
When switching colors or tying off yarn, leave long enough tails to weave them into your work for a smoother finish. This ensures the stocking looks neat and professional!
Conclusion
This crochet Christmas stocking pattern is a fantastic way to add a handmade touch to your holiday season. The steps are easy to follow, and the pattern is fun to customize. Whether you create a full set for your family or use them as gifts, these stockings are sure to bring festive cheer.


