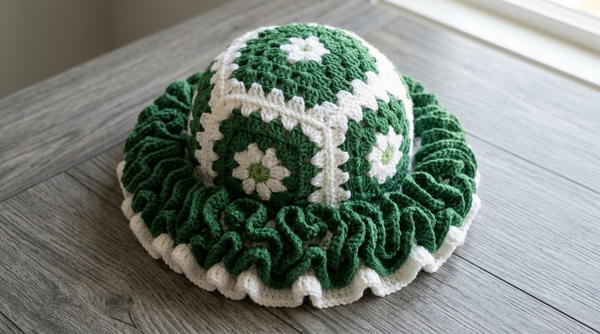
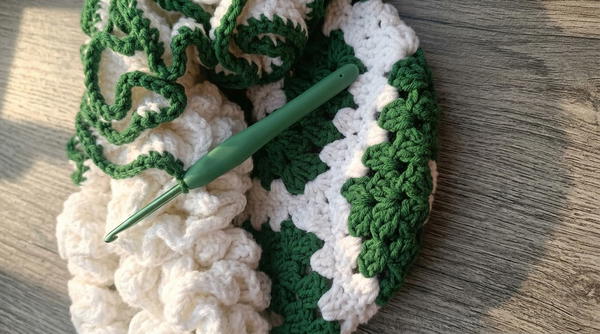
Spin into cozy style with this Free Crochet Granny Square Ruffle Hat Pattern, a cheerful and easy project that adds playful texture and charm to your outfit.
Have you ever wondered how a simple ball of yarn can turn into something colorful and full of life? The Free Crochet Granny Square Ruffle Hat pattern transforms plain yarn into a cozy, charming hat with classic granny squares and soft ruffles circling the edge. It begins by connecting square shapes, building a warm and comfortable fit for the head, while the ruffles at the bottom add a playful, flowing touch that moves gently with every step.
Crochet Granny Square Ruffle Hat Pattern Easy Stitch Guide
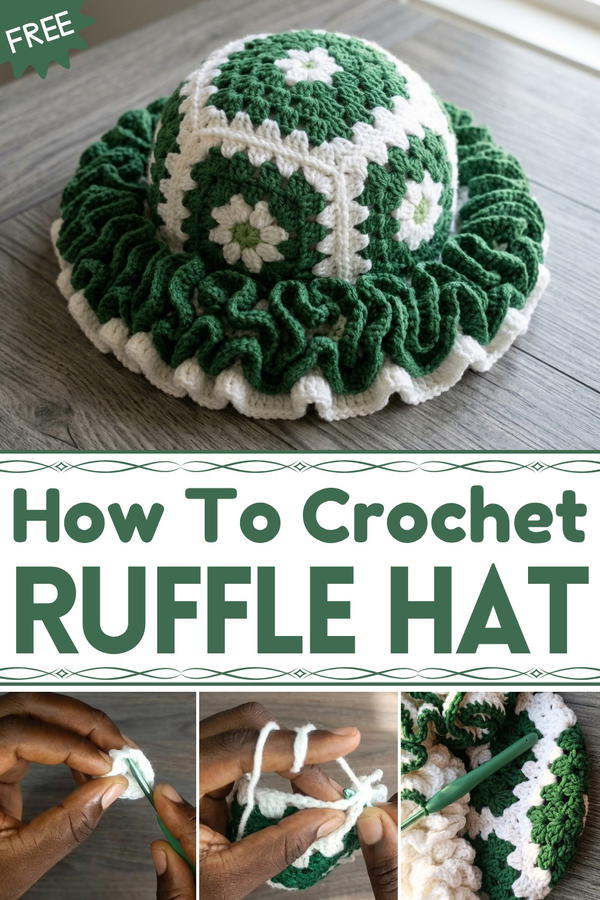
The bright squares make it cheerful and eye-catching, giving an ordinary hat a handmade, artistic feel. It is soft, snug, and perfect for cool days, outings, or just relaxing at home. Its size and color can be easily adjusted, making it suitable for anyone. With this pattern, plain yarn becomes both practical and beautiful, turning a simple accessory into something stylish, fun, and full of personality.
Granny Square Ruffle Heart Pattern
Materials Required
- Yarn: 5-ply yarn in two or more colors of your choice (e.g., Color A & Color B for the squares, and Color C for the ruffles and/or border).
- Crochet Hook: 4.5 mm crochet hook.
- Measuring Tape: For ensuring proper size and arrangement.
- Scissors: For cutting yarn.
- Darning Needle: To weave in ends and for joining the squares.
Gauge
- The gauge for this pattern is not critical, but ensure that each granny square measures approximately 10 cm x 10 cm (4" x 4"). Adjust your tension or crochet hook size if needed.
Finished Size
- Approximate finished size after adding ruffles: 40 cm x 40 cm (16" x 16").
Special Notes
- US Crochet Terminology has been used.
- Each granny square follows a traditional three-round pattern with increases at the corners.
- The ruffles can be customized to have more or fewer stitches and rows as per your preference.
- When joining squares, work with the wrong sides facing each other.
Stitches and Abbreviations
- ch - Chain
- dc - Double Crochet
- sl st - Slip Stitch
- sc - Single Crochet
- tr - Treble Crochet
- sp - Space
Pattern Instructions
Part 1: Granny Squares
Make Five Granny Squares
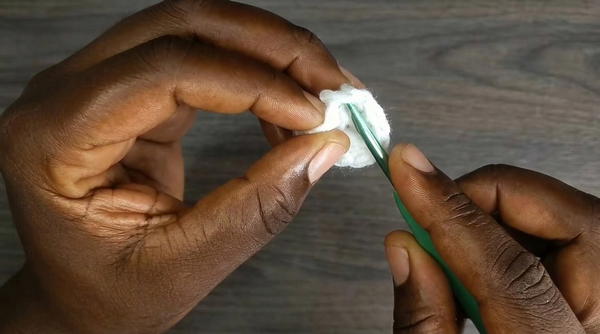
Foundation Round:
- Start with a slip knot.
- Chain 5, join with a sl st to form a ring.
Round 1:
- Chain 3 (counts as the first dc).
- Into the ring, work the following: 2 dc, ch 2. Repeat three more times for a total of four sets of 3 dc separated by ch 2.
- Join with a sl st to the top of the initial chain 3.
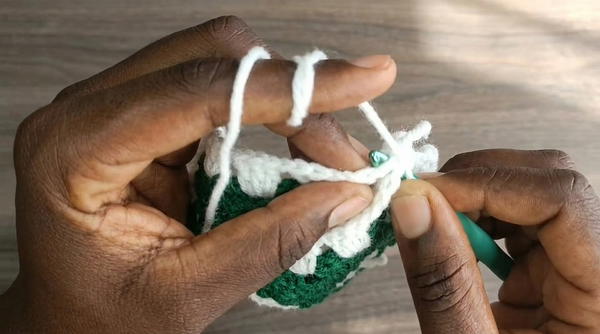
Round 2:
- Attach the second color (Color B). Chain 3 (counts as the first dc).
- Into the first ch-2 sp, work 2 dc, ch 2, 3 dc (this forms a corner).
- Ch 1, repeat the corner pattern (3 dc, ch 2, 3 dc) in each ch-2 sp around, and ch 1 between corners.
- Join with a sl st to the top of the initial chain 3.
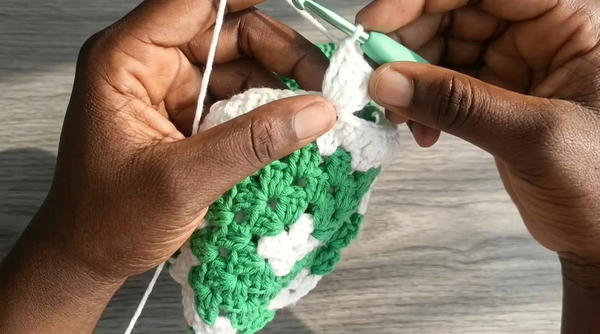
Round 3:
- Slip stitch into the next sp, chain 3 (counts as the first dc).
- Work 2 dc into the same space.
- Ch 1, work 3 dc into the next ch-1 sp.
- At each corner space, work 3 dc, ch 2, 3 dc followed by ch 1.
- Repeat this pattern for the entire round.
- Join with a sl st, fasten off, and weave in ends.
Part 2: Joining the Squares
Arrange the five squares in a cross-like formation:
- Place one square in the center, with one square on each of the four sides (top, bottom, left, and right).
Joining Squares:
- With the wrong sides facing, join the squares by working into the chain-2 spaces and corresponding stitches on each square.
- Use single crochet (sc) to join the stitches together neatly.
- Repeat the joining process until all squares are connected, forming a cross shape.
Once the cross shape is complete, fold and join the squares along their sides to create a heart shape. Ensure to work into the chain-2 spaces at the corners to secure all edges smoothly.
Part 3: Adding Ruffles
First Round: Base Round
- Attach a new yarn color (Color C) to any stitch at the edge of the heart shape.
- Work 1 dc into every stitch along the edge, and into the seams where squares are joined. This will create a strong base for the ruffles.
- Join with a sl st, chain 1, and work a round of sc stitches into every stitch. Mark the beginning with a stitch marker.
Second Round: First Layer of Ruffles
- Start with ch 4 (counts as a tr).
- Work 4 tr stitches into the same stitch. You now have 5 tr in one stitch.
- Move to the next stitch and repeat: 5 tr in the same stitch.
- Continue this process around the edge.
- Join with a sl st to the chain-4 from the start.
Third Round: Second Layer of Ruffles (Optional)
- Chain 4, then work 3 tr into the same stitch.
- Work 4 tr in each subsequent stitch. This creates a slightly less densely packed ruffle for the second round.
- Repeat this process around the edge, join with a sl st, fasten off, and weave in the ends.
Part 4: Optional Border
- If you wish to add a border, attach a contrasting color of yarn (e.g., Color C).
- Work a round of sc into every stitch around the edge, including over the ruffle.
- Join with a sl st, fasten off, and weave in all remaining ends.
Conclusion
Your Granny Square Ruffle Heart is now complete! This beautiful project can be used as a wall hanging, decoration, or even as part of a blanket. The ruffles add dimension and a unique touch to the traditional granny square design.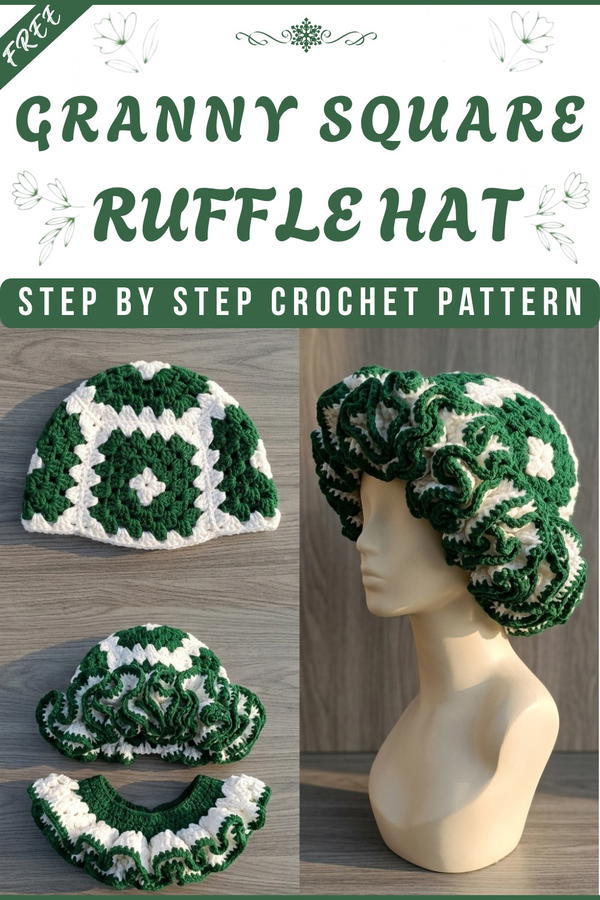
Tips for Customizing and Enhancing the Pattern
- Color Blocking: Use a variety of shades for the squares and ruffles for a vibrant design or a single color palette for a cohesive look.
- Ruffle Adjustment: You can add more or fewer treble crochet stitches into each stitch for different ruffle densities.
- Border Ideas: Experiment with picots or reverse single crochet (crab stitch) for a more intricate border.
- Size Alterations: Increase the size of each granny square to make a larger heart or use finer yarn for a smaller, more delicate project.
Final Remarks
This Granny Square Ruffle Heart is an excellent project to showcase your crochet skills while creating an elegant and lively design. The combination of simple granny squares with detailed ruffles makes this pattern both accessible and stunning. Feel free to personalize it to fit your style or home décor!