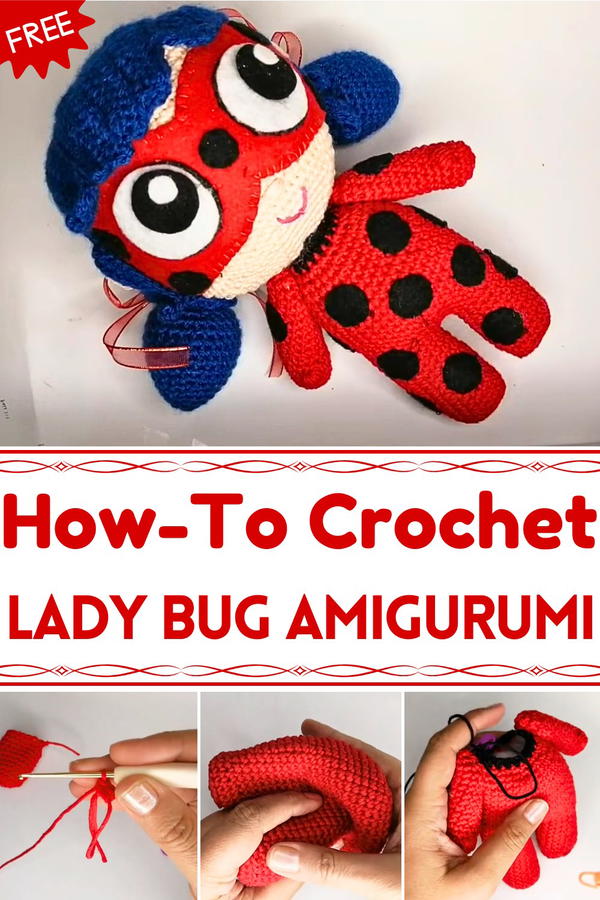
Brighten your space with a cheerful companion using this Free Crochet Lady Bug Amigurumi Pattern, perfect for gifts, décor, and mindful stitching fun.
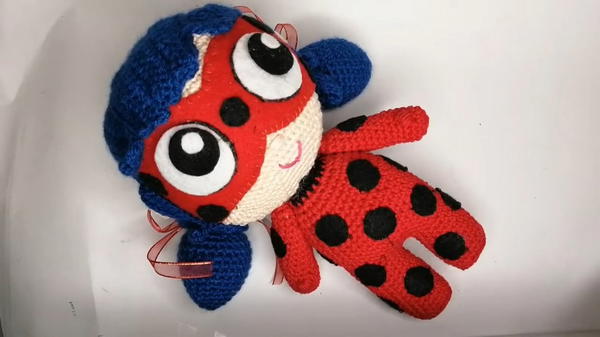
A tiny ladybug perched delicately on a vibrant leaf can spark curiosity and joy, reminding us of the simple wonders in everyday life. This Free Crochet Lady Bug Amigurumi Pattern brings that charm into your hands, offering a whimsical companion that brightens any space. Perfect for gifting, decorating, or simply keeping as a cheerful desk buddy, this amigurumi combines soft textures with a playful form, making it appealing to both children and adults alike.
Fun Crochet Lady Bug Amigurumi to Inspire Creativity
Its compact size allows it to adorn bookshelves, desks, or nursery corners, while its durable construction ensures long-lasting enjoyment. Beyond mere decoration, creating this ladybug can serve as a soothing activity, promoting mindfulness and reducing stress as you focus on each stitch. Collecting a variety of these miniature critters can also spark imagination and storytelling for young minds, turning quiet moments into playful adventures.
Additionally, this project encourages hand-eye coordination and fine motor skill development, making it an excellent activity for beginners and seasoned crochet enthusiasts alike. The vibrant colors and charming details add personality to your surroundings, while the sense of accomplishment from completing it fosters confidence and pride. Whether used as a thoughtful gift or a personal keepsake, this ladybug offers both joy and functional charm, making it a delightful addition to any handmade collection.
Special Features
- Articulated Limbs: The arms are movable, adding playfulness and flexibility to the design.
- Cartoonish Hair Design: Unique hair style inspired by animated characters adds to the charm.
- Detailed Felt Features: Felt pieces are used for the doll's mask and other clothing details.
- Custom Ribbon Ties for Pigtails: Adds a decorative and personalized touch to the doll.
- Supportive Structure Inside: A silicone stick is added for structural strength, preventing the head from tilting.
Difficulty Level
Intermediate to Advanced
This project involves advanced techniques like making articulated limbs, detailed shaping, sewing piece components together, and creating cartoon-like features. It is best suited for experienced crocheters or ambitious beginners who are ready to learn new skills.
Materials Required
Yarn:
- Skin Color: For the doll's base skin tone.
- Red Yarn: For the doll's dress and shoes.
- Blue Yarn: For the hair (acrylic yarn is recommended for softness).
- Pink Yarn: For the lips.
- Additional yarn of desired colors for details and sewing.
Felt:
- Red, black, and white felt for creating the doll's mask, eyes, clothing details, and more.
Accessories:
- Red ribbon (preferably with decorative golden edges) for pigtails.
- Articulated joints/hooks for movable arms.
Tools:
- Crochet Hook: Use a 2 mm hook for this project.
- Stuffing: For filling the doll's body parts.
- Long Pins: For holding and positioning parts during stitching.
- Tapestry Needle: For sewing parts together.
- Normal Needle: For delicate stitching with thread.
Other:
- Silicone Stick: To reinforce the neck and head.
- Liquid Silicone: Used to glue felt pieces securely.
Step-by-Step Instructions
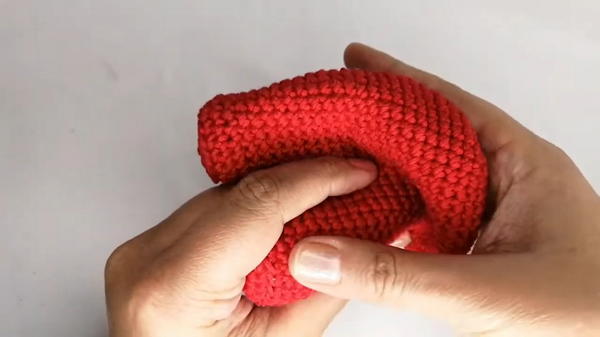
1. Making the Legs
Start with a Magic Ring: Use red yarn to form a magic ring and secure it with a chain. Crochet 6 single crochets into the ring.
Round 2: Make 6 increases (12 stitches total).
Round 3: Alternate 1 single crochet, 1 increase (18 stitches total).

Round 4: Crochet into the back loops only of 18 stitches to create a distinct edge.
Rounds 5–13: Work in spirals without increasing to form the leg shape.
For the Second Leg: After completing the second leg, do not cut the yarn. Instead, join the legs with 2 chains in the center, forming the base of the body.
2. Body Construction
Rounds 15–27: Work evenly in rounds (40 stitches per round) to continue shaping the body.
Add Decreases:
- Round 28: Decrease after every 4 stitches (34 stitches total).
- Rounds 29–30: Continue decreasing in patterns of 3 stitches and a decrease.
Add Structural Joints: Insert articulated joints or hooks between rounds 28 and 29 to attach the arms.
3. Creating the Arms
- Magic Ring for Arms: Start with 6 single crochets in a magic ring.
- Increase and Shape Fingers: Create "popcorn stitches" in one specific round to shape the doll's fingers.
- Rounds 7–16: Work evenly to create the proper arm length.
- Add Hooks: Insert and secure the joint hooks by using patience and precision to ensure both arms are symmetrical.

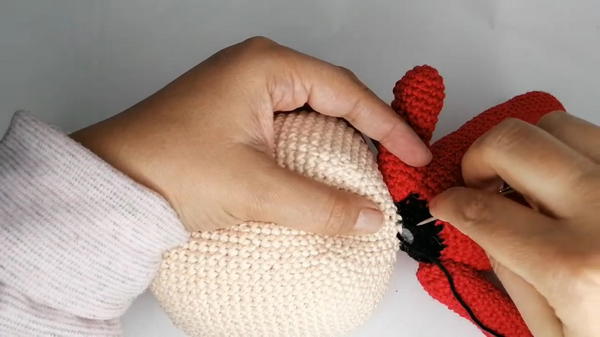
4. Making the Head
- Rounding Up: Start with a magic ring and use regular increases up to Round 9 (54 stitches).
- Rounds 10–30: Work evenly to create a full, spherical head.
- Decrease for Sculpting: Gradually decrease the stitches across Rounds 31–39 while stuffing the head for firmness.
- Insert Silicone Support: Place the silicone bar inside the head to stabilize the structure before sewing it to the body.
5. Adding Hair and Details
- Use blue acrylic yarn to crochet and attach cartoon-inspired hair strands.
- Tie decorative red ribbon onto the pigtails to add flair.
- Attach mask features, eyes, and other details using felt and liquid silicone for secure adhesion.
Tutor’s Suggestions
- Patience is Key: The process involves precise attachment of parts (like the arms and head), so take your time when sewing to ensure symmetry.
- Stuff Gradually: Overstuffing may strain the stitches, while under-stuffing might result in a floppy doll. Ensure the filling is evenly distributed.
- Mark Stitches: Use stitch markers or pins to keep track of where you’re working. This is especially important in complicated sections like the legs and body.
- Mix Materials: Feel free to experiment with different types of yarn or felt to give your doll a unique appearance.
Uses of the Doll
- Children’s Toys: Soft, articulated, and cartoon-inspired, making it fun and safe for kids.
- Decorative Piece: Great for display on shelves, desks, or as a nursery decoration.
- Gifting: A thoughtful handmade gift for birthdays or other special occasions.
Tip
When sewing the head to the body, always insert a silicone stick or other stabilizer in the neck area to support the head and prevent tilting. It’s a small step that ensures the doll’s posture stays upright.
Conclusion
This crochet tutorial offers a creative and rewarding way to make a unique, cartoon-inspired articulated doll. From its detailed construction to its adorable accessories, this project combines fun, skill-building, and functionality.


