Spruce up your storage with this Free Crochet Cute Bunny Pouch Pattern that brings soft texture, playful charm, and practical use in one adorable piece.
Tiny pouches have long been used to hold keepsakes, coins, or charms, items small in size but big in meaning. This version, shaped like an adorable bunny, adds playful appeal to a classic idea. The Free Crochet Cute Bunny Pouch Pattern offers a cheerful and functional way to store little essentials with a soft and friendly touch. With upright ears and gentle curves, this pouch is perfect for spring gifting, Easter surprises, or adding joy to your everyday carry.
Adorable and Handy Free Crochet Cute Bunny Pouch
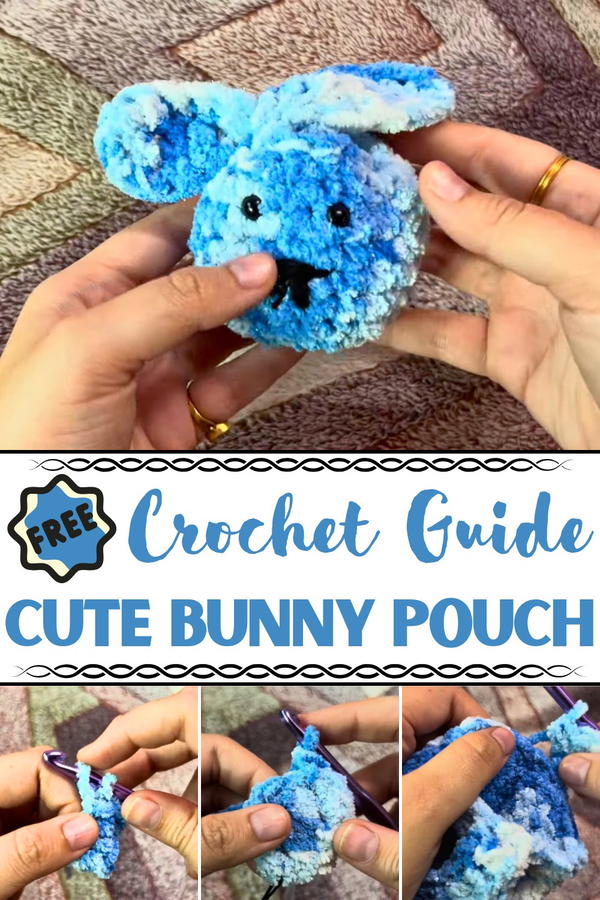
Its drawstring closure keeps everything neatly tucked inside, whether it’s earbuds, tiny toys, or notes of affection. Lightweight and compact, it fits easily into any bag or hangs as a cute charm on backpacks and totes. Its form remains tidy, while the bunny details add personality that appeals to kids and adults alike.
Made in soft pastels or cozy neutrals, it suits a range of styles and occasions. Whether you're looking for a handmade gift idea or a fun storage solution for small treasures, this pouch delivers both purpose and charm. It’s a thoughtful little project with just the right amount of whimsy to lift your mood and brighten the day in the most effortless way.
Step-by-Step Instructions
1. Materials Needed
- Main Material: Bernat Blanket Yarn (or any chunky yarn for beginners).
- Crochet Hook Size: 6 mm.
- Additional Items: Safety eyes, yarn needle, bobby pins, or stitch markers.
- All materials are linked in the video’s description box.
2. Starting the Magic Ring
- Begin by creating a magic ring.
- Place 10 single crochets into the ring.
- Close the ring tightly by pulling the loose string, ensuring no gaps remain.
- Slip stitch in the very first single crochet to complete Row 1.
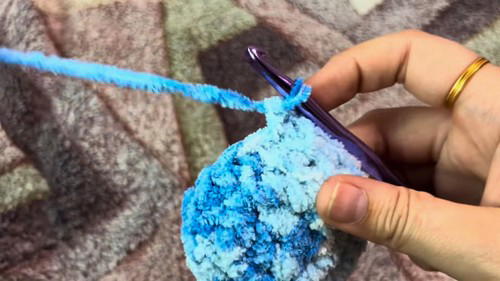
3. Building the Base
- Row 2: Use stitch markers (or bobby pins) to mark your starting points. Create 2 single crochets in each stitch of the previous row, finishing with 20 stitches. Slip stitch to close the round.
- Row 3: Crochet 1 single crochet in each stitch around. Complete 20 stitches in this row.
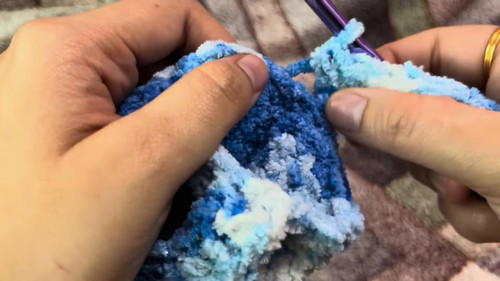
- Repeat this process for Rows 4 to 7. Continue making one single crochet in each stitch to build the pouch’s height.
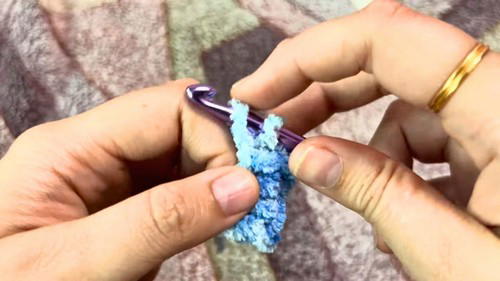
4. Creating the Bunny Ears
- Row 9:
- Chain 11. Skip 3 stitches and insert 1 double crochet in the 4th stitch. Make 2 more double crochets in the next stitches.
- Follow up with 4 half double crochets in the subsequent stitches to form the first ear.
- Skip 2 stitches, then slip stitch to secure the ear.
- Crochet 5 single crochets and slip stitch before starting the second ear.
- Chain 11 again for the second ear and repeat the process followed for the first ear.
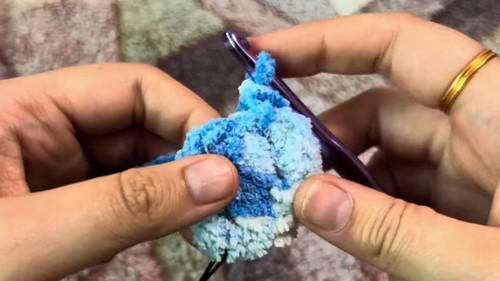
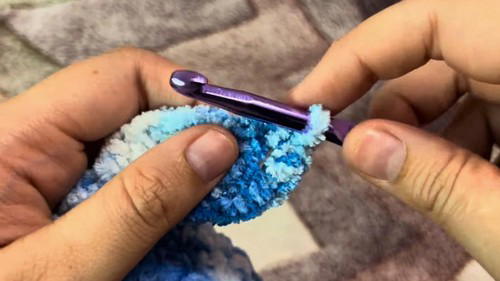
5. Finishing the Edges
- Add single crochets along the edges of both bunny ears to widen and smooth their appearance. In the chain-3 section of each ear's tip, insert 3 single crochets to create a rounded look.
- Once complete, slip stitch to join edges and finish the pouch.
6. Adding the Face Details
- Use safety eyes to create the bunny’s face. Place the eyes, align them, and securely attach the backings.
- For the nose, use black yarn to stitch an inverted "V" shape. Experiment with shapes to avoid making it look like a puppy.
Special Features
- Adorable Design: The finished product doubles as cute packaging for treats, gifts, or small items.
- Closeable Ears: The bunny pouch has a clever closure mechanism where one ear can be looped through the other.
Level of Difficulty
- The project is best suited for intermediate-level crocheters due to the use of a magic ring, working in rounds, and forming ears and edges.
- Beginners can attempt it using non-fluffy chunky yarn for easier stitch visibility.
Tutor’s Suggestions
- Use Stitch Markers/ Bobby Pins: These are strongly recommended to avoid losing track of stitches while working with fluffy yarn.
- For Beginners: Substitute fluffy yarn with Bernat Chunky Yarn (non-fluffy), which is easier to work with.
- Take Your Time: Working with blanket yarn can be tricky, especially differentiating stitches—so work slowly and carefully.
Uses of the Bunny Pouch
- Easter and Festivities: Fill it with chocolates or candies.
- Gift Wrapping: Use it to package small gifts or jewelry.
- Decor: The bunny pouch can also double as an adorable table piece.

Materials Recap
- Bernat Blanket Yarn (or Bernat Chunky Yarn for beginners).
- 6 mm crochet hook.
- Safety eyes for the bunny's face.
- Black yarn for creating the nose.
- Stitch marker or bobby pin.
Conclusion
This mini bunny pouch is a delightful crochet project that combines fun and functionality. It’s perfect for special occasions like Easter or as a lovable handmade gift. By following the clear and well-paced tutorial, you can create your own charming bunny pouch.
Tip
If you find it hard to work with fluffy yarn, start with regular chunky yarn for better visibility. Once you’re comfortable, switch to blanket yarn for a professional and soft finish. Happy crocheting!


