Spice up spooky season with this Free Crochet Halloween Ghost, a soft and playful touch perfect for decorating, gifting, or charming your October setup.
Autumn evenings often invite a playful chill, where flickering lights and soft textures turn spooky into something sweet. In this festive spirit, the Free Crochet Halloween Ghost makes a charming addition to seasonal décor. With its soft curves, gentle flow, and expressive little face, it turns eerie into endearing, perfect for those who prefer whimsy over fright. Its compact size makes it ideal for hanging on door handles, adding to party tables, or slipping into candy baskets as a delightful surprise.
Simple Tips to Stitch the Cutest Free Crochet Halloween Ghost
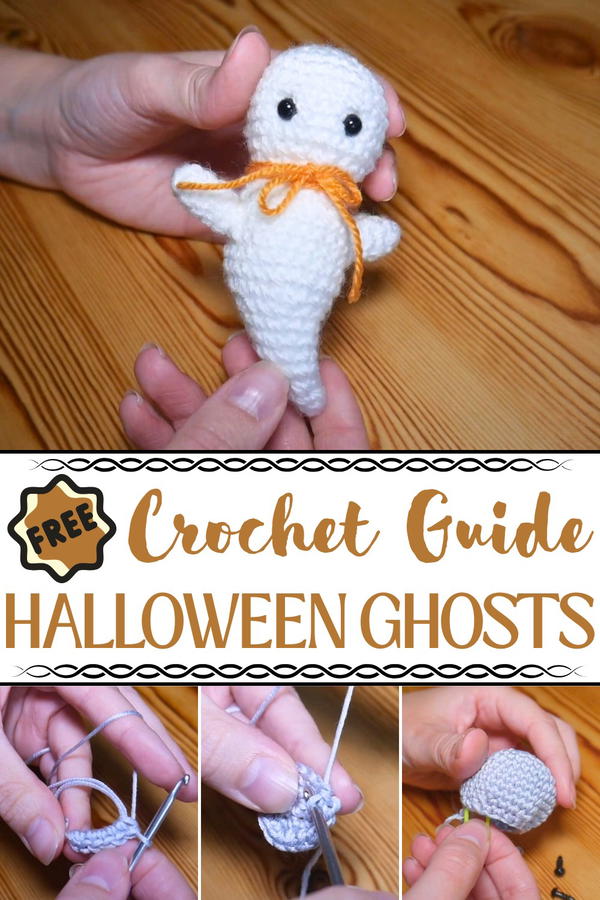
This little ghost stands out not only for its cuteness but for how simple and satisfying it is to bring to life. It involves minimal shaping and no rigid structure, making it approachable even for less experienced hands. The design flows smoothly from top to base, forming its classic ghostly silhouette, while the final details, like its stitched eyes, bring character and charm.
Beyond decorations, this piece works as a small keepsake, seasonal keychain, or part of a handmade garland. It’s quick to complete yet full of thoughtful detail, ideal for those who enjoy small seasonal touches with a personal twist. Whether gifted or kept close, it delivers a playful nod to Halloween traditions in the softest, most spirited way.
How to Crochet the Halloween Ghost
Materials Needed
- Yarn: Standard DK-weight yarn (the video uses a silvery yarn for better stitch visibility).
- Crochet Hook: 3mm hook (the creator recommends going down hook sizes for tight stitches suited to amigurumi).
- Stitch Marker: Essential for marking your starting stitches as amigurumi is worked in a spiral.
- Safety Eyes: Small plastic safety eyes for the ghost's cute expressions (or sew on features if preferred).
- Stuffing: Fiberfill to fluff up and shape the ghost.
- Scissors and a needle for sewing/weaving in ends.
Special Features
- Amigurumi Technique: Boo uses tight spirals to minimize gaps in stitches.
- Invisible Decrease: Front-loop-only decreases for seamless shaping.
- Customization: Adjust size using thicker yarn and larger hooks.
- Additions: The tutorial includes adding a scarf accessory for a unique Halloween look.
Step-by-Step Instructions
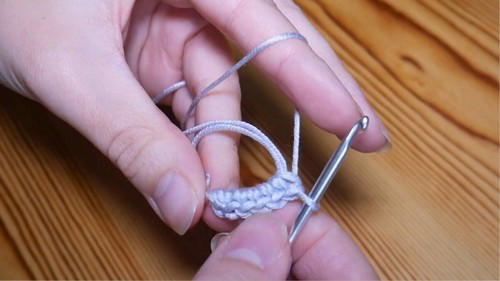
1. Start with the Magic Ring
- Use a magic ring to begin, making six double crochets inside the circle (UK terms; US equivalent is single crochet).
- Pull the tail end to close the ring tightly for a seamless base.
2. Build the Head
- Round 1: Continue with six double crochets.
- Round 2: Increase by placing two double crochets in each stitch (total: 12 stitches).
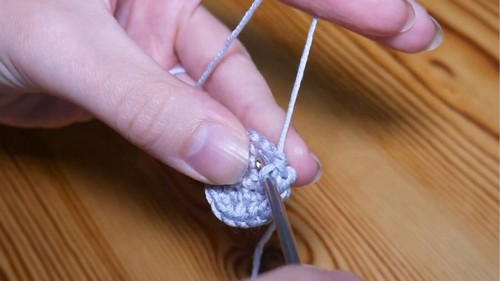
- Round 3-5: Alternate between single stitches and increases to build the rounded shape of the head (by Round 5, you’ll have 30 stitches).
- Rounds 6-9: Work even, maintaining the stitch count.
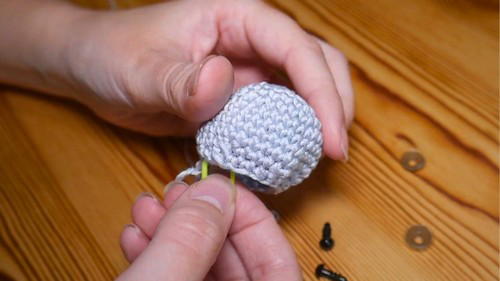
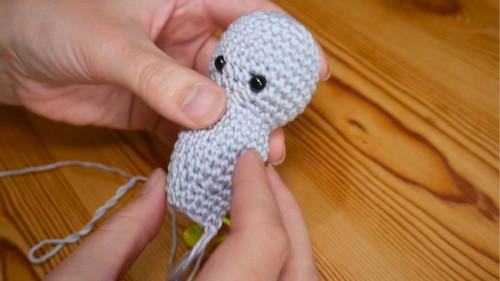
3. Add Eyes and Stuffing
- Insert safety eyes between rows 8 & 9, evenly spaced with about 5-6 stitches between them.
- Begin lightly stuffing the head to prevent distortion later.
4. Shape the Neck and Body
- Decrease stitches to form the neck (Round 10 onwards).
- Continue alternating decreases and single stitches to create the body curve.
- Begin tapering the tail end using decreases starting at Round 21.
- Finished stitch count narrows to just six stitches at the tip.
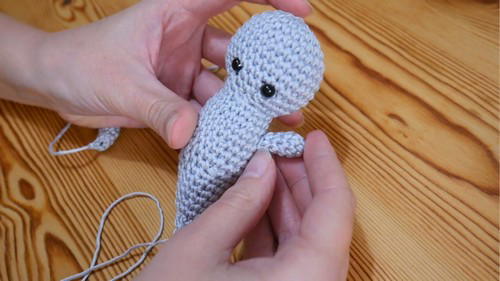
5. Crochet the Arms
- Start with a six-stitch magic ring for tiny arms.
- Work four rounds of single stitches to shape the arm before fastening off.
- Attach both arms securely to the ghost's body, adjusting position based on your design preference.
6. Optional Scarf Decoration
- Wrap a scrap yarn scarf around the ghost for a fun Halloween touch.
Tutor's Suggestions
- Magic Ring Mastery: Practice this tricky technique first (a slow tutorial is linked for beginners).
- Tension Control: Use a smaller hook size than recommended for your yarn to ensure tight stitches and prevent gaps.
- Counting Stitches: Mark your starting point diligently after every round to keep the pattern accurate.
- Stuffing: Gradually stuff during checkpoints to ensure the ghost retains its desired shape.
- Eye Placement: Be careful while aligning eyes to balance Boo's expression.
Difficulty Level
- Skill Level: Beginners comfortable with basic stitches (such as UK double crochet or US single crochet) can manage this project. Intermediate skills are helpful for handling the invisible decrease and tiny arms.
- Effort Level: Moderate; patience and attention to detail are required for shaping and stitching small components.
Uses
- Halloween Décor: Perfect for holiday decorations on shelves, tables, or hanging in doorways.
- Gifts: A delightful handmade gift for children or Halloween enthusiasts.
- Accessories: Add scarves, hats, or other themed embellishments to personalize Boo further.
Conclusion
With Boo, you’ll develop foundational amigurumi skills while crocheting an enchanting Halloween keepsake. The small size of this ghost offers a challenging but rewarding crochet experience.
Tip
When working on small rounds and tight spaces, use a yarn needle to tuck loose ends or tails between stuffing to minimize clutter. It's a great way to keep your project neat and polished.


