Elevate daily outings with the Crochet Bag pattern, a stylish and sturdy accessory that keeps essentials organized and effortlessly chic.
On a bustling market street, a handwoven bag swung gently from the shoulder of a shopper, catching the sunlight and drawing admiring glances. Inspired by the charm and utility of handmade accessories, the Crochet Bag pattern brings practicality and style into everyday life. Each bag features a durable body with textured stitches that provide strength while adding subtle elegance, making it ideal for carrying essentials like wallets, keys, books, or small personal items. The spacious interior and sturdy handles ensure comfort and convenience during daily use, whether for errands, work, or casual outings.
Stylish Crochet Bag That Combines Beauty and Utility

The versatility of this pattern allows for personalization through color choices and yarn types, resulting in a bag that reflects individual taste and style. Lightweight yet resilient, it maintains its shape while offering long-lasting performance. Beyond functionality, making this bag provides a satisfying and calming experience, allowing hands to move rhythmically while producing a practical, beautiful item. Its handmade charm makes it a thoughtful gift for friends, family, or anyone who appreciates functional elegance.
The Crochet Bag pattern combines practicality, beauty, and personal expression, transforming a simple accessory into a statement piece. Its utility and aesthetic appeal make it an indispensable companion for everyday life, adding warmth, style, and personality to every outing.
Materials Needed
- Yarn:
- 150 g straw yarn for the bag.
- Three strands of yarn are recommended for the handles to make them durable.
- Crochet Hooks:
- 3 mm hook for the bag.
- 5 mm hook for the Romanian cord handles.
- Scissors: To trim ends neatly.
- Yarn Needle: For stitching the handles to the bag.
- Stitch Markers: To mark the beginning of rounds and track stitches.
- Optional Additions: Magnetic buttons for closure.
Special Features
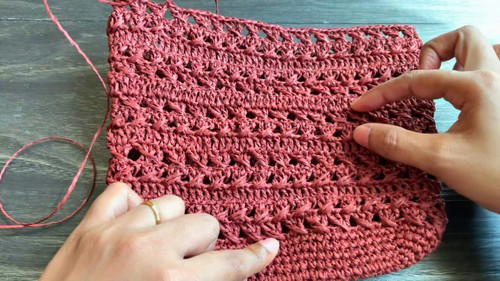
- Stylish Crisscross Pattern: The tutorial includes a step-by-step guide to creating a textured crisscross double crochet pattern for the bag.
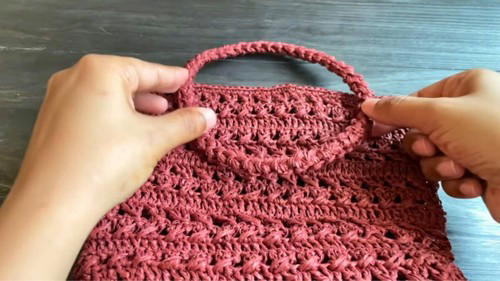
- Durable Romanian Cord Handles: The sturdy straps add functionality while maintaining a stylish look.
- Customizable Size: Adjust chain and round counts to make bags of different dimensions and proportions.
- Eco-Friendly Materials: Straw yarn and scrap yarn help reduce waste, making this project sustainable and minimalist.
- Seamless Joining: The tutorial demonstrates creating seamless connections for a clean, professional finish.
Level of Difficulty
Beginner-Friendly
- Includes simple stitches like single crochet, double crochet, slip stitch, and chain stitches.
- The crisscross pattern and Romanian cords require basic knowledge of tension control, making it slightly more intricate but still accessible for beginners with practice.
Step-by-Step Instructions
Part 1: Base of the Bag
1. Chain Foundation
- Start with a slip knot, then chain 32 stitches. (For larger bags, increase the chain count.)
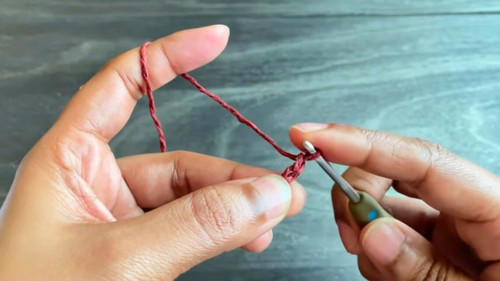
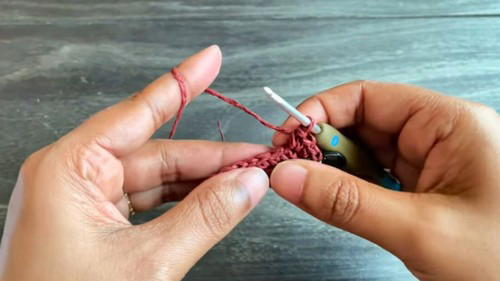
2. Single Crochet Rounds
- Work the following pattern to create a rounded base:
- Round 1: Chain one, skip the first chain space, and work 2 single crochets into the second chain space. Mark the first stitch with a stitch marker. Crochet 1 single crochet into each of the next 30 chain spaces, and 3 single crochets into the last chain space. Proceed to the opposite side of the base chain and crochet 1 single crochet in each of the next 30 chain spaces. Finish the round with one single crochet into the first chain space, making 3 single crochets in total on each corner. Join the round with a tight slip stitch to prevent confusing the slip stitch as a chain in successive rounds.
- Round 1: Chain one, skip the first chain space, and work 2 single crochets into the second chain space. Mark the first stitch with a stitch marker. Crochet 1 single crochet into each of the next 30 chain spaces, and 3 single crochets into the last chain space. Proceed to the opposite side of the base chain and crochet 1 single crochet in each of the next 30 chain spaces. Finish the round with one single crochet into the first chain space, making 3 single crochets in total on each corner. Join the round with a tight slip stitch to prevent confusing the slip stitch as a chain in successive rounds.
3. Adding Rounds & Increases
- Gradually expand the base with increases at the corners:
- Round 2: Chain one, make 2 single crochets in the first chain space (mark the first stitch). Work 1 single crochet in each of the next 30 spaces, then make 3 sets of increases (2 single crochets in each chain space) at the corner. Continue single crochets along the opposite side and finish with the last set of increases.
- Repeat this process for Rounds 3-5, adding increases at the corners progressively to smooth the edges as the base grows in size.
- Round 2: Chain one, make 2 single crochets in the first chain space (mark the first stitch). Work 1 single crochet in each of the next 30 spaces, then make 3 sets of increases (2 single crochets in each chain space) at the corner. Continue single crochets along the opposite side and finish with the last set of increases.
4. Flatten the Base
- Steam iron the base to flatten any curves for a polished look before proceeding to the body of the bag.
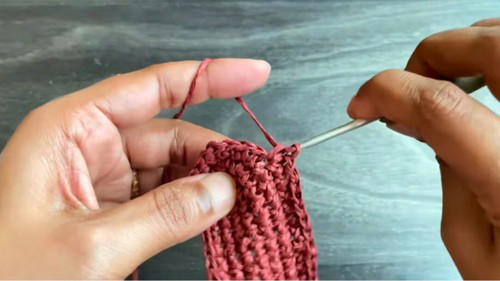
2: Crisscross Pattern for the Bag Body
1. Starting the Crisscross Round
- Chain three to count as the first double crochet. Work a double crochet into the next chain space.
- To create the crisscross effect, yarn over and work the next double crochet in the skipped chain space before the chain three. Pull the loop slightly longer to avoid tight stitches and complete the double crochet.
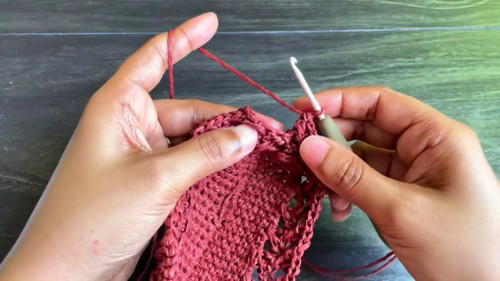
2. Continue the Pattern
- Skip the next space, work two double crochets in the following two spaces, and then go back to the skipped chain space to complete the crisscross.
- Repeat this pattern all the way around and join with a tight slip stitch at the third chain of the starting chain three.
3. Alternating Rounds
- Follow an alternating round pattern:
- Crisscross Round: Create the crisscross double crochet pattern in this row.
- Double Crochet Round: Work standard double crochets all around without crisscross stitches.
- Repeat these rounds after the base increases to build the body of the bag. Remember to increase on the corners in every double crochet round for better shaping.
3: Romanian Cord Handles
1. Prepare the Yarn
- Divide the yarn into three strands by looping a single ball of yarn into an "S" shape, creating three continuous sections.
2. Start the Cord
- With the 5 mm hook, begin with a slip knot and chain two. Crochet into the second chain and continue with the following method:
- From the previous single crochet, locate the side loop and insert the hook. Pull up a loop and create the next single crochet.
- Turn the work upward, locate both loops, and repeat the process.
3. Build the Cord
- Continue creating single crochet stitches by turning the side loop and pulling through until the cord reaches the desired length (e.g., 17 inches for the tutorial straps).
4. Join the Ends
- Stitch the two ends of the cord together in a circular or preferred shape to form the handle. Once finished, securely attach it to the bag by sewing it to the top edges using a yarn needle. Repeat for the second handle.
4: Finishing Touches
1. Optional Single Crochet Edge
- Before finishing, add one round of single crochet around the top of the bag for a clean edge.
2. Trim and Secure Ends
- Chain one to secure the end, leaving a tail before cutting. Use a yarn needle to weave the tail back into the stitches.
3. Add Magnetic Buttons
- Add closures like magnetic buttons to make the bag more functional.
Tutor's Suggestions
- Tight Slip Stitches: Always make slip stitches tight to avoid confusing them for chain spaces in subsequent rounds.
- Mark Your Stitches: Use a stitch marker to track your starting points for each round.
- Customize Size: Adjust chain lengths and increase rounds to create bags of different shapes and sizes.
- Steam Iron Curves: Flatten the base with steam ironing before continuing with the bag body.
Uses of the Bag
- Day-to-Day Practicality: Perfect for shopping trips or casual outings.
- Stylish Accessory: A unique handmade ornament for any look.
- Gifting: Thoughtful handmade gifts for loved ones.
- Eco-Friendly: A sustainable creation using straw yarn or scrap materials.
Tip for Success
Maintain consistent tension while working the crisscross stitches to prevent uneven patterns. Stretch and pull loops slightly when working back into skipped stitches for a clean crisscross effect.
Conclusion
This elegant straw yarn tote bag offers a balance of style and durability, while being mindful of eco-conscious crocheting. With beginner-friendly steps, versatile design elements, and opportunities for customization, this bag is a satisfying project for crochet enthusiasts of any skill level.


