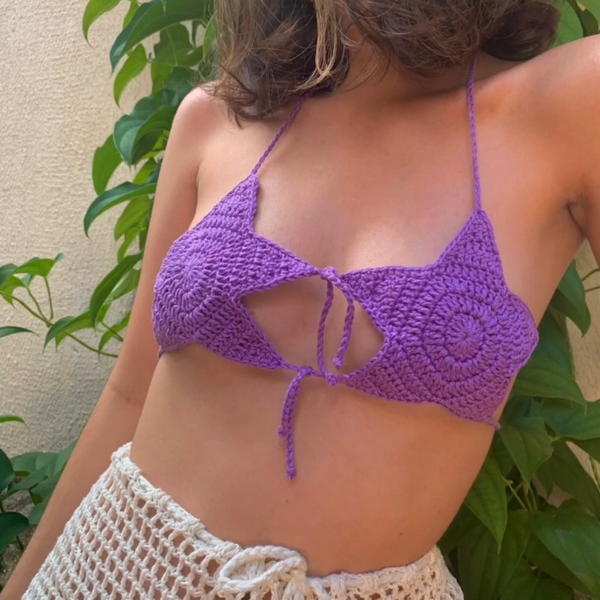
Shine bright in this Crochet Top Pattern with breezy stitches playful fit and a feel good piece that suits warm days casual plans and easy layering.
Enjoy a cool and comfortable outfit that feels as good as it looks! This handmade summer top is soft and light, perfect for keeping you fresh on warm days. Its simple stitches create a pretty pattern that gently hugs the body without feeling tight or heavy. The design is open and airy, letting the breeze in while showing off a lovely texture that adds charm to your look.
Casual Crochet Top Pattern Perfect for Daily Fashion
Great for wearing alone or with other clothes, it can take you from a casual walk to a friendly gathering with style and ease. Made with soft yarn, it’s gentle on the skin and feels cozy to wear all day long. Easy to make and customize with the colors you love, this top brings a personal touch to your wardrobe. It’s the perfect mix of beauty, comfort, and handmade joy to brighten up any day!
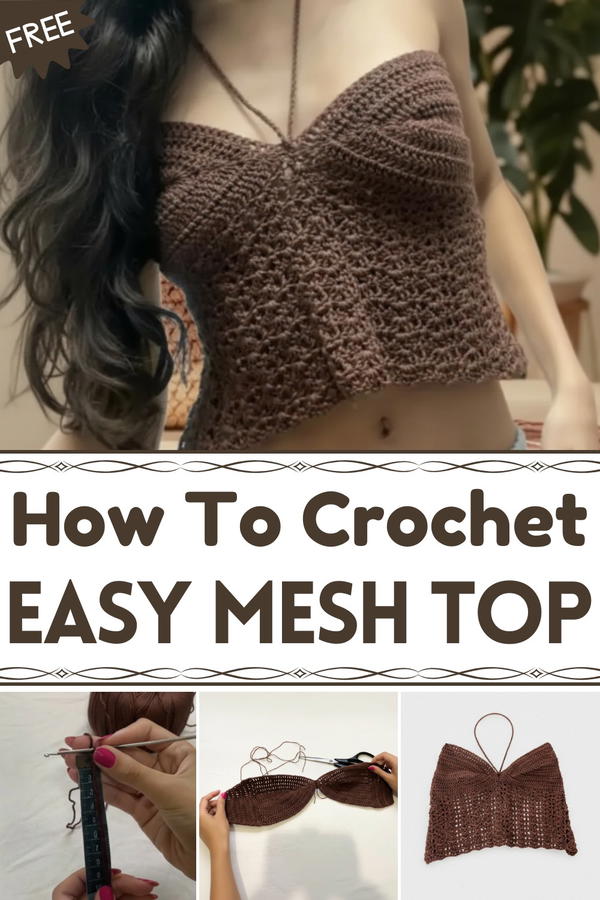
Crochet Bra Cup Top – Step by Step Pattern
Materials
- Migorumi yarn (color Brigadeiro or your choice)
- Crochet Hook 2.5 mm (recommended for tight stitch)
- Scissors
- Measuring tape or ruler
- 3 mm needle (for threading straps)
Pattern Steps
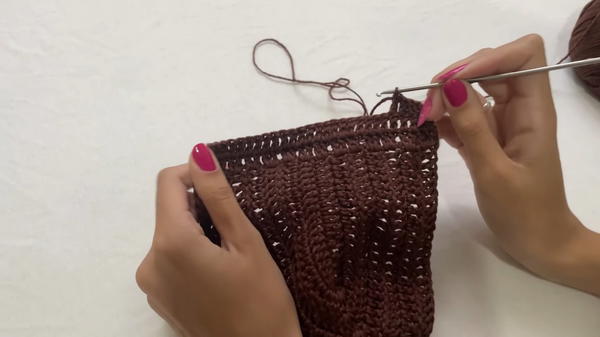
Round 1 – Foundation Chain & Row of Double Crochets
- Find the yarn end inside the skein and pull from there for a smoother start.
- Ch 20 (or enough chains to equal approximately 9 cm, adjust length to desired width).
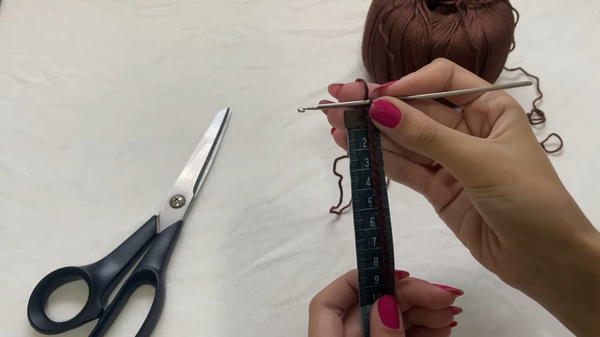
- Count 3 ch from your hook (counts as first dc).
- In the fourth chain from hook, make the first dc.
- Continue with 1 dc in each chain across to the end.
- At the last stitch, make 2 dc in the same chain for shaping.
- Sl st to the third chain of your initial 3 chain to close the row.
Round 2 – Second Row with Fan Formation
- Ch 3 (counts as first dc), turn.
- Dc in the same stitch as your chains.
- Ch 1 for separation.
- In the next stitch, make 2 dc, ch 1, and 2 dc forming the fan.
- Continue alternating: 1 dc in next stitch, then a fan in the next stitch across the row.
- End with 1 dc in last stitch, turn.
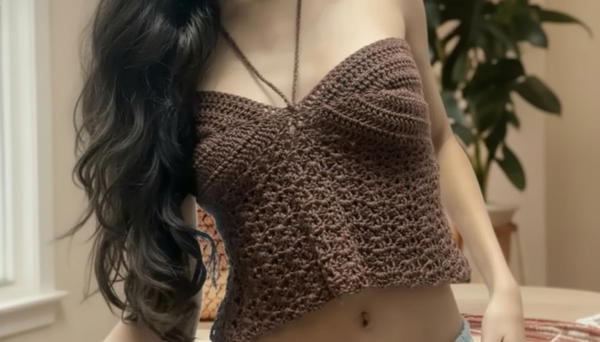
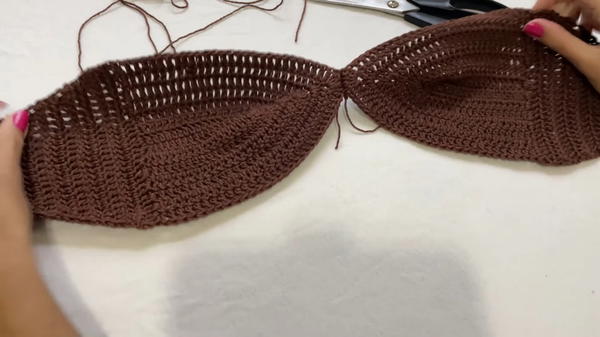
Round 3 and Following – Building Bra Cup with Fans and Double Crochets
- Repeat row 2’s pattern: make fans in chain-1 spaces, and dc stitches in between.
- Always make 2 dc, ch 1, 2 dc in the same stitch to form fans.
- Continue working rows until the cup reaches desired height (Ester created 6 rows for a Size S).
- Keep checking shape and stitch count for evenness on both sides.
Round 4 – Finishing Row of Bra Cup
- When nearing cup size, work a final row of dc stitches flat to stabilize shape.
- At the start and end of the row, do extra dc stitches to maintain straight edges.
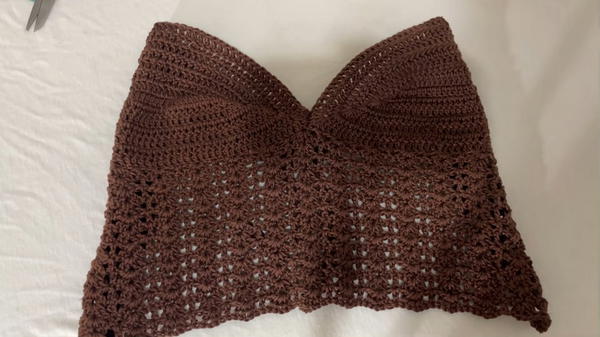
Back Strap Attachment
- Attach yarn to one bra cup side at the back edge.
- Ch to desired back strap length (Ester chained approximately 25 cm).
- Join with a sl st to the corresponding point on the other bra cup.
Edge Finishing with Single Crochet
- Work sc evenly around edges of bra cups and strap for a polished finish.
- Place 1 sc per stitch and inside chain spaces.
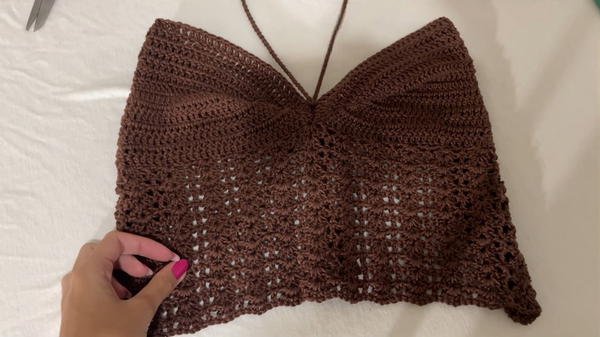
Straps and Front Tie
Straps:
- From the top back edges of bra cups, chain desired length for neck straps (Ester chained ~300 ch, adjust to your size).
- Attach or tie securely for comfortable fit.
Front Tie:
- Using yarn tail or extra yarn, chain a length for a decorative front tie.
- Attach at the center bottom between the two cups with a sc stitch.
- Thread the chain tie through with a needle or by hand as desired, knot securely.
Special Features
- Elegant fan stitch texture sculpts and supports the bust.
- Adjustable back strap and neck ties offer customizable wearing options.
- Tight 2.5 mm stitches provide a firm structure for the bra cups.
- Edging in sc gives a clean, finished look.
Difficulty Level
Beginner to Intermediate
Requires knowledge of basic dc, ch, and fan stitch construction.
Tutor’s Suggestions
- Use a 2.5 mm hook for firmer, well-defined stitches and better top shaping.
- Measure carefully when chaining for the base to match your bust size.
- Keep symmetry by counting stitches on both sides consistently.
- Secure knots of straps and front tie well to avoid loosening.
- Practice fan stitch separately if uncertain.
Uses
- Stylish summer or beachwear crochet bra top.
- Can be layered or worn alone as a cute crop piece.
- Great for handmade shops or custom gifts.
Tip
If your bra cups don't lay flat, check that the number of stitches on either side are equal, and block the cups if needed to shape them evenly.
Conclusion
This crochet bra cup top is a charming and functional project for beginners and above, combining simple stitches with creative shaping via fan textures. Adjustable straps and ties make it versatile and comfortable.