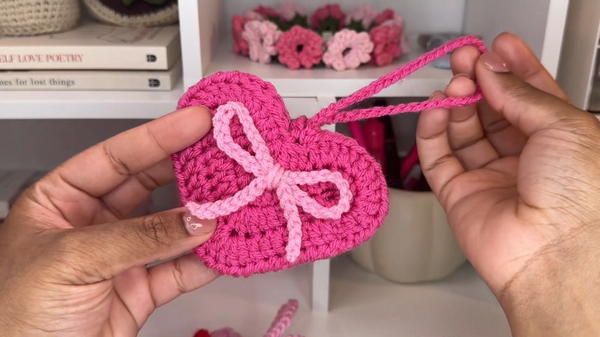
Charm your loved ones with the Free Crochet Heart Pouch & Bow Pattern, a lovely way to gift keepsakes with elegance and heartfelt style.

Its neat size and elegant structure make it easy to carry, display, or use as part of decorative setups for special occasions like Valentine’s Day, weddings, or anniversaries. The combination of a gentle texture and graceful detailing gives it a timeless appeal that suits every style.
Whether made in bold colors or soft pastels, it carries warmth and emotion in every stitch, turning an everyday accessory into something meaningful. The pouch not only serves as a charming little holder but also as a beautiful reminder of care and thoughtfulness, perfect for those who value simple elegance in handmade treasures.
Materials Required
- Medium Weight Yarn: Any color of your choice.
- Crochet Hook: Size 5 mm.
- Scissors: For trimming the yarn.
- Yarn Needle/Darning Needle: To sew and weave in ends.
- Two Stitch Markers: To hold your stitches in place.
- Stuffing Material (optional, for shaping the bow).
Step-by-Step Instructions
1. Making the Body of the Heart (First Half)
Create the Foundation Chain:
- Make a slip knot and chain 16.
Forming the First Curve:
- Skip 3 chains and make 5 double crochets into the fourth chain from the hook.
Adding Stitches for Symmetry:
- Make 1 double crochet in the next three chains.
Shaping the Bottom Point:
- Crochet 5 double crochets together to form the bottom tip:
- Start a double crochet but stop before the final pull-through.
- Repeat in the next chain until you have 5 incomplete double crochets with 6 loops on the hook. Yarn over and pull through all loops to complete the stitch.
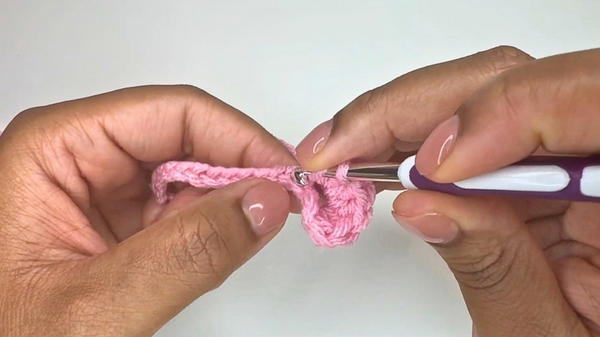
- Crochet 5 double crochets together to form the bottom tip:
Second Side Curve:
- Make 1 double crochet in the next three chains.
- In the last chain, make 6 double crochets to form the second top curve.
Working the Underside:
- Turn your work upside down and crochet 1 double crochet into the next 5 chains.
- Next, make 5 double crochets into the following chain for the opposite side of the heart’s curve.
Closing the Round:
- Make 1 double crochet in the final 5 chains.
- Slip stitch into the chain-3 gap at the top to complete the round.
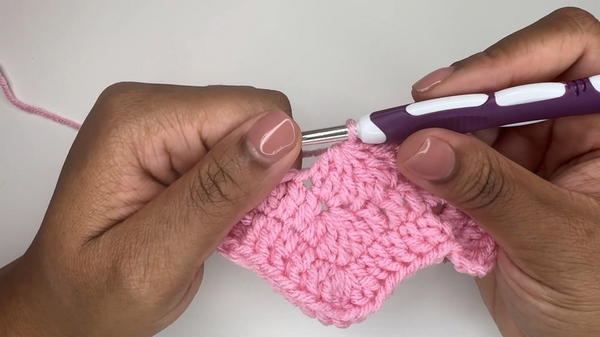
2. Creating the Second Round
Starting the New Layer:
- Chain 3 and double crochet in the same stitch you slip stitched into.
Building the Shape:
- Make 2 double crochets into the next 5 stitches.
- Follow the pattern:
- 1 double crochet.
- 5 double crochets together for the heart's point.
- 1 double crochet.
Forming the Top Curves:
- Make 2 double crochets into the next 6 stitches.
- Work 1 double crochet into the next 7 stitches.
- Create 5 double crochets into the next stitch to shape the second top curve.
Finishing the Heart Piece:
- Complete with 7 single crochets and slip stitch into the top of the chain-3 to close.
- Fasten off the yarn and weave in the ends.
3. Making Another Half
- Repeat the above steps to make the second half of the heart.
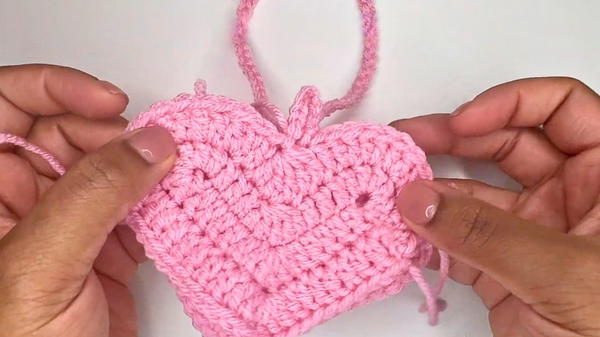
4. Adding the Closure Loop
- Identify the center of the heart by placing your yarn into the loops from the 5-together stitch at the bottom point of the heart.
- Create a Chain Loop:
- Attach the yarn and chain 7.
- Slip stitch back into the same spot.
- Tie off the yarn and weave in the ends.
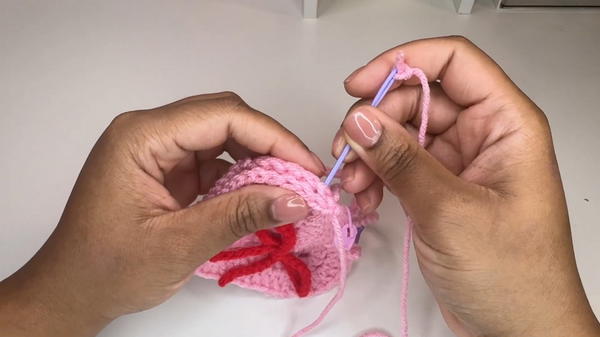
5. Making the Strap
Attach to the Heart:
- Secure yarn at the center loops of the second heart.
Crocheting the Strap:
- Chain 50 or your preferred length.
- Slip stitch back into the same stitch.
Secure the Strap:
- Tie off the yarn and weave in the ends.
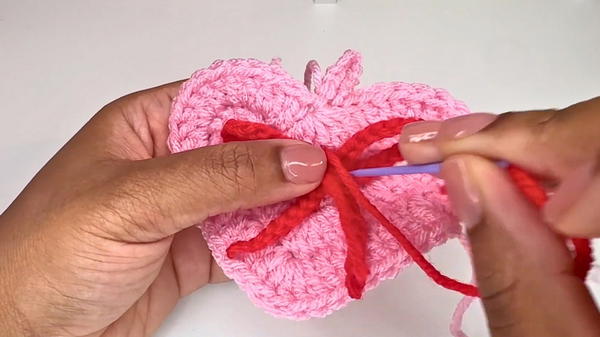
6. Adding the Decorative Bow (Optional)
Making the Bow Base:
- Create a slip knot and chain 45–55 (depending on your desired bow size).
- Cut the yarn and make a knot at each end to prevent fraying.
Shaping the Bow:
- Place the chain on one of the heart pieces.
- Shape it into a bow and ensure the center overlaps.
Securing the Bow:
- Use your yarn needle and extra yarn. Stitch through the center of the bow and around several times to hold the layers together.
- Tie and secure the yarn at the back.
7. Assembling the Pouch
Prepare for Sewing:
- Place the two heart halves together with the wrong sides facing inward.
- Use stitch markers, counting 5 stitches from the closure loop center towards each side, marking 10 stitches across the top as the pouch opening.
Sewing with a Whip Stitch:
- Cut 36" of yarn (or measure 7 widths of the pouch). Use a whip stitch to join the hearts along the edges, ensuring even alignment.
Finishing the Pouch:
- Tie off and weave in all loose yarn ends.
- Tie off and weave in all loose yarn ends.
Special Features
- Heart Shape: Elegant and universally loved, perfect for Valentine’s gifts or personal use.
- Dual Functionality: The pouch can hold small items or be used as a decorative accessory.
- Portable Design: Equipped with a strap for easy attachment to bags.
- Customizable Embellishment: Add bows, beads, or colors to personalize each pouch.
Tutor's Suggestions
- Yarn Selection: Use bright or contrasting colors to highlight the shape of the heart.
- Practice with 5-Together Decreases: If you're new to this stitch, practice it separately before starting the project.
- Align Stitches Carefully: When sewing the pieces together, ensure even alignment for a neat result.
Level of Difficulty
- Beginner-Friendly to Intermediate: The tutorial walks through every step meticulously, making it accessible even for motivated beginners. Intermediate crocheters may find it a breeze.
Uses
- Valentine's Day Gift: Fill with chocolates, jewelry, or small trinkets.
- Personal Accessory: Store earbuds, lip balm, or other small items.
- Decorative Item: Add to your bag or use as a home décor piece.
- Handmade Gift Bag: Present small treasures in a beautiful pouch.
Helpful Tip
When creating the closure loop, consider reinforcing it with additional stitches to ensure durability, especially if the pouch will be used regularly.
Conclusion
This small crochet heart pouch is a quick, versatile project with both practical and decorative appeal. Whether you gift it to a loved one or use it yourself, it’s a wonderful way to showcase your crocheting skills.


