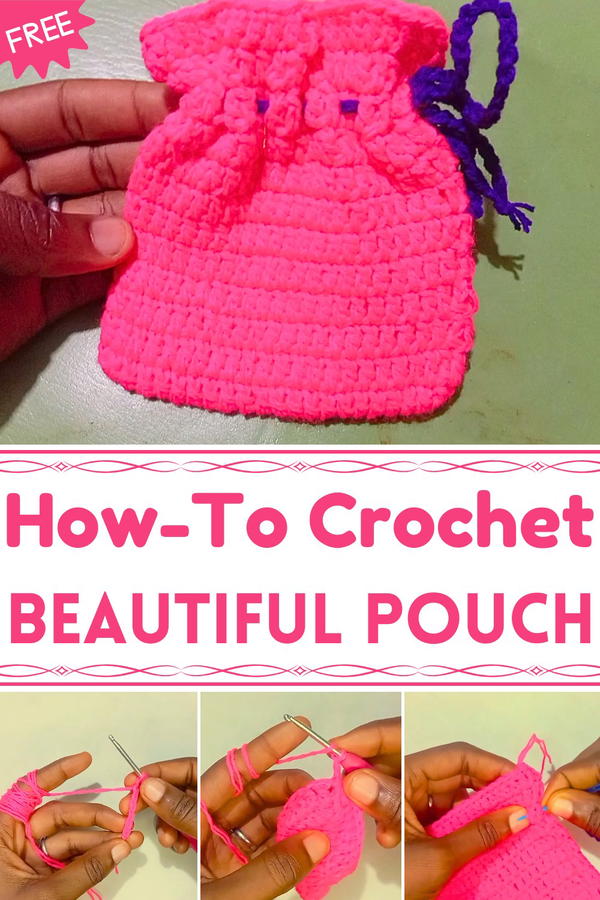
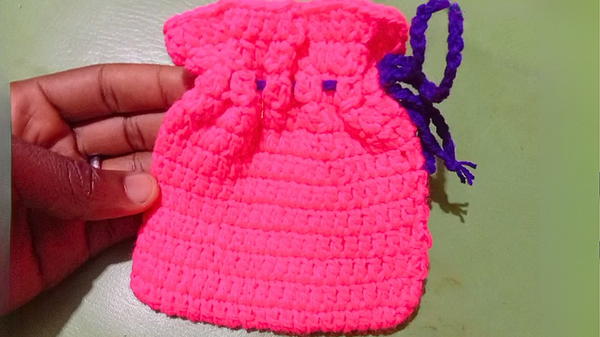
Carry style effortlessly with the Free Crochet Pouch Pattern, a versatile and charming accessory ideal for organizing essentials or gifting with flair.
Soft, versatile, and endlessly practical, a handmade crochet pouch can turn ordinary storage into something charmingly personal. Many crafters recall the joy of slipping small essentials—lip balm, coins, or keys—into a pouch that fits perfectly in a handbag or pocket, instantly adding order and style to daily routines. The Free Crochet Pouch Pattern offers a simple yet satisfying way to produce these handy accessories, whether for personal use or thoughtful gifting.
Stylish Crochet Pouch Pattern to Upgrade Your Accessories
Its compact size makes it ideal for organizing makeup, stationery, or even travel necessities, while its soft texture provides gentle protection for delicate items. Beginners will appreciate the approachable instructions, while more experienced makers can experiment with colors and stitch variations to reflect their unique taste. Beyond convenience, these pouches can also serve as eco-friendly alternatives to disposable bags, encouraging sustainable habits with flair.
They are excellent as small, heartfelt gifts, party favors, or quick handmade items for holiday seasons, offering both practicality and charm. By completing a pouch, makers experience a sense of accomplishment, a tangible reward that can brighten daily life or someone else’s day. This pattern transforms simple yarn into functional beauty, making everyday organization effortless and visually appealing, with a personal touch that only handcrafting can provide.
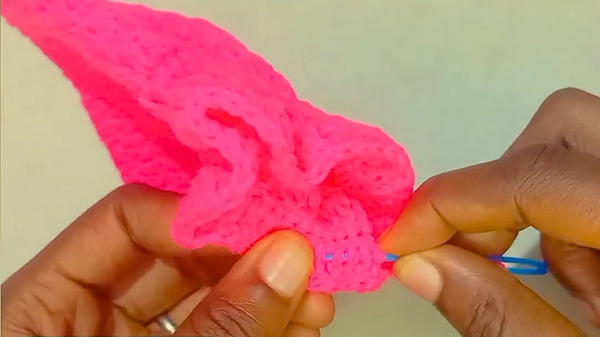
Materials Needed
- Yarn: Pink and purple.
- Crochet hook: Sized appropriately for your yarn.
- Scissors
- Stitch marker
- Yarn needle
Step-by-Step Crochet Instructions
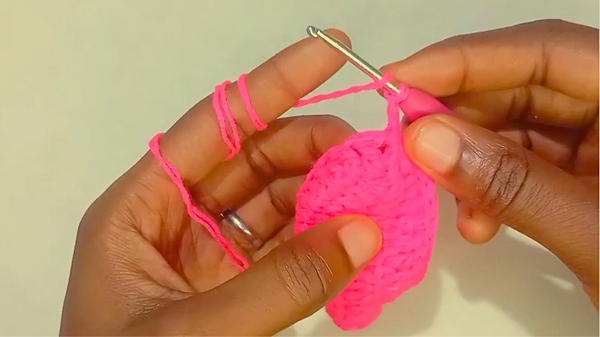
1. Foundation and First Row
- Start with your pink yarn and create a slip knot.
- Crochet 21 chains to form your foundation.

- Skip the first two chains; in the third chain, make 1 double crochet (dc) and place a stitch marker there for tracking.
- Continue making 1 double crochet in each chain across the row.
2. Increasing at the End of Row 1
- At the last chain of the first row, make 4 double crochets into the same stitch.
- Continue to the next stitch on the opposite side and start crocheting 1 double crochet in each stitch again.
- At the last stitch of this side, make 3 double crochets (instead of 4).
3. Closing Row 1
- Remove the stitch marker from the first two chains of the row.
- Close the row with a slip stitch.
- Chain 2 stitches to start the next row.
4. Repeating Double Crochet Rows (Rows 2–11)
- In each row, make 1 double crochet in each stitch across.
- Always close each row with a slip stitch, then chain 2 stitches to begin the next row.
- Repeat this process until you complete a total of 11 rows, including Row 1.
5. Finishing the Base
- After completing the 11th row, close it with a slip stitch, chain 1, and fasten off.
6. Adding the Purple Cord
- Use the purple yarn to make a chain of 100 stitches.
- Fasten off, leaving a long tail to work with. Pull the yarn through to close completely.
7. Inserting the Cord
- With a yarn needle, insert the purple chain into the third row of the porch.
- Skip 2 stitches at a time as you weave the purple chain through the stitches.
- Once completed, tie the ends of the purple chain securely using a reef knot.
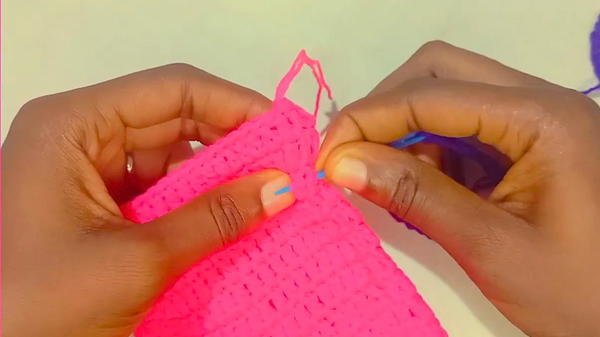
8. Hiding the Tail Yarn
- Cut the excess yarn, leaving a small tail.
- Use a yarn needle to hide the leftover tails between stitches for a polished look.
Special Features
- Functional and minimalistic design: Ideal for storing small items or as decorative storage.
- Cord weaving: Adds a neat and contrasting touch to the finish.
- Quick and simple: Suitable for those looking for projects that don't require intricate designs.
Difficulty Level
This project is ideal for beginners who are comfortable with basic stitches, like double crochets and slip stitches, and ready to practice repetitive patterns. It does not require advanced skills, making it perfect for developing confidence in your crochet technique.
Tutor's Suggestions
- Use a stitch marker to keep track of key stitches—this helps avoid losing count during rounds.
- Ensure proper tension throughout the project to maintain a consistent look.
- Carefully weave in the cord to avoid uneven placement across the third row.
- Regularly check placement when tying knots for the cord to ensure balance.
Uses and Applications
- Storage: Perfect for organizing accessories, coins, or small personal items like clips and keys.
- Gift: A thoughtful and practical handmade present for friends and family.
- Decor: A stylish addition to a workspace or vanity.
Tip
When weaving the cord into the fabric, start at a visible spot so you can quickly catch any mistakes early. This ensures you don’t have to undo large portions of your work.
Conclusion
This crochet porch project is a blend of functionality and simplicity, offering an opportunity to practice basic stitches while creating something practical and appealing. The step-by-step process ensures ease and clarity, resulting in a finished item that is both beautiful and useful.


