Carry essentials with charm using this Free Crochet Mini Potli Bag Pattern, offering a stylish, handmade touch that enhances any outfit with elegance.
Small bags have long served as practical companions, keeping essentials organized while adding a touch of personal style. Among these, compact drawstring bags, often called potli bags—have been cherished for their portability and versatility, offering a charming way to carry coins, accessories, or small keepsakes. The Free Crochet Mini Potli Bag Pattern provides a guide to create a delicate yet functional accessory that combines tradition with handcrafted elegance.
Fresh Crochet Mini Potli Bag Pattern with Quick Assembly
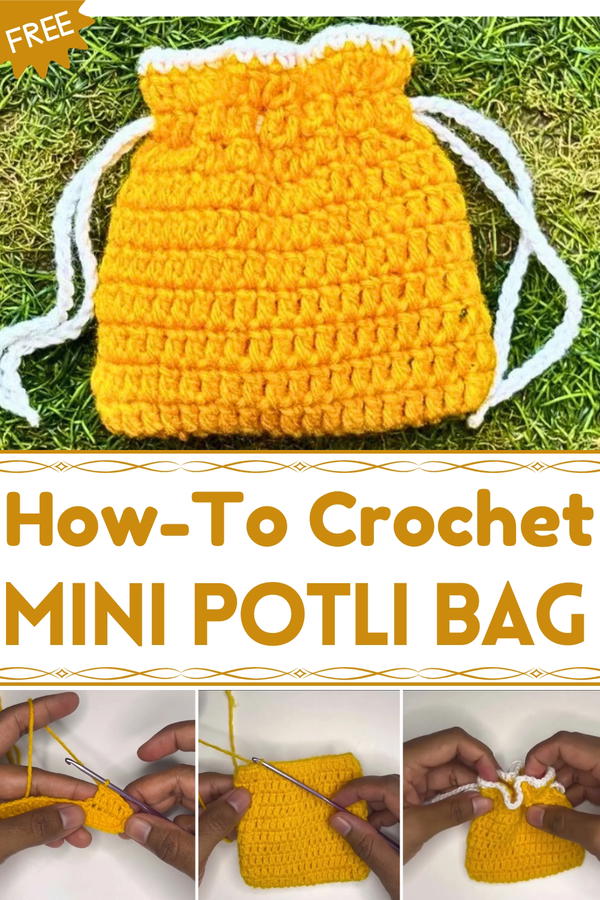
Lightweight and sturdy, these mini bags can be used for casual outings, festive occasions, or as thoughtful gifts, adding both charm and utility to everyday life. The textured crochet stitches offer durability and visual appeal, while the drawstring closure ensures that contents remain secure and easily accessible. Step-by-step instructions make the project approachable for both beginners and experienced crocheters, allowing the process to be as enjoyable and rewarding as the finished piece.
Beyond practicality, creating the bag provides a calming, mindful experience, giving crafters a sense of accomplishment with each completed stitch. Finished potli bags can be customized in colors, embellishments, or sizes, transforming simple yarn into a versatile accessory that carries personality, functionality, and handcrafted beauty, proving that even the smallest items can make a lasting impression.
Materials Required
- Yarn: Acrylic yarn is used in this tutorial, but any yarn of your choice will work. The recommended yarn details are in the video description.
- Crochet Hook: 3mm crochet hook for a neat and tight finish.
- Scissors: To trim excess yarn.
- Yarn Needle: For weaving in loose ends.
Step-by-Step Instructions
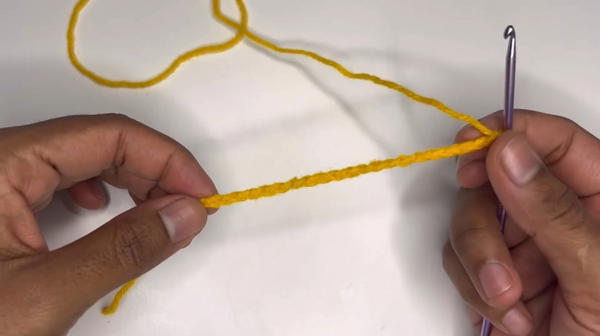
Step 1: Create the Foundation Chain
- Start with a slip knot.
- Make 21 chains (this represents the width of the Potli Bag).
- Customization Tip: You can increase the number of foundation chains to make the bag wider.
- Skip the first two chains from the hook.
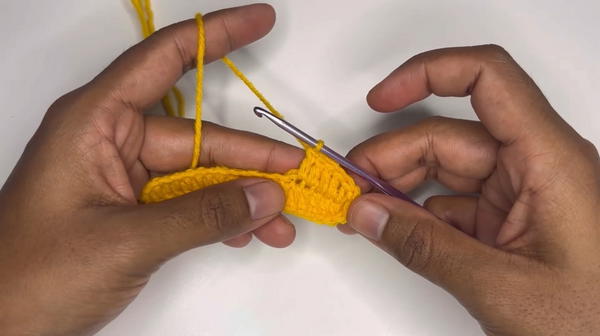
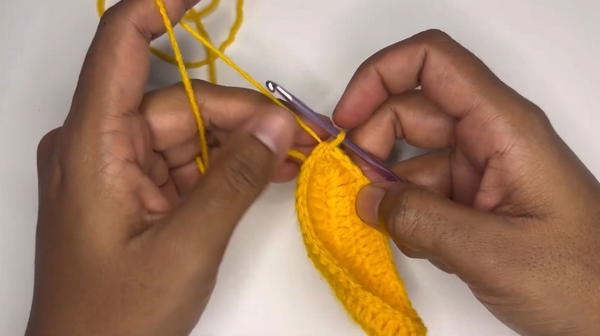
Step 2: First Round of Double Crochets
Begin working double crochets:
- Make the first double crochet in the third chain from the hook.
- For beginners, the tutor recommends marking this initial stitch with a stitch marker or pin for ease.
Make one double crochet in each chain until you reach the last chain.
In the last chain, make three double crochets to turn the corner.
Work along the opposite side of the foundation chain:
- Make double crochets in each chain along the reverse side.
Finish the round:
- In the first chain (where you started), make two additional double crochets for symmetry.
- Join the round by making a slip stitch in the marked first stitch. Tighten the slip stitch slightly to maintain neatness.
- By the end of this round, there should be 40 double crochet stitches in total.
Step 3: Subsequent Rounds
Start the new round by chaining two stitches. This acts as the height for the first double crochet.
- To avoid confusion, mark this as the starting stitch if you're a beginner.
For the second round:
- Make one double crochet in each stitch (no additional stitches in corner spaces).
- Close the round with a slip stitch in the first double crochet of the round.
From round 3 to round 10, repeat the pattern from round 2:
- Chain two stitches to start the round.
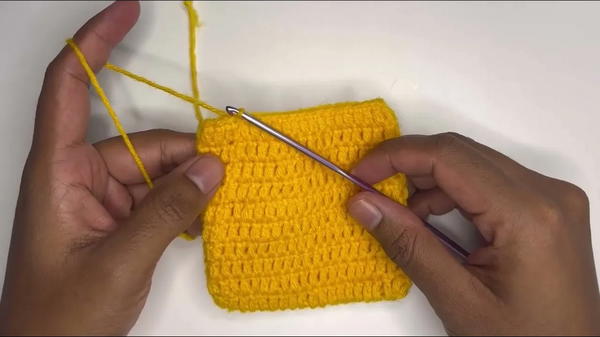
- Crochet 40 double crochet stitches in total, one in each stitch.
- Close each round with a slip stitch.
- Chain two stitches to start the round.
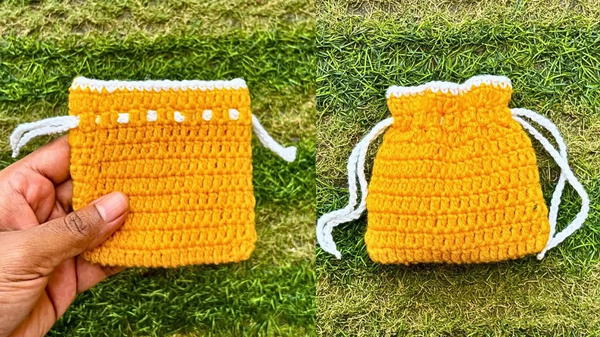
Step 4: Adding the Border
- Optional but recommended: Add a new border color for a decorative edge.
- Attach the new yarn color into any stitch.
- Work a round of single crochets:
- Make one single crochet in each stitch.
- Weave in loose threads while working the border for a cleaner finish.
- Close the border round with a slip stitch.
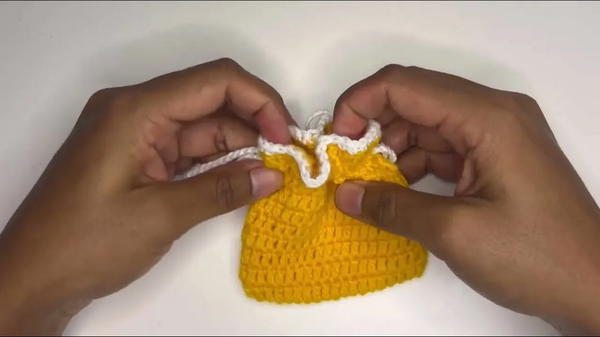
Step 5: Create the Drawstrings
For the drawstring:
- Start with a slip knot.
- Chain a total of 70 chains to form the string.
- Cut the yarn, leaving 2–3 inches extra, and tighten the last chain to secure.
Repeat the process to make the second drawstring.
Attach the drawstrings to the bag:
- Insert the drawstring into round 9 of the bag.
- Use a consistent pattern:
- Pull the string out of 2 stitches, skip 1 stitch, and repeat.
- Insert the second drawstring using the same pattern but starting from the opposite side of the bag.
Knot the ends of the drawstrings and trim any excess yarn.
Special Features
- Beginner-Friendly Design: Simple stitches (double crochet and slip stitches) make it accessible even for newcomers.
- Customizable Size: Change the number of chains for width or increase the number of rounds for length.
- Functional Yet Compact: Though the bag appears small, it can hold a significant amount of items, making it ideal for carrying essentials.
- Flexible Yarn Choice: You can experiment with different yarn types and colors to match your style.
Level of Difficulty
The Potli Bag project is beginner-friendly. The tutorial covers foundational techniques like double crochet, slip stitching, and single crochet. It also explains how to mark stitches, making it less intimidating for first-time crafters.
Tutor’s Suggestions
- Mark Your Stitches: Beginners should use stitch markers or pins to avoid confusion when closing rounds.
- Maintain Stitch Count: Always count your stitches at the end of each round to ensure there are 40 stitches.
- Secure Loose Ends: Weave in the loose yarn tails as you crochet for a polished appearance.
- Experiment with Borders: Use complementary or contrasting colors for the border and drawstrings to add a unique touch.
Uses
- Utility Bag: Perfect for carrying small items like makeup, jewelry, or coins.
- Gift Bag: Use it as a decorative pouch for gifting during the festive season or special occasions.
- Home Décor: Acts as an elegant décor item to store small trinkets.
- DIY Projects: A great way to practice basic crochet skills while creating something functional.
Tip
Pro Tip: When working on the drawstrings, ensure the pattern of insertion remains consistent. This helps the bag pull closed evenly when the drawstrings are tightened.
Conclusion
This Potli Bag tutorial is an excellent project for beginners to learn the basics of crochet while creating something practical and stylish. You can easily customize the size, color, and design to suit your personal preferences. By following the clear and simple instructions, you’ll end up with a beautiful handcrafted bag that can be used for a variety of purposes.


