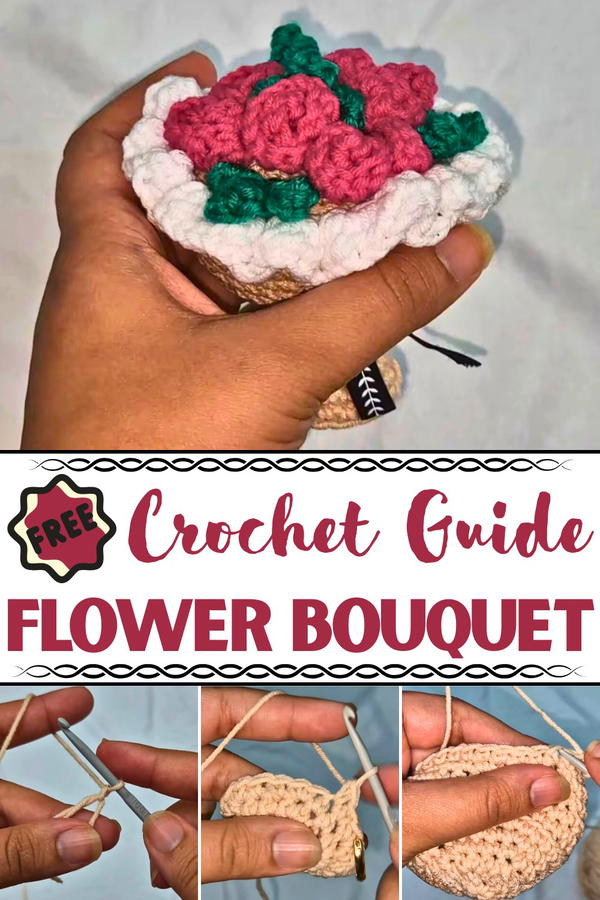
Delight your senses with the Free Crochet Flower Bouquet Pattern that brings timeless charm, lasting beauty, and a thoughtful handmade touch.
A fresh bouquet has always been a timeless symbol of affection, yet blooms often wilt before memories fade. That’s where artistry steps in—with the charm of handmade petals that never lose their luster. The Free Crochet Flower Bouquet Pattern offers a brilliant alternative to traditional florals, capturing the softness of yarn and the brilliance of color in every stitch. Each flower showcases intricate texture and lifelike structure, giving your bouquet a natural yet playful flair.
Make Long-Lasting Floral Decor Crochet Flower Bouquet Pattern
This piece serves more than just beauty; it holds purpose. Whether gifted for birthdays, anniversaries, or simply placed on a desk to brighten the day, it offers an enduring touch of thoughtfulness. The bouquet is lightweight, reusable, and never needs water, perfect for allergy sufferers or those who love florals without the fuss. Easy to customize in various sizes and shades, it's ideal for adding personality to home decor, party centerpieces, or meaningful gifts.
More than a visual delight, it delivers the satisfaction of handmade keepsakes with sentimental value. The joy lies not only in its presence but in the story it holds, lasting longer than any fresh bouquet ever could. A floral touch, minus the fleeting season.
Special Features of the Project
- Timeless Gift: Unlike real flowers, this bouquet lasts a lifetime, serving as a sentimental memento.
- Customizable Design: You can use any yarn colors to create personalized flowers and leaves.
- Eco-Friendly Craft: Perfect for repurposing leftover yarn scraps.
- Versatile Use: Suitable for gifting to loved ones, teachers, or as decorative pieces for weddings.
Level of Difficulty
- Beginner-Friendly: The tutorial features easy-to-follow instructions to create the bouquet base, flowers, and leaves.
- Intermediate Techniques: Includes stitches like single crochet, double crochet, half-double crochet, increases, decreases, and working in back/front loops.
- Clear Demonstrations: Visual aids are provided for techniques like the magic ring and slip stitches, making it accessible for those new to crochet.
Tutor's Suggestions and Materials Needed
Materials Needed
- Yarn: Sport-weight yarn (or medium-weight yarn for larger projects) in different colors.
- One for the bouquet base.
- One for the leaves.
- One or two colors for flowers.
- Crochet Hook: Size 2 mm (use a larger hook for thicker yarns).
- Stuffing: Minimal stuffing, such as polyfill, fiberfill, or old pillow stuffing.
- Ribbon: For tying the bouquet (optional; a crocheted string can be substituted).
- Other Accessories: Stitch marker, scissors, and yarn needle.
Tutor's Suggestions
- Adjust the hook size or yarn type based on your preference for the bouquet’s size.
- Use scrap yarn for eco-friendly crafting.
- Add stuffing gradually to avoid gaps and ensure the bouquet holds its shape.
- Stitch securely when creating flowers to prevent unraveling.
Step-by-Step Instructions
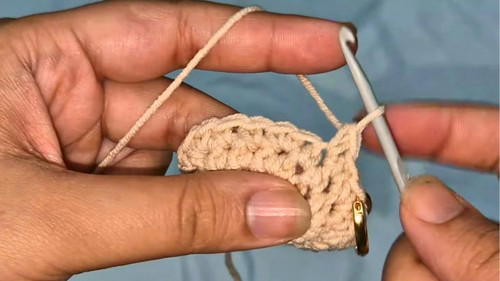
Creating the Bouquet Base
Magic Ring: Begin by creating a magic ring. Crochet six single stitches into the ring and pull to tighten the tail end.

Increase Rows:
- Row 2: Place two single crochets in each stitch (12 stitches in total).
- Row 3: Alternate between one single crochet and an increase (18 stitches).
- Row 4: Two single crochets followed by an increase (24 stitches).
- Continue similarly to grow the circle: three single crochets followed by an increase, then four single crochets followed by an increase, etc., until reaching 36 stitches.
Shaping the Base with Back-Loop Stitches: Work single crochets into back loops for one row to create depth.
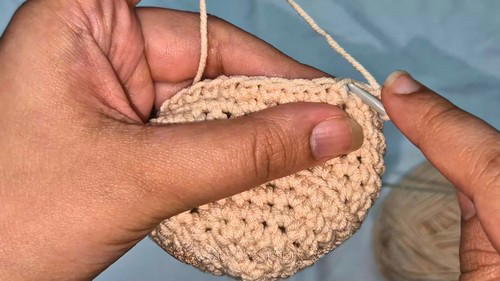
Forming the Bouquet Shape: Crochet four regular rows with single stitches to finalize the shape. Add stuffing before decreasing rows.
Adding Handle to Bouquet
- Create the Handle Top: Chain three stitches and place three double crochets into the first stitch. Repeat around to form a circle (18 stitches).
- Handle Rows: Crochet rows of single stitches to form the handle, leaving a long tail at the end to secure gaps with stitching.
Adding a Frill Design
- Locate Row 6: Work into the hanging front loops.
- Row 1 of Frill: Place single crochets in these loops to create a fan-like effect.
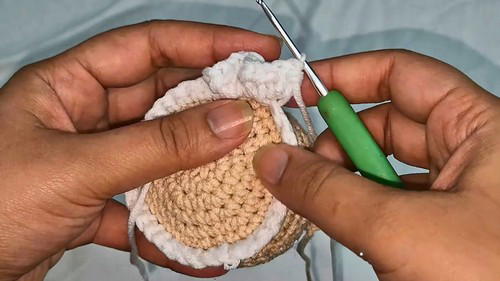
- Row 2 of Frill: Alternate between three half-double crochets in front and back loops, forming decorative ruffles.
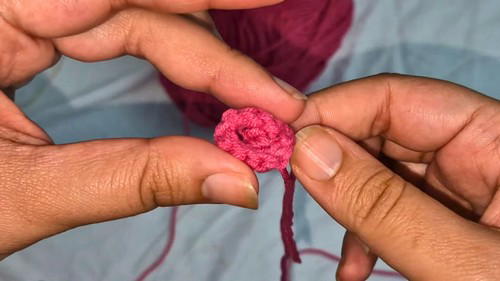
Creating Flowers
- Chain Stitches: Start with eight chains and work single and double crochet stitches to form petal-like shapes.
- Curl the Flower: Roll the completed stitch pattern into a spiral and secure with a slip stitch. Use a needle to secure the shape.
Creating Leaves
- Magic Ring: Start with three single stitches into a magic ring and chain three.
- Leaf Shape: Crochet single and half-double stitches into subsequent chains and tie with slip stitches. Repeat for multiple leaves.
Assembly
- Add flowers and leaves around the bouquet using sewing or glue.
- Arrange and secure designs using stuffing if needed.
- Tie a ribbon around the handle for a finishing touch.
Uses of the Crochet Bouquet
- Thoughtful gifts for Valentine’s Day, weddings, anniversaries, or teacher appreciation days.
- Decorative centerpieces for events.
- Keepsake gifts for loved ones.
A Tip for Success
- Take Your Time with Details: To ensure your bouquet looks neat, spend extra time securely weaving in tails and sewing flowers and leaves. This prevents pieces from unraveling over time, especially if gifting the bouquet.
Conclusion
This crochet bouquet project combines creativity and sentimentality, offering crocheters a way to repurpose scrap yarn into meaningful gifts. The tutorial breaks down each step clearly, ensuring that even beginners can follow along and crochet a stunning bouquet.


