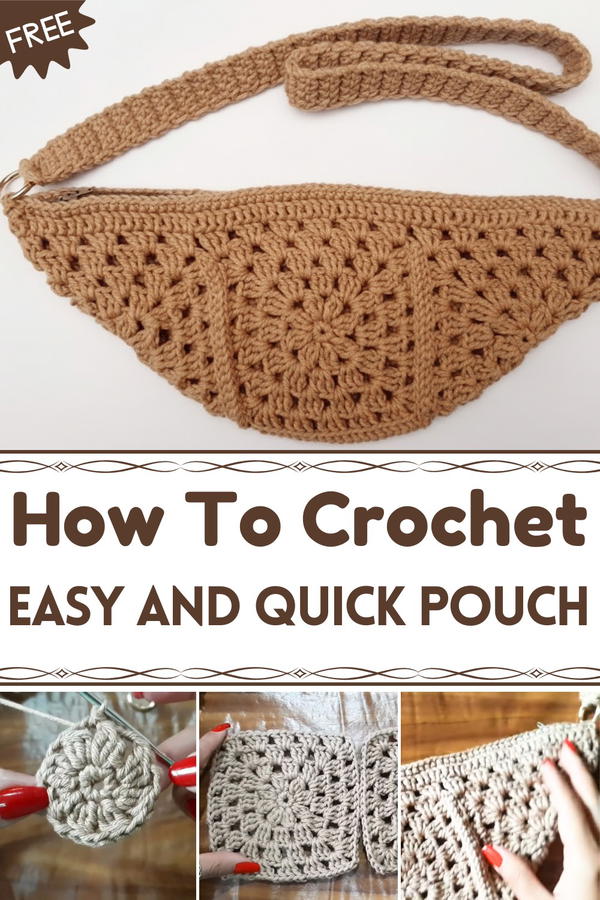
Organize your essentials with a Crochet Pouch Pattern that looks cute, feels sturdy, and adds a stylish touch to daily errands, travel, or gift ideas.
A small handmade bag that’s perfect for holding your treasures and little things is both useful and beautiful. This delicate crochet pouch shines with its soft texture and charming look, making it more special than ordinary bags. It’s just the right size to carry your phone, keys, coins, or makeup, keeping everything tidy and easy to find.
Easy-to-Follow Crochet Pouch Pattern for Quick Results
With pretty stitches and a simple shape, the pouch feels gentle in your hands and looks wonderful wherever you take it. Choose from a rainbow of colors to match your style or mood, making each pouch truly one of a kind. Easy to carry, it fits in your bigger bag or can be taken alone when you want to travel light. Whether for yourself or as a gift, this lovely pouch blends beauty and function in a playful, everyday way that anyone will appreciate.
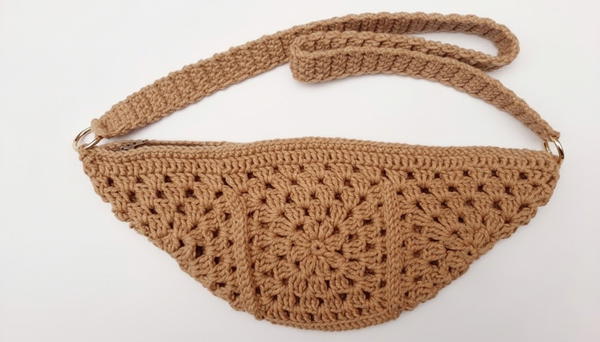
Crochet Fanny Pack Pattern
Difficulty Level
Intermediate — This pattern requires knowledge of single crochet, slip stitch, double crochet, treble crochet, joining crochet pieces, and sewing a zipper. Patience and attention to detail will be rewarded with a beautiful finished bag.
Materials Needed
- Crochet hook size 3.5 mm
- Baroque Maxcolor yarn or similar, color of choice
- Tapestry needle
- Durable zipper (preferably visible, matching the yarn color)
- Sewing thread and needle
- Articulated rings for strap attachments
- Scissors
- Optional: denim glue (for securing knots)
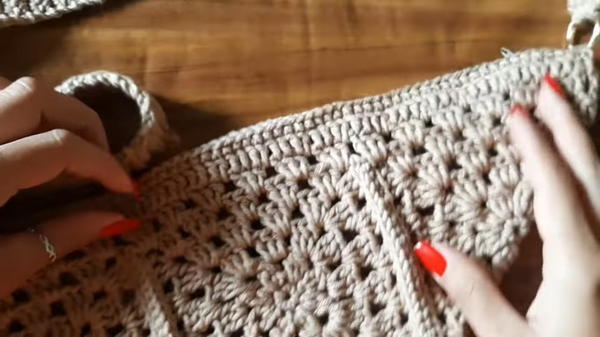
Special Features
- Constructed from four identical crochet squares with a raised texture pattern
- Secure zipper closure for functionality
- Adjustable crossbody strap attached with rings
- Durable finish with securely sewn seams and hidden knots
- Trendy, versatile style perfect for travel and casual wear
Pattern Steps
Step 1: Create Initial Crochet Square
- Using the 3.5 mm crochet hook and your yarn, make a foundation loop and chain 8.
- Join to form a loop by slip stitching into the first chain.
- Work 8 single crochet (sc) stitches evenly around the loop.
- Close the round by slip stitching into the first sc.
- Pull the yarn tail to close the center loop tightly.
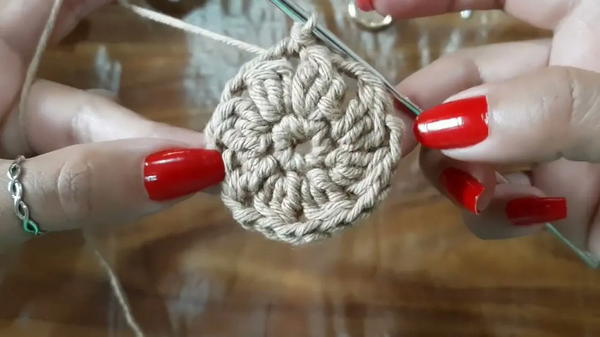
Step 2: Tire Stitch Texture (Base Row)
- Insert the hook into the base stitches and work slip stitches around as needed to prepare for the next round.
- Chain 2 to start the next round.
- Work three unfinished treble crochet (TR) stitches in the same space: yo, insert hook, pull up a loop but do not finish the stitch.
- After the 3 unfinished TRs are on hook, yarn over and pull through all loops to complete the cluster.
- Chain 2.
- Repeat the 3 unfinished TR stitches in the next space.
- Continue this pattern (3 TR clusters separated by chains) around to create a textured square pattern until you have 8 groups.
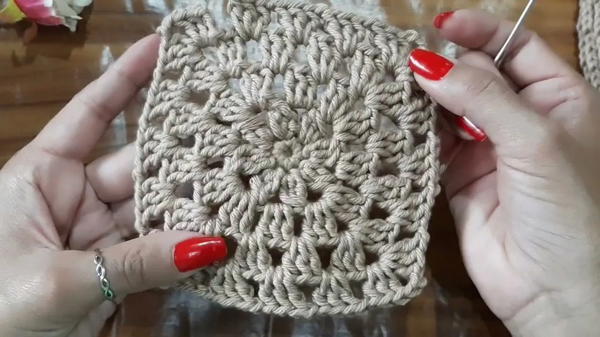
Step 3: Close the Square
- After completing the last cluster, chain 2 and join with a slip stitch to the second chain in your starting chain-2.
- Secure the end and weave in yarn tails.
Step 4: Repeat Squares (Make 4 Squares)
- Make 4 identical squares following Steps 1-3.
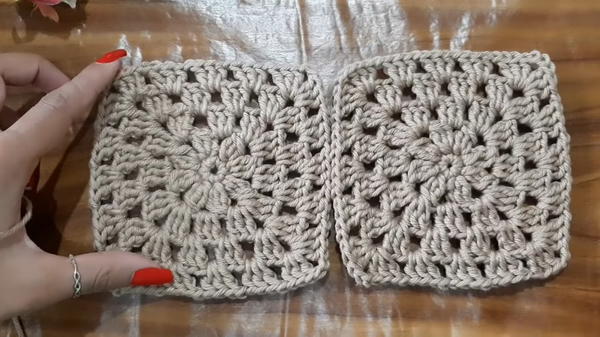
Step 5: Join Squares
- Place two squares wrong side to wrong side (inside out).
- Seam them together using slip stitches (sl st) or whip stitch along the edges, joining loops of both squares carefully by matching corner points.
- Join the remaining squares to form the bag’s body shape — a folded square pouch.
Step 6: Seam Formation
- Use low stitches around joined edges to create a sturdy seam, sewing with care to avoid loose stitches.
Step 7: Attach Zipper
- Position the zipper along the top opening of the bag.
- Using a sewing needle and thread matching the yarn color, sew zipper in place carefully. Keep zipper open during sewing for usability.
- Secure stitches and weave ends.
Step 8: Crochet and Attach Strap
- Attach one of the articulated rings to a side of the bag.
- Crochet a strap by chaining to desired length (ideally 77 cm for crossbody style; adjust length as needed).
- Work single crochet (sc) stitches evenly along chain for strength; finish the strap by enclosing loops around the ring with low stitches.
- Attach the other ring and repeat strap finishing.
- Knot securely, weave in tails, and add a drop of denim glue if desired for stability.
Step 9: Final Finishing
- Inspect seams, weave in any remaining yarn ends inside the bag for a clean look.
- Optionally add denim glue on knots for extra security.
Tutor’s Suggestions
- Use a visible, durable zipper to avoid issues with invisible zippers breaking.
- Adjust strap length before finishing to ensure comfortable fit.
- Take care with edges when joining squares for a neat look—matching loops exactly makes sewing easier.
- Use color tones that blend well for a professional finish.
- Denim glue is optional but helps keep knots secure over time.
Uses
- Stylish hands-free accessory for shopping, walking, or travel.
- Great gift option for family and friends.
- Practical for outdoor events, festivals, and daily errands.
- Supports carrying essentials safely and comfortably.
Tip
Measure your waist or preferred bag placement before making the strap. It’s easier to add length than shorten it, so start a bit longer and adjust as you try it on!
Conclusion
This crochet fanny pack is a fun, practical, and trendy project that doubles as a wearable art piece. With texture-rich squares, a sturdy zipper, and a comfortable strap, it’s perfect for everyday use and gifting. Following these clear steps, you’ll master the skills needed for joining, finishing, and creating beginner-friendly accessories with flair.