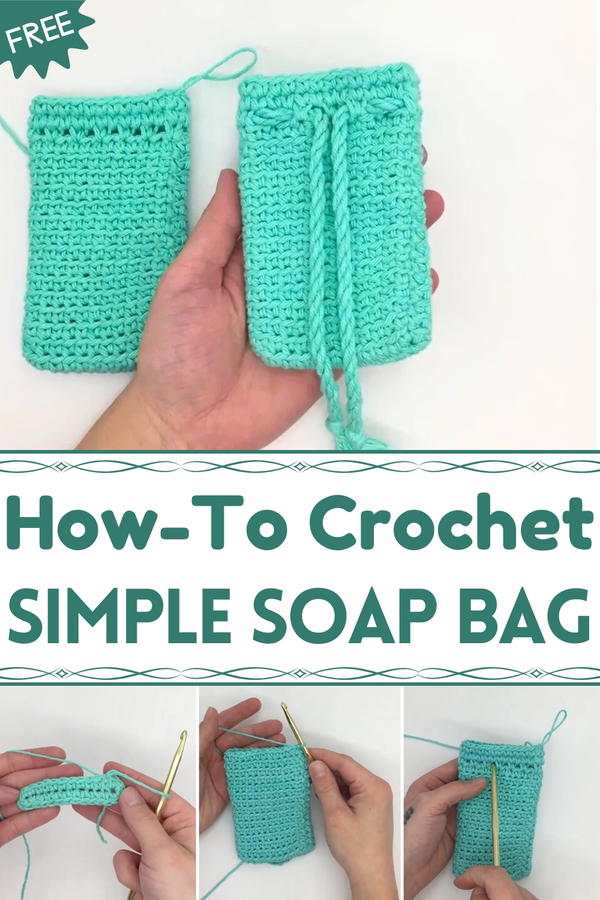
Elevate bath time with this Free Crochet Soap Bag Pattern, perfect for creating eco-friendly, charming holders that keep soaps fresh and stylishly organized.
In small, everyday rituals, even the simplest items can transform daily routines into moments of care and comfort. A handcrafted soap holder has long been appreciated not just for its practicality but for the gentle touch it brings to bathing. The Free Crochet Soap Bag Pattern introduces a charming way to combine functionality with aesthetic appeal. Lightweight yet durable, these bags allow soap to lather easily while keeping it protected, extending the life of each bar.
Charming Crochet Soap Bag Pattern Perfect for Every Bathroom
Their textured surface offers a subtle exfoliating effect, turning an ordinary wash into a soothing, skin-friendly experience. Beyond personal use, they make thoughtful gifts, travel companions, or sustainable alternatives to disposable holders, supporting eco-conscious habits. The open structure encourages quick drying, reducing residue and maintaining cleanliness in bathrooms or kitchens.
Simple steps guide crocheters of all levels, making it satisfying to complete each bag while experimenting with colors and yarn types to suit individual tastes. Beyond their practical purpose, these soap bags encourage mindful engagement with a routine task, promoting relaxation and small moments of accomplishment. Each finished piece blends utility with charm, turning a necessary daily habit into an opportunity for creativity and well-being, demonstrating how functional items can also carry warmth and care.
Special Features
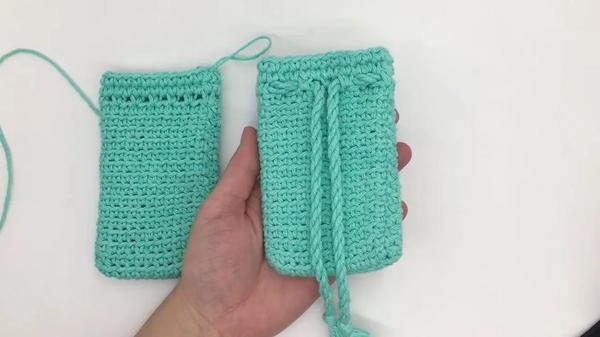
- Practical Design: The bag can hold a full bar of soap or small leftover soap pieces, providing versatility.
- Cotton Yarn: The tutor uses cotton yarn, which is eco-friendly, durable, and better suited for washing purposes.
- Textured Scrubbing Bag: The crochet stitches create a slightly textured surface, perfect for scrubbing.
- Customizable Size: You can easily adjust the size by adding or reducing stitches or rounds.
- Pull-String Closure: The bag includes a twisted rope for convenient closure, preventing soap from slipping out.
Level of Difficulty
This pattern is beginner-friendly, but the final product looks polished and functional. The tutor recommends patience with techniques like single crochet in the back loop and offers additional resources for beginners who need extra help with basic stitches.
Materials Required
- Yarn: Peaches & Cream cotton yarn (or another #4 medium-weight yarn).
- Hook Size: 5mm crochet hook (as recommended for the yarn).
- Scissors: For cutting the yarn cleanly.
- Tapestry Needle: For weaving in ends.
Tutor’s Suggestions
- Preview the Tutorial: The tutor strongly recommends watching the full tutorial once before beginning, to better understand the entire process.
- Proper Tension: Keep consistent tension throughout the project for a polished and uniform bag.
- Use Cotton Yarn: Cotton yarn is gentle on skin, durable, and suited for the purpose of washing.
- Weave-in Technique: Crochet over the tail ends during the project to minimize finishing work later.
Step-by-Step Instructions
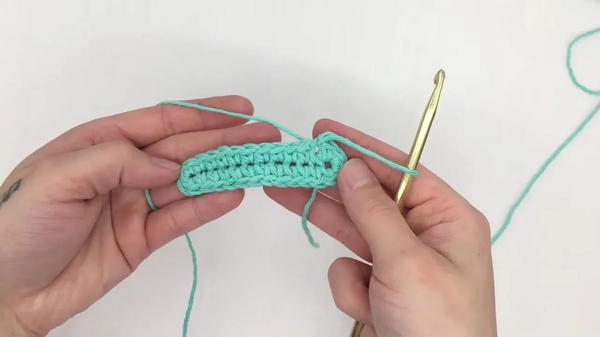
Step 1: Creating the Base (Round 1)
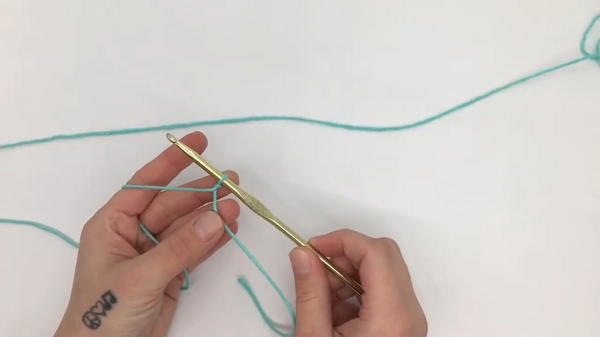
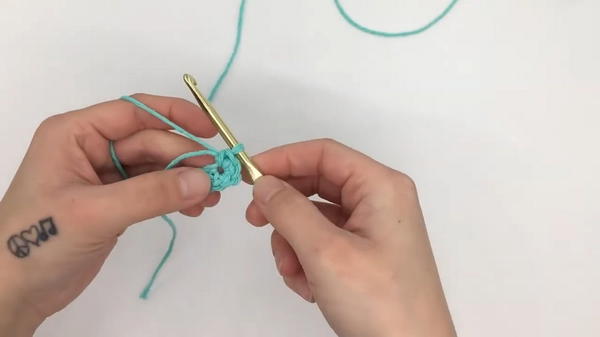
- Tie a slip knot on your 5mm hook.
- Chain 13 stitches.
- Single crochet into the second stitch from the hook, and in each stitch across the chain (totals 11 single crochets).
- In the last stitch of the row, work 4 single crochets to round the corner.
- On the opposite side of the chain, work 1 single crochet into each stitch until you reach the starting stitch.
- In the starting stitch, add 3 single crochets to round the opposite corner, creating a total of 28 single crochets around.
- Slip stitch to the beginning stitch to complete the round.
Step 2: Building the Bag (Round 2)
- Start with a chain 1 (does not count as a stitch).
- Single crochet into the back loop only of the first stitch.
- Continue single crocheting into the back loop only for each stitch around.
- Slip stitch into the first single crochet to complete the round (28 single crochets).
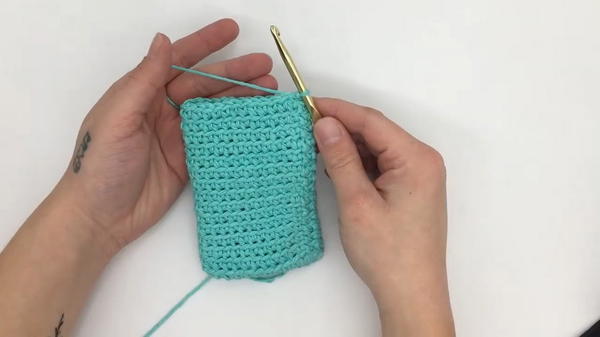
Step 3: Repeating the Pattern (Rounds 3–15)
- Repeat the process from Round 2, working single crochets into the back loop only for every stitch of the round.
- At the end of each round, slip stitch into the first stitch of the round.
- After completing Round 15, your bag should start to take shape with a boat-like base and tall sides.
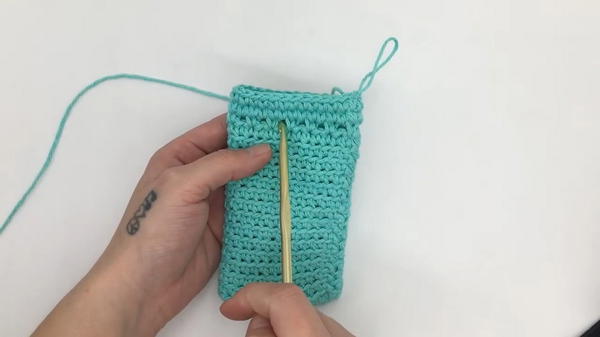
Step 4: Creating the Holes for the Drawstring (Round 16)
- Chain 1. Work 1 single crochet in the first stitch.
- Chain 1, skip the next stitch, and then single crochet into the following stitch.
- Repeat this pattern (chain 1, skip a stitch, single crochet) around the bag.
- At the end of the round, slip stitch into the first single crochet.
- You will have 14 single crochet stitches and 14 chain spaces.
Step 5: Solidifying the Top (Round 17)
- Chain 1. Work 1 single crochet in the first stitch.
- Single crochet over each chain space and into each stitch from the previous round.
- Complete the round with 28 single crochets and slip stitch into the first stitch to close the round.
Step 6: Final Round (Round 18)
- Chain 1. Work 1 single crochet in every stitch around.
- Slip stitch into the first stitch to complete the round, and fasten off your work.
Step 7: Adding the Drawstring
- Create a twisted rope for the drawstring. (The video links a separate tutorial for creating twisted ropes.)
- Weave the rope through the chain spaces created in Round 16, ensuring the two ends meet at the front for tying.
Uses of the Soap Bag
This soap bag is both functional and eco-friendly. It serves as a scrubbing pouch for full bars of soap or as a handy way to make use of leftover soap fragments. It can also be a thoughtful handmade gift or an item to sell at craft fairs.
Tip for Success
For a sturdier drawstring, consider double-stranding your yarn while making the twisted rope. Also, adjusting the number of chain stitches and rounds can help customize the bag to fit different soap sizes.
Conclusion
The crochet soap bag is a simple yet highly practical project for beginners and advanced crocheters alike. With just a few basic materials, you can create a reusable accessory that helps reduce waste while elevating your shower routine.


