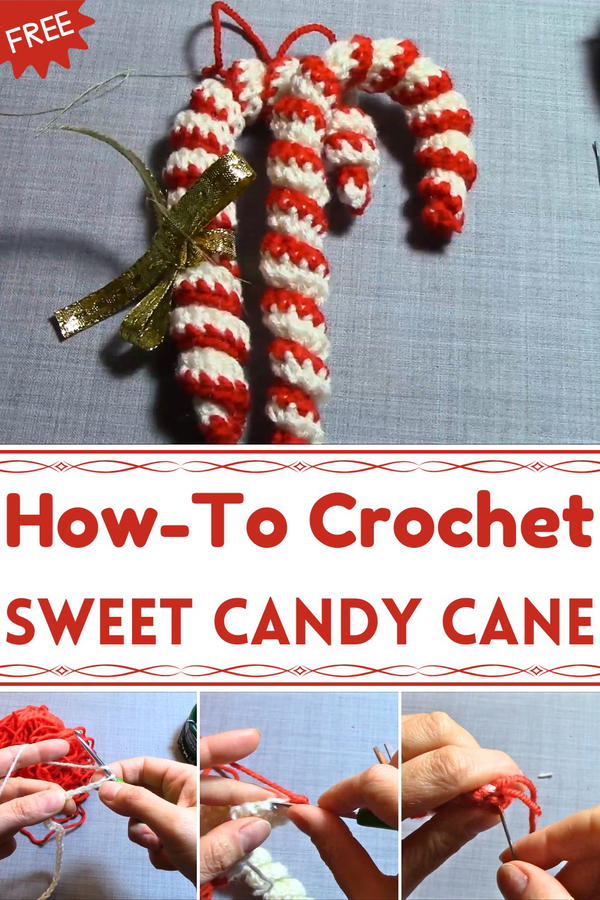
Sweeten your holidays with this Free Crochet Candy Cane Pattern, lovely for festive décor, handmade gifts, or adding cheerful touches to any space.
For many families, the striped candy cane has long symbolized the sweetness and warmth of the holiday season. The Free Crochet Candy Cane pattern captures that nostalgic charm in a handmade form that lasts year after year. Its classic red and white stripes bring instant festive cheer, making it perfect for adorning Christmas trees, wreaths, garlands, or even gift packages. Lightweight and soft, each candy cane adds a personal, cozy touch to seasonal décor without the fragility of real ornaments.
Festive Crochet Candy Cane Pattern for Cozy Christmas Decor
The project also offers a calming and mindful experience, helping makers relax while improving focus and coordination with each careful stitch. Ideal for thoughtful gifting, these crocheted candy canes make wonderful keepsakes for friends, family, or classroom exchanges. Multiple pieces can be grouped together for decorative arrangements, table accents, or stocking stuffers that radiate handmade warmth.
The Free Crochet Candy Cane pattern combines tradition, creativity, and practicality, resulting in a timeless piece that celebrates the heart of the holidays. Each finished cane brings a sprinkle of nostalgia and charm to every corner of the home, serving as a simple reminder of joy, comfort, and festive togetherness.

Step-by-Step Instructions
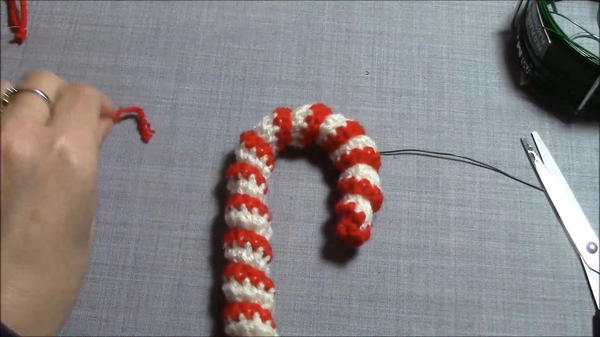
1: Materials Needed
- Yarn: White and red acrylic yarn (medium thickness).
- Hook: 3.5 mm crochet hook.
- Wire: A thin piece of wire longer than your candy cane (for structure).
- Scissors for cutting the yarn.
- Tapestry/Wool needle for sewing the ends.
- Optional: Ribbon for a bow to decorate the candy cane.
2: Starting the Candy Cane
Foundation Chain:
- Begin by chaining 35 stitches in white yarn. If you want your candy cane to be shorter or longer, adjust the number of chains accordingly.
- For a small version, you can chain 30 stitches.
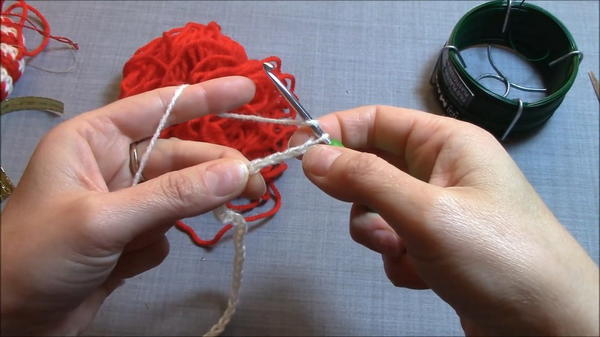
Double Crochet Rows:
- After finishing the chain, keep your finger on the last chain to secure it.
- Chain 3 more stitches (this counts as the first double crochet). Then, in the 4th chain from the hook, work 3 double crochets. Combined with the chain-3, this makes 4 double crochets.
- Into the next chain, work 4 double crochets. Repeat this pattern of working 4 double crochets into each chain across until you reach the end.
- This creates a curl-like effect as the stitches build up and gather.
Finish Off the Row:
- After completing the row, chain 1, and cut the yarn to secure the end. You will now have a curly white base for your candy cane.
3: Adding Red Stripes
Join the Red Yarn:
- Attach the red yarn at the beginning of your white base by pulling the yarn through and securing it.
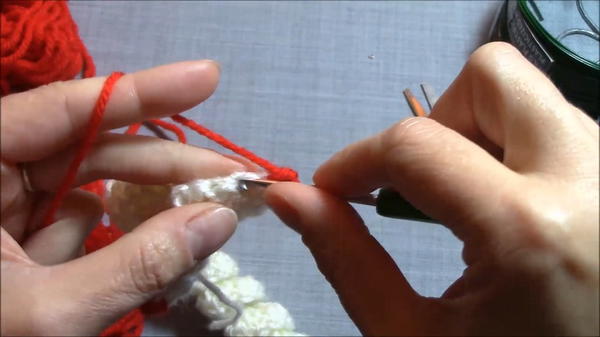
- Attach the red yarn at the beginning of your white base by pulling the yarn through and securing it.
Single Crochet Row:
- Work 1 single crochet into every double crochet stitch along the white base. Ensure you catch every stitch evenly to keep the structure neat.
Finish Off:
- At the end of the row, chain 1, and cut the yarn. You’ll now have the iconic candy cane striped effect.
4: Inserting the Wire and Shaping
Prepare the Wire:
- Cut a piece of wire slightly longer than your crocheted candy cane to ensure you can bend it into shape.
Wrap the Candy Cane:
- Thread the wire through the center of the crocheted piece, ensuring it runs along the length of the work.
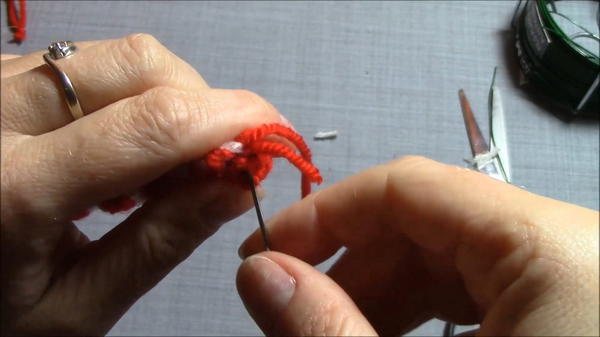
- Thread the wire through the center of the crocheted piece, ensuring it runs along the length of the work.
Sew Both Ends Shut:
- Use a tapestry needle with a bit of yarn to sew the ends of the candy cane securely. Fold any excess wire into small loops at each end to prevent sharp edges from being exposed. Wrap the loops with additional yarn to ensure they’re covered.
Shape the Candy Cane:
- Bend the wire into the traditional candy cane shape—curving one end into a hook and straightening the other.
5: Final Touches
- Add a ribbon bow around the candy cane if desired.
- Alternatively, leave it as-is for a classic look.
Special Features
- Easy-to-follow pattern: Includes only basic stitches (chains, double crochets, and single crochets), making this perfect for beginners.
- Curly texture: The use of 4 double crochets per chain gives it a natural curl for a realistic candy cane effect.
- Customizable size: You can adjust the length and proportions to suit your preferences simply by changing the number of foundation chains.
- Structural wire: Adds durability and allows you to shape the candy cane as needed.
Level of Difficulty
Beginner-Friendly: This project uses only basic stitches and techniques. The addition of wire may require slightly more care, but overall, it’s great for those new to crochet or looking for an easy holiday project.
Tutor’s Suggestions
- Adjust Chain Count: You can customize the candy cane’s length by adding or reducing chains on the foundation row.
- Keep Stitches Tight: Use a smaller hook (3.5 mm) to ensure a tight finish and prevent gaps in the stitches.
- Secure the Wire Ends: Fold the wire into loops before sewing to prevent sharp ends and ensure safety.
- Decorate Playfully: Add bows or festive embellishments for extra charm.
Uses
- Christmas Tree Decorations: Perfect for hanging as ornaments or decorating garlands.
- Gift Add-ons: Tie them to holiday gift boxes for a cute handmade touch.
- Festive Décor: Use as part of a holiday centerpiece or mantel decoration.
Tip
When sewing the yarn at each end, ensure the wire loops are tightly covered and stitched into place. This keeps the candy cane durable and prevents the wire from slipping or poking out.
Conclusion
These crocheted candy canes are a quick and easy holiday crochet that adds a handmade personal touch to your festive decorations. Their simplicity makes them beginner-friendly, yet their striped design and structural shape give them professional charm.


