Moo up the cuteness with this Free Crochet Milk Cow Amigurumi Pattern making an adorable farm friend for gifts display or playful décor.
On a peaceful day in the countryside, the sight of gentle cows grazing often brings comfort and calm and this same warmth is captured through yarn in the form of a milk-cow amigurumi. The Free Crochet Milk Cow Amigurumi Pattern turns a simple skein into a delightful handmade toy with endearing details and practical uses. From nursery decor to a thoughtful gift or even a charming bag accessory, its versatility makes it a favorite for crocheters who enjoy blending skill with creativity.
Fun Crochet Milk Cow Amigurumi Pattern to Brighten Playtime
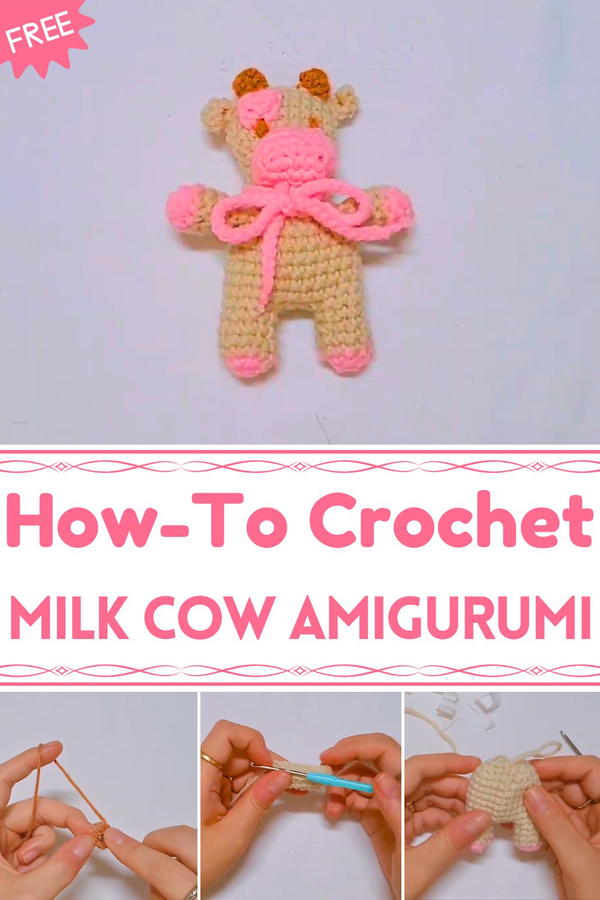

The pattern guides you through each stage, beginning with a rounded head worked in continuous rounds, fitted with safety eyes and a stitched muzzle for character.
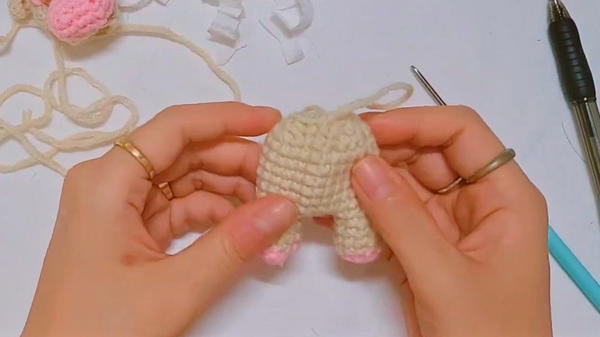
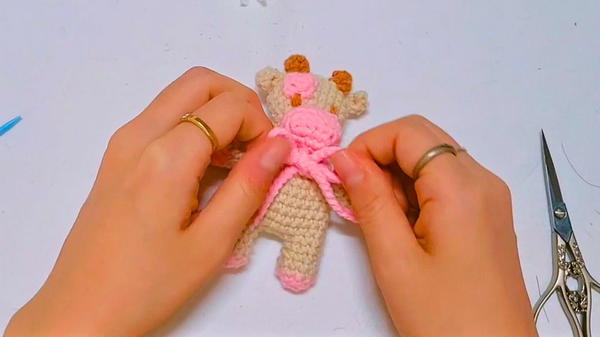
Small horns and soft ears are shaped and attached, giving the cow its recognizable expression. The body is crocheted separately, stuffed for firmness, and paired with four short legs that let it sit upright.

A playful tail, a neat udder, and scattered black spots bring authenticity to the figure, while accessories like ribbons or bells can be added for extra charm.
Materials & tools
Main yarn (white) and contrast yarn (black) plus a small amount of pink for muzzle/udder.
Crochet needle (commonly 3.0–4.0 mm for small amigurumi).
Polyester stuffing (polyfill).
Safety eyes (6–10 mm) or yarn for embroidered eyes.
Tapestry needle, stitch marker, small scissors.
Optional: key-ring hardware, small bell, or ribbon.
Special features shown
Classic rounded proportions with a prominent cute muzzle.
High-contrast milk-spot placement for instant cow recognition.
Option to scale size up or down for plush toy or key-ring.
Closeups of facial detail and clean finishing techniques.
Level of difficulty
This is beginner-friendly for someone who is familiar with basic single crochet and magic rings. This is intermediate for learners who are new to assembly and shaping, because they require creating multiple small parts and performing neat sewing.
Tutor’s suggestions
use a slightly smaller needle than the yarn label suggests for tighter stitches; place safety eyes before stuffing; stuff in small increments; pin parts in place for trial assembly before stitching; hide ends neatly and reinforce attachment points for durability.
Uses
Baby-safe plush (use embroidered eyes instead of safety eyes).
Nursery or shelf decor.
Bag charm or key-ring (make smaller and attach hardware).
Handmade gift or craft fair item.
Tip
For the firmest finish, stuff the head and body in layers: add a small core of stuffing first, close partially, then add extra stuffing through the opening while shaping with your fingers. This reduces lumps and helps the cow keep its rounded silhouette.
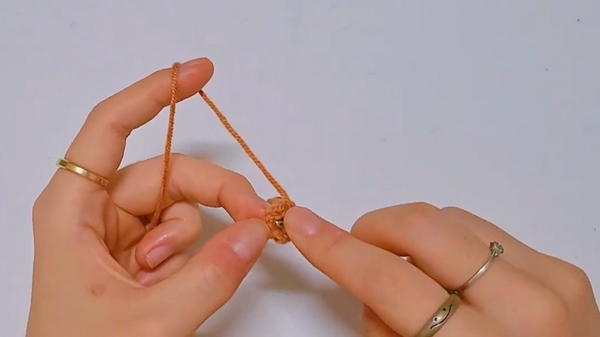
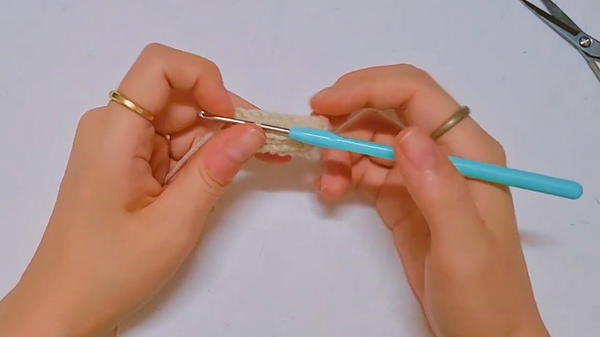
Step-by-step
This Milk-Cow amigurumi tutorial demonstrates how to make a small cuddly cow by crocheting separate parts (head, body, legs, ears, horns, tail and spots) and sewing them together for a neat finish. The instructor shows shaping, facial detail, spot placement, and assembly techniques suitable for a keepsake, nursery decor or a bag charm.
Short conclusion
This Milk-Cow amigurumi is a satisfying small project that reinforces basic amigurumi skills (magic ring, shaping, joining parts) and allows lots of personalization through colors and accessories. With careful stuffing and neat sewing, the finished toy is durable and adorable.


