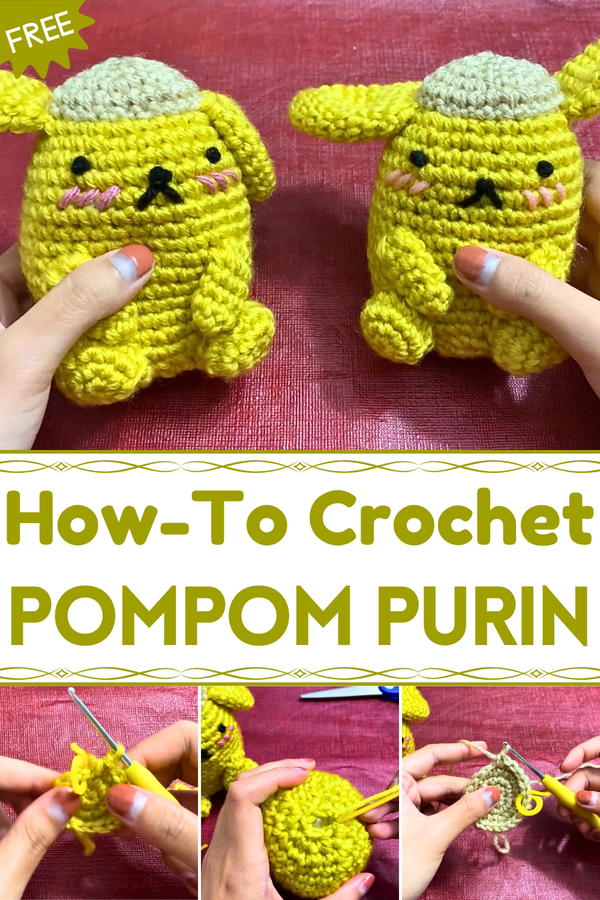
Bring cheerful fun to life with this Free Crochet Pompompurin Amigurumi Pattern, a handmade creation perfect for gifts, décor, or cuddly companions.
Beloved characters often inspire a sense of joy and nostalgia, turning everyday spaces into little corners of happiness. A Free Crochet Pompompurin Amigurumi pattern brings that cheerful charm into a soft, handmade form that can be treasured by fans of all ages. Perfect as a cuddly companion, a decorative accent, or a thoughtful gift, this amigurumi adds personality and warmth to bedrooms, desks, or shelves. Crocheting each section encourages a calm, focused rhythm, allowing makers to enjoy a meditative process while producing a playful, huggable figure.
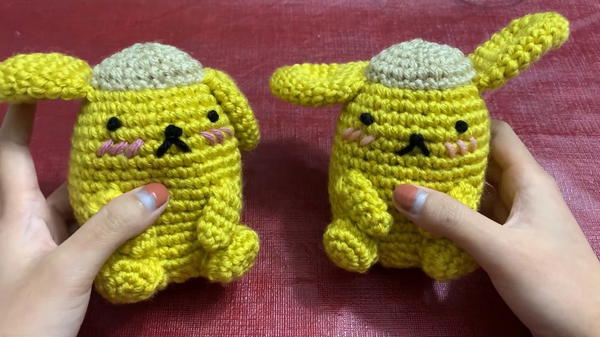
Bright Crochet Pompompurin Amigurumi for Cuddly Friends
Its lightweight yet sturdy construction ensures that it holds shape while remaining soft to the touch, making it ideal for display or gentle play. Color variations and small details allow for customization, whether staying true to the original character or experimenting with creative touches that reflect personal style. Beyond personal enjoyment, the finished Pompompurin serves as a delightful gift for friends, family, or fellow enthusiasts, offering both charm and lasting appeal.
Compact and easy to store, it can accompany travels or seasonal décor, bringing smiles wherever it appears. A Free Crochet Pompompurin Amigurumi pattern transforms yarn into a lovable companion, combining creativity, relaxation, and a whimsical touch that brightens any space.
Materials Required
- Yarn Colors:
- Yellow Yarn: For the body, arms, ears, and feet.
- Brown Yarn: For the iconic hat.
- Black Yarn: For the eyes, nose, and mouth (optional if using safety eyes).
- Pink Yarn: For blush accents (optional but recommended).
- Crochet Hook: 2.5mm crochet hook for tight stitching.
- Other Tools:
- Scissors.
- Stitch marker.
- Tapestry needle/darning needle.
- Fiber filling for stuffing.
Special Features
- Adorable Character Design: Perfectly captures Pom-Pom Purin’s signature look, complete with a hat and blush details.
- Compact Size: Small and handheld, making it an ideal collectible or gift.
- Beginner-Friendly Construction: Uses basic stitches (magic circle, single crochet, increases, and decreases) along with simple sewing for assembly.
Step-by-Step Instructions
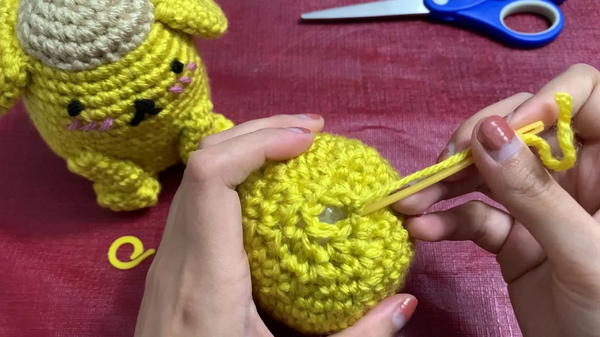
1. Crocheting the Body
Start with a Magic Circle:
- Create a magic circle and make 6 single crochets (SC) into the circle.
- Tighten the circle to close it.
Increase Rounds:
- Round 2: Place 2 SC in each stitch (increase). You should have 12 stitches by the end.
- Round 3: Alternate 1 SC and increase in the next stitch. By the end, you'll have 18 stitches.
- Round 4: Place 2 SC followed by an increase. Finish with 24 stitches.
- Round 5: Alternate 3 SC and an increase. End with 30 stitches.
- Round 6: Work 4 SC followed by an increase, totaling 36 stitches.
Maintain Round Size:
- For 13 rounds, place 1 SC in each stitch (keep the total at 36 stitches per round).
- This creates the cylindrical shape for the body.
Decrease Rounds:
- Round 20: Alternate 4 SC followed by a decrease. End with 30 stitches.
- Round 21: Work 3 SC and decrease. Finish with 24 stitches.
- Stuff the body firmly with fiber filling at this stage.
- Round 22: Alternate 2 SC followed by a decrease (18 stitches).
- Round 23: Alternate 1 SC followed by a decrease (12 stitches).
- Final Round: Decrease until 6 stitches remain. Slip stitch, fasten off, and leave a tail to sew the opening shut.
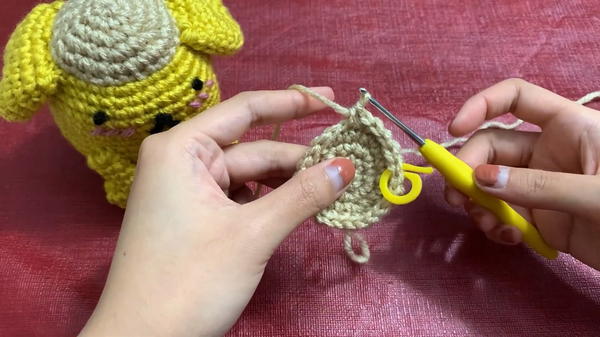
2. Crocheting the Ears
- Magic Circle:
- Start with 6 SC in the circle and close it.
- Increase:
- Work 2 SC in each stitch, finishing the round with 12 stitches.
- Shaping the Ears:
- Round 3: Alternate 1 SC followed by an increase (18 stitches).
- Rounds 4-9: Work 1 SC in each stitch for 6 rounds (maintain 18 stitches per round).
- Finishing:
- Fasten off, leaving a long tail for sewing.
- Make a second ear identical to the first.
3. Crocheting the Arms
- Magic Circle:
- Begin with 6 SC in the circle.
- Shaping:
- For 4 rounds, work 1 SC in each stitch (6 stitches per round).
- Finishing:
- Fasten off and leave a long yarn tail for sewing.
- Make a second arm identical to the first.
4. Crocheting the Feet
- Magic Circle:
- Start with 6 SC in the circle.
- Increase Rounds:
- Round 2: Place 2 SC in each stitch (12 stitches).
- Round 3: Alternate 1 SC followed by an increase (18 stitches).
- Decrease Round:
- Work decreases across the round. Finish with fewer stitches to complete the rounded foot shape.
- Finishing:
- Fasten off and leave a tail for sewing.
- Make a second foot identical to the first.
5. Crocheting the Hat
- Magic Circle:
- Begin with 6 SC in the circle.
- Increase Rounds:
- Round 2: Place 2 SC in each stitch (12 stitches).
- Round 3: Alternate 1 SC followed by an increase (18 stitches).
- Round 4: Alternate 2 SC followed by an increase (24 stitches).
- Shaping:
- For the final round, work 1 SC in each stitch to finish the hat shape.
- Fasten off, leaving a long tail for sewing.
6. Creating the Face (Eyes, Nose, Mouth, and Blush)
- Eyes:
- Cut small lengths of black yarn and tie knots twice to create the eyes (or use safety eyes).
- Nose:
- Tie knots thrice to make the slightly larger nose.
- Mouth:
- Cut a longer piece of black yarn to shape the smile during assembly.
- Blush:
- Cut 6 small strands of pink yarn to add blush accents to the cheeks.
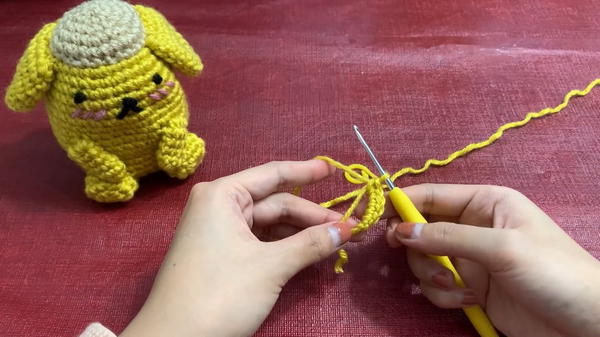
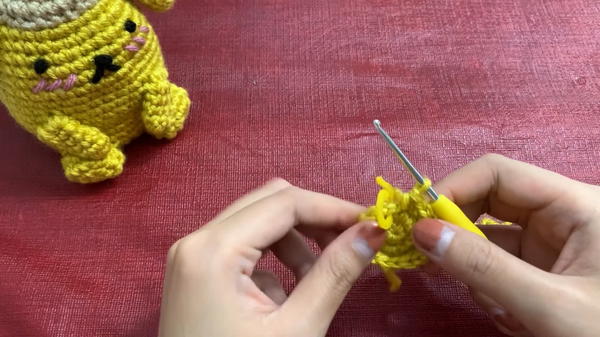
7. Assembly
- Hat: Sew the hat securely onto the top of the body using a tapestry needle.
- Ears: Attach ears symmetrically on either side of the head.
- Arms and Feet: Sew the limbs carefully into place.
- Facial Features: Use the pre-prepared facial pieces (eyes, nose, mouth, and blush) and sew or glue them onto the face, ensuring proper alignment.
Tutor’s Suggestions
- Yarn Type: Use tightly woven yarn to ensure the amigurumi’s structure holds well.
- Stitch Marker: Use a stitch marker for tracking rounds, especially for complex sections like the body.
- Stuffing: Firmly stuff the body and limbs to maintain their shape while avoiding overstuffing to prevent stretching.
- Custom Colors: Tutor recommends experimenting with alternate colors to give Pom-Pom Purin your unique touch.
Level of Difficulty
- Beginner to Intermediate: Most of the pattern involves basic stitches like single crochet, increases, and decreases, making it accessible for beginners. Intermediate skills are required for sewing the parts together neatly.
Uses of the Pom-Pom Purin Amigurumi
- Decorative Item: Display it as a collectible or adorable décor.
- Gift Option: Perfect for fans of Sanrio characters.
- Toy: Great as a handmade toy for children.
Tip
To ensure clean assembly, sew each part systematically. Start with the hat and ears, then attach the arms and feet. Always align facial features evenly to give your Pom-Pom Purin the perfect expression.
Conclusion
This Pom-Pom Purin amigurumi project is a delightful crochet endeavor, blending creativity and simplicity. With its adorable design and versatile uses, it’s an excellent choice for handmade gifts or personal collections.


