Cuddle up with whimsy using this Free Crochet Totoro Plush Pattern, a handmade creation bringing adorable charm and playful magic to décor or gifts.
Animated stories often introduce characters that capture hearts and inspire gentle imagination, bringing warmth and whimsy into everyday life. A Free Crochet Totoro Plush pattern brings one such beloved character into a tangible, soft form that can be cherished by children and adults alike. Perfect as a cuddly companion, a decorative accent, or a thoughtful handmade gift, this plush offers comfort and a touch of nostalgia.
Gift-Ready Crochet Totoro Plush Pattern for Cozy Cuddles
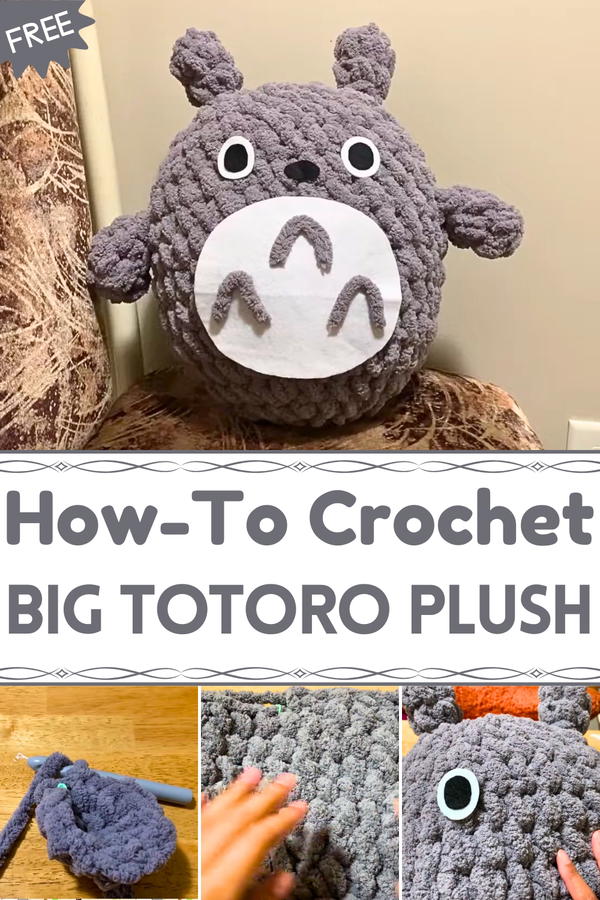
Each part of the plush encourages a steady, calming rhythm while crocheting, allowing makers to engage in mindful, satisfying handiwork that turns yarn into a huggable figure. Its compact yet sturdy structure makes it ideal for display on beds, shelves, or desks, while soft fibers ensure a cozy touch for little hands. Color choices allow for personalization, from faithful representations to playful variations that reflect personality or seasonal themes.
Beyond personal enjoyment, it serves as a delightful gift for fans of animation, adding charm and character to any space. Lightweight and portable, the plush travels easily, bringing smiles wherever it goes. A Free Crochet Totoro Plush pattern transforms yarn into a comforting, whimsical companion, combining creative satisfaction with a lovable, timeless keepsake that inspires joy and imagination.
Materials Required
- Yarn: Bernat Blanket Yarn (Jumbo Size - Approx. 300 grams)
- Crochet Hook: 15mm crochet hook, perfect for thick yarn.
- Felt: White felt for the belly and eyes; black felt for the eye pupils and nose.
- Stuffing/Filling: A large amount to give the plush its squishy and soft structure.
- Glue: For attaching the felt pieces and yarn details.
- Scissors: To cut the yarn and felt.
- Stitch Marker: Essential for tracking stitches in large, bulky yarn.
Special Features
- Super soft, squishy, and jumbo-sized Totoro design.
- Made entirely using a simple series of increasing, decreasing, and single crochet stitches.
- Minimal additional assembly required, with felt pieces for the face and belly area.
- Beginner-friendly pattern that fosters creativity with a thick, fluffy yarn.
Step-by-Step Instructions
1. Starting the Body
- Create a magic ring (magic circle) as the base.
- Place 6 single crochets (SC) into the magic circle.
- Tighten the circle and ensure the stitches are secure.
2. Increasing for the Body
- Round 2: Place 2 SC in each stitch (increase). By the end, you should have 12 stitches.
- Round 3: Alternate 1 SC in the first stitch, then 2 SC in the next stitch (increase). Repeat this until the end of the round, ensuring you have 18 stitches in total.
- Round 4: Work 2 SC in consecutive stitches, then increase in the third stitch. Repeat this pattern until the end of the row (24 stitches).
- Round 5: Place 3 SC, then 1 increase. Repeat the pattern around until you have a total of 30 stitches.
- Round 6: Alternate 4 SC, then increase, working this pattern to the end of the row with 36 stitches.
3. Building the Body
- Rows 7 to 12: Place 1 SC in each stitch all around for 6 rounds (total of 36 stitches in each row).
- This creates height for the plush’s body to form its cylindrical, pillowy shape.
4. Decreasing to Close the Plush
- Round 13: Start decreasing with a pattern of 4 SC, then decrease. You should end with 30 stitches.
- Round 14: Decrease further with 3 SC, then 1 decrease. This will reduce the row to 24 stitches.
- Round 15: Continue with 2 SC, then decrease. You’ll end up with 18 stitches.
- Round 16: Work 1 SC, then a decrease, reducing the stitches to 12 total.
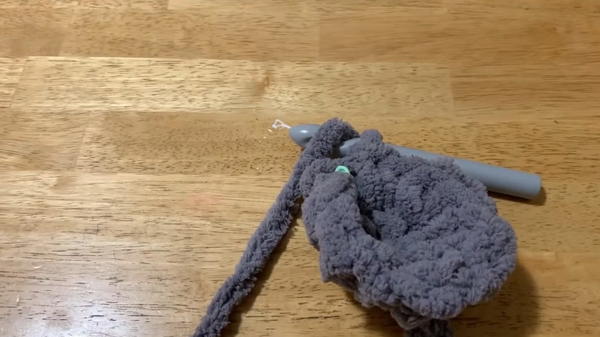
5. Closing the Body
- For the final row (Round 17), decrease in all stitches to close the plush. By the end, only 6 stitches will remain.
- Cut a long yarn tail and fasten off securely.
- Using a needle, sew the remaining hole by grabbing the outer loops of each stitch. After completing the stitches, pull the tail to close the hole fully.
- Weave in the ends by tucking them into the body.

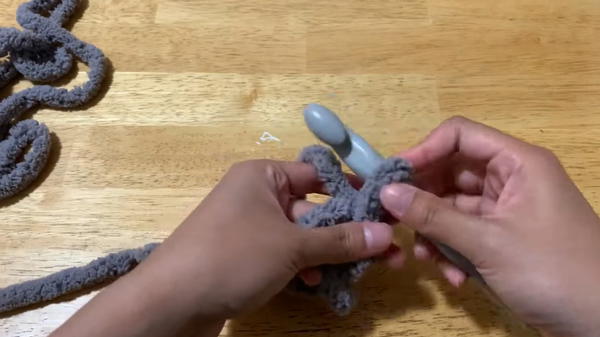
6. Making the Ears and Arms
- Both the ears and arms use the same pattern, and you will need to create 4 pieces in total:
- Create a magic circle and place 5 SC in the ring.
- Work 2 rows of SC (no increases, 5 stitches per row).
- Cut a long yarn tail for sewing and secure the end.
7. Creating the Details
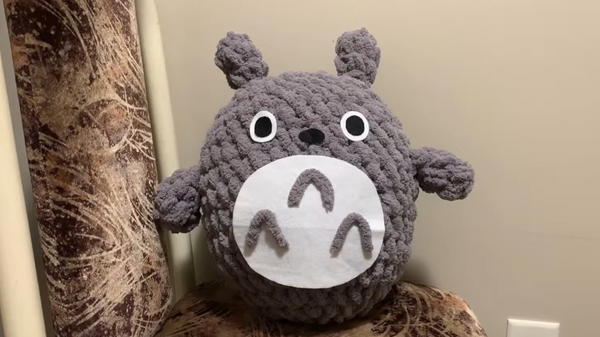
- Use felt fabric for the plush’s belly, eyes, and nose:
- Belly: Cut a large white oval, folding the felt in half to ensure symmetry. If the material is too thin, double-layer it for a thicker appearance.
- Eyes: Cut out two white circles, along with smaller black circles for the pupils, and glue them together.
- Nose: Cut a small black triangular piece.
8. Attaching the Parts
- Ears: Sew the two ears to the top of the plush’s body, ensuring they’re symmetrical.
- Arms: Attach the two arms to the sides. Use the long yarn tails to sew them securely.
- Details: Glue on the felt belly, eyes (with pupils), and nose.
- Final Touches: Cut small black yarn pieces for the stripes on Totoro’s belly and glue them in place.

Tutor’s Suggestions
- Use a stitch marker to avoid losing your place in the bulky yarn.
- Double-layer the felt pieces for a more polished and sturdy look.
- Count stitches carefully after each round to ensure the plush is evenly shaped.
- Work patiently with the thick yarn, as it can be tricky to see individual stitches.
Level of Difficulty
- Beginner-Friendly: While the plush involves several rounds of stitching and assembling, the stitches used are basic (single crochets, increases, and decreases), making it accessible even for beginners.
Uses of the Totoro Plush
- A decorative item for your home or workspace.
- A soft toy for cuddling or gifting.
- A perfect handmade gift for fans of Studio Ghibli.
Tip
To ensure your Totoro plush holds its shape, use high-quality stuffing and thoroughly fill the body before closing it. Avoid under-stuffing, as this can cause the plush to lose its cylindrical shape.
Conclusion
This large, soft Totoro plush is a fun, creative project that results in a cuddly masterpiece. With its simple pattern and adorable design, it’s perfect for fans of crochet and Studio Ghibli alike. By using jumbo yarn and taking your time with assembly, you’ll create a plush that’s both unique and irresistibly squishy.


