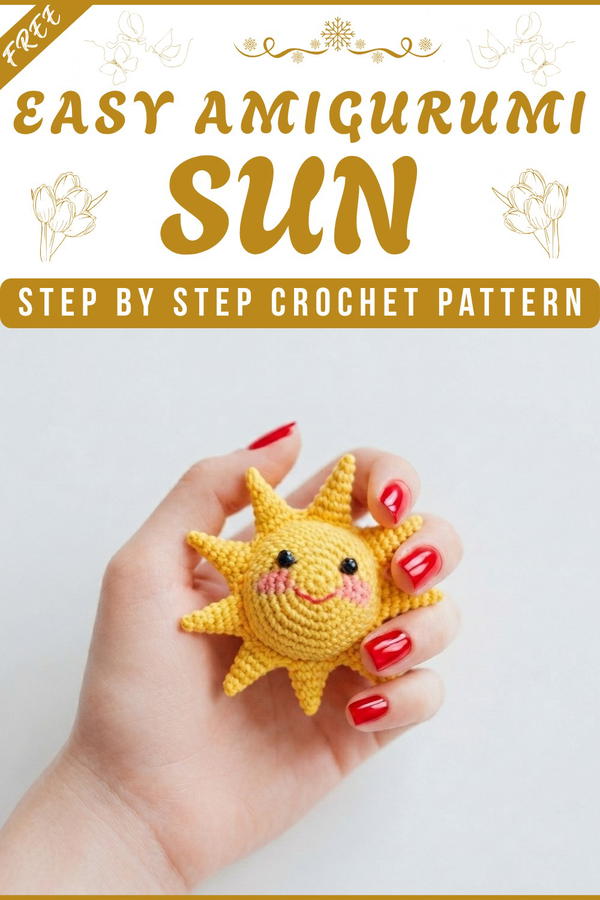
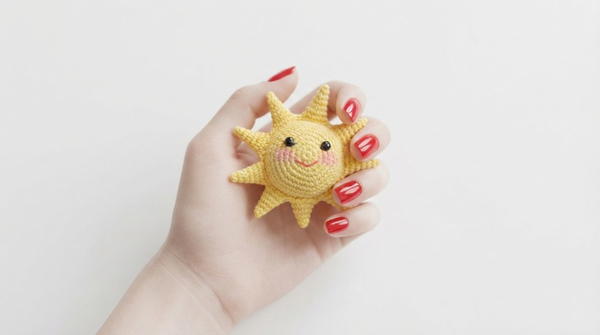
Brighten your day by creating this adorable Free Crochet Amigurumi Sun, a cheerful project that's perfect for gifts or home décor.
Making a bright and happy sun is always fun, and the Free Crochet Amigurumi Sun Pattern lets you do just that! This little sun is a cheerful toy or decoration that children and grown-ups will both enjoy. It’s small enough to hold in your hand but big enough to smile at you when you see it. I loved making mine because it’s soft, cute, and makes any space feel warm.
Cute Crochet AMIGURUMI SUN Pattern for Summer Smiles
This sun has round, puffy shape with sweet sun rays sticking out all around. Its soft texture feels nice to touch, and it looks like a tiny sunshine you can hug. The best part is you can use any color you want, classic yellow for a sunny look, orange for extra warmth, or even mix colors like red or white to make it more special. You can also make it bigger or smaller depending on how many stitches you use or the thickness of your yarn. This makes it great for turning into toys, keychains, bags, or even a bright pillow decoration.
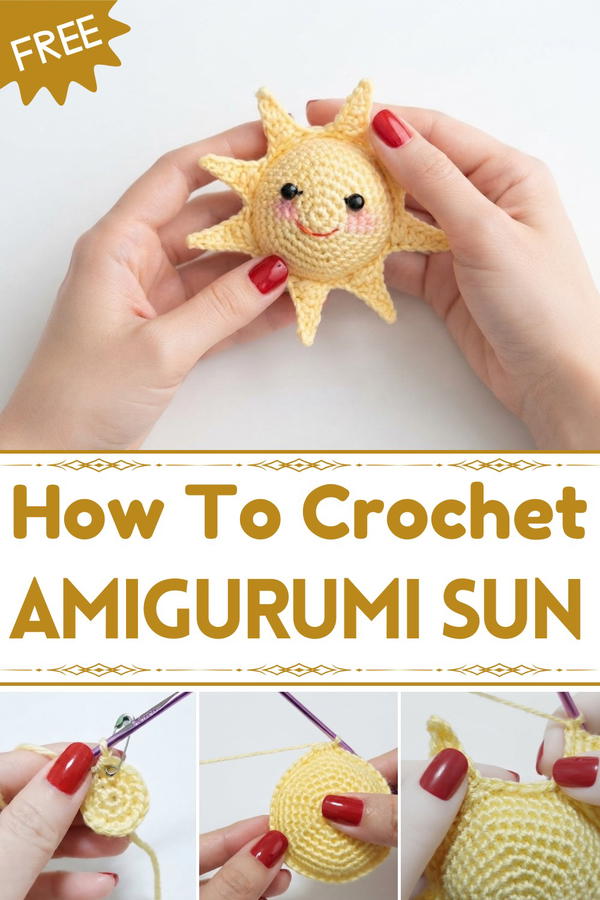
The most important stitch in this pattern is the single crochet, which helps keep the sun tight and stuffed so it doesn’t lose shape. You will also use simple increases and decreases to make the round shape with the sun rays. Even if you’re new to crochet, this pattern is easy to follow step-by-step, making it a great project for beginners.
This cute little amigurumi sun is perfect for gifts, decorating a kid’s room, or just adding a smile to your day. It’s a bright, soft piece that can bring a bit of sunshine anywhere. If you want to make something sweet, soft, and fun, this Free Crochet Amigurumi Sun Pattern will bring lots of joy as you create.
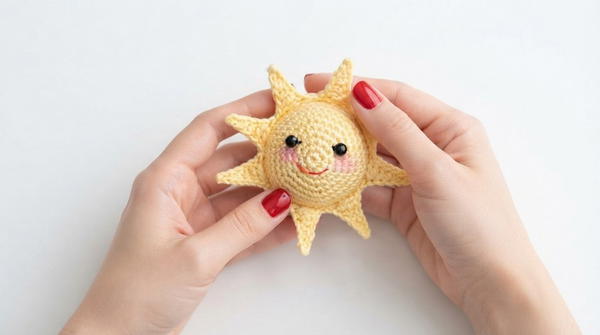
Crochet SUN Pattern
This pattern provides a detailed, step-by-step walkthrough for assembling a charming amigurumi sun. By following these clear, individualised rounds, you can easily construct this delightful project from start to finish.
Quick Overview Of Pattern
Structure: Two identical circular faces joined together.
Technique: Continuous rounds (spiral) for the main body.
Embellishments: Rays are crocheted directly onto the edge of the finished body.
Finishing: Stuffed for a 3D effect, with optional glue application to stiffen the rays.
Notes
This pattern is worked in continuous rounds; do not join rounds unless specified. Use a safety pin as a stitch marker to track the beginning of each round.
Keep your tension consistent to ensure a neat finish and to prevent stuffing from showing through.
Skill Level
Beginner-Friendly: Ideal for those familiar with basic crochet stitches and working in the round.
Materials
Yellow acrylic yarn (or cotton yarn).
3mm crochet hook.
Safety pin (stitch marker).
Scissors.
Yarn needle.
Toy stuffing.
Two small beads (optional, for eyes).
Glue (optional, for stiffening the sun rays).
Stitch Abbreviations
Ch: Chain
St(s): Stitch(es)
Sc: Single crochet
Inc: Increase (2 sc in the same stitch)
Hdc: Half double crochet
Dc: Double crochet
Sl st: Slip stitch
The Crochet Pattern
The Sun Body (Make Two)
Begin by forming a magic ring.
Round 1: Chain 1, then work 6 sc into the magic ring. Pull the tail to close the circle. (6 sts)
Round 2: Work 1 inc in every stitch around. (12 sts)
Round 3: Work 1 sc in the first stitch, then 1 inc in the next stitch. Repeat this sequence around. (18 sts)
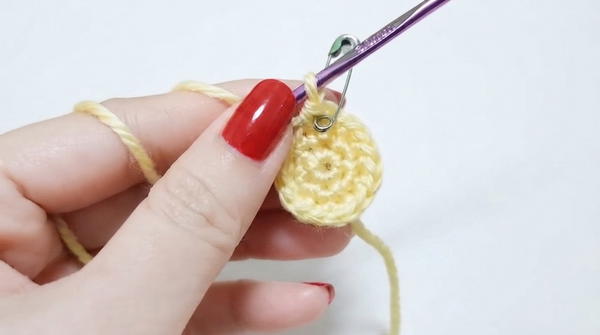
Round 4: Work 1 sc in the next 2 stitches, then 1 inc in the next stitch. Repeat this sequence around. (24 sts)
Round 5: Work 1 sc in the next 3 stitches, then 1 inc in the next stitch. Repeat this sequence around. (30 sts)
Round 6: Work 1 sc in the next 4 stitches, then 1 inc in the next stitch. Repeat this sequence around. (36 sts)
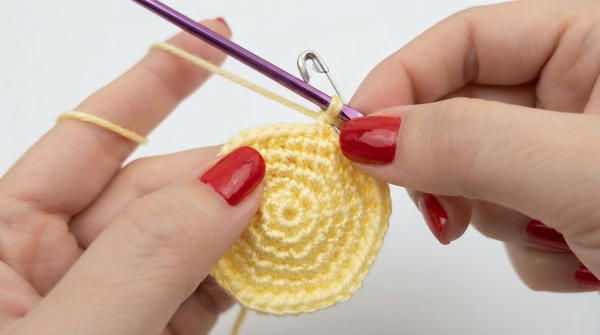
Round 7: Work 1 sc in the next 5 stitches, then 1 inc in the next stitch. Repeat this sequence around. (42 sts)
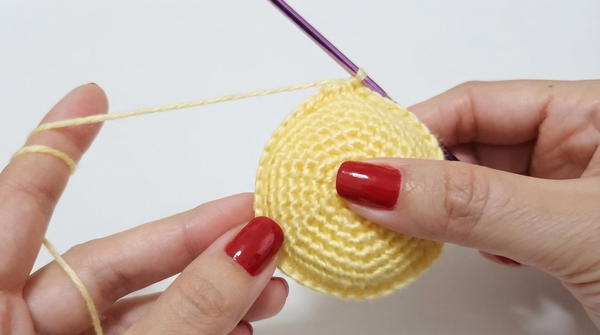
Round 8: Work 1 sc in every stitch around. (42 sts)
Round 9: Work 1 sc in every stitch around. (42 sts)
After completing these rounds, fasten off the first piece. For the second piece, do not cut the yarn, as you will use the remaining yarn to join the two sides together.
Assembly
Align the two completed circular pieces with the wrong sides facing each other.
Join the two pieces by working single crochet stitches through both layers along the edge.
Pause halfway through the joining process to insert the toy stuffing into the center.
Continue single crocheting around the edge, adding more stuffing as needed to ensure the sun is firm, then complete the edge.
Creating the Rays
Initial Ray Foundation
Step 1: Chain 7.
Step 2: Work a slip stitch (sl st) into the second chain from your hook.
Step 3: Work 1 single crochet (sc) into the next chain.
Step 4: Work 1 half double crochet (hdc) into the next chain.
Step 5: Work 1 half double crochet (hdc) into the next chain.
Step 6: Work 1 double crochet (dc) into the next chain.
Step 7: Work 1 double crochet (dc) into the final chain.
Step 8: Skip 4 stitches on the sun body edge.
Step 9: Slip stitch (sl st) into the 5th stitch on the sun body to anchor the ray.
Second Ray
Step 10: Chain 7.
Step 11: Work a slip stitch (sl st) into the second chain from your hook.
Step 12: Work 1 single crochet (sc) into the next chain.
Step 13: Work 1 half double crochet (hdc) into the next chain.
Step 14: Work 1 half double crochet (hdc) into the next chain.
Step 15: Work 1 double crochet (dc) into the next chain.
Step 16: Work 1 double crochet (dc) into the final chain.
Step 17: Skip 4 stitches on the sun body edge.
Step 18: Slip stitch (sl st) into the 5th stitch on the sun body to anchor the ray.
Continuing the Pattern
Step 19: Repeat the sequence established in Steps 10 through 18 for each subsequent ray.
Step 20: Continue working this ray pattern around the entire edge of the sun body.
Final Completion
Step 21: Once you have reached the last ray, perform a slip stitch into the base of the very first ray you made to close the round.
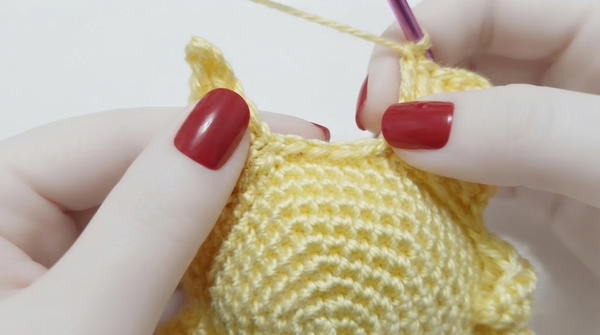
Step 22: Cut the yarn, leaving a tail.
Step 23: Thread your needle and weave the tail into the body of the sun to hide it securely.
Step 24: (Optional) Apply glue to the rays and allow them to dry for two to three hours to maintain their shape.
Finishing
- If desired, use a small amount of glue on the rays to help them hold their shape and stay stiff once dry.
- If you choose to add eyes, attach your beads securely to the front of the sun using glue or by sewing them on with thread.
- Allow the glue to dry fully, typically for two to three hours, before handling the finished sun.
Conclusion
You have successfully completed your project. This simple, delightful design is a fantastic way to brighten up any space. If you found this tutorial helpful, remember to support the artist by liking the video and subscribing to their channel for more inspiring projects. Enjoy your new handmade creation.