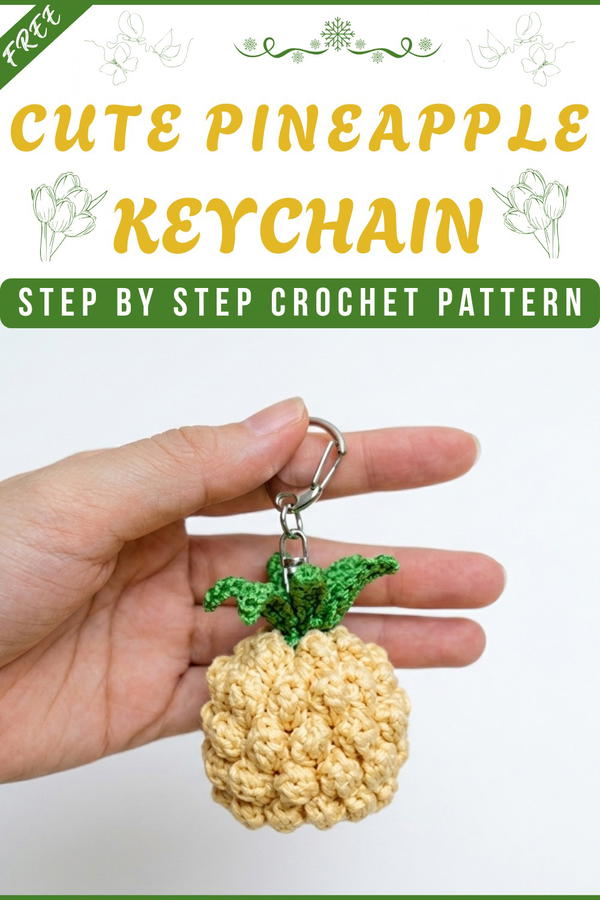
Personalize your keys with a vibrant crochet pineapple keychain that’s simple to follow, playful in design, and perfect for spreading fun tropical vibes everywhere.
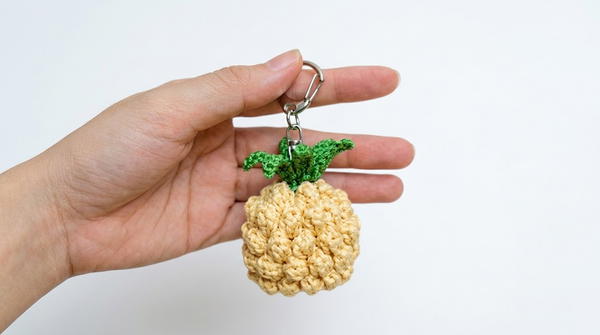
Brighten your day with a small yet delightful accessory that radiates joy! This crochet pineapple keychain not only symbolizes tropical vibes and fun but also makes for a cheerful addition to your daily essentials. Its bright yellow body combined with green, textured leaves closely resembles a real pineapple, creating a charming design that instantly grabs attention. This free crochet pineapple keychain pattern is specifically crafted to look cute and detailed while remaining lightweight and compact.
Crochet Pineapple Keychain Tutorial for Adorable Summer Accessory
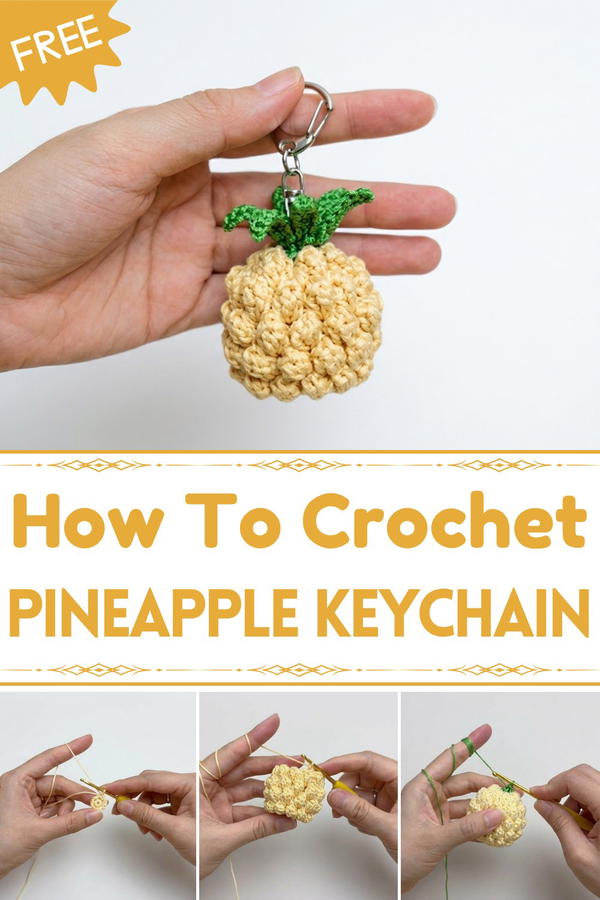
Whether you're attaching it to your keys, purse, or backpack, its playful appearance is sure to bring smiles everywhere you go. It’s more than just a keychain, it’s a creative, handmade piece you can carry around with pride or gift to friends and family who love unique accessories. Plus, making it yourself brings a sense of accomplishment and a personal touch. Celebrate the beauty of mini pineapples with this easy, fun-to-follow pattern that's perfect for beginners and crocheting enthusiasts alike.
Crochet Pineapple Keychain Pattern
Skill Level
Intermediate
Finished Size
Approximately 6–7 cm (2.4–2.8 inches) height, suitable for a compact keychain.
Materials
Waxed String:
- Yellow wax string for the pineapple’s body (~6–8 meters).
- Green wax string for the leaves (~4–6 meters).
Crochet Hook:
- 2.5 mm crochet hook (or adjust size based on wax string thickness).
Keyring or Loop:
- Metal keyring to attach the pineapple.
Blunt Needle (Optional):
- To tidy and weave ends.
Scissors:
- For cutting ends neatly.
Special Techniques
- Magic Circle:
Used for the pineapple base to ensure a tight, adjustable center. - Corn Spike (Pineapple Texture):
Formed by working sets of 5 double crochet stitches, secured with slip stitches. - Invisible Decreases:
Applied to reduce spikes in later rounds for structural shaping.
Pattern Instructions
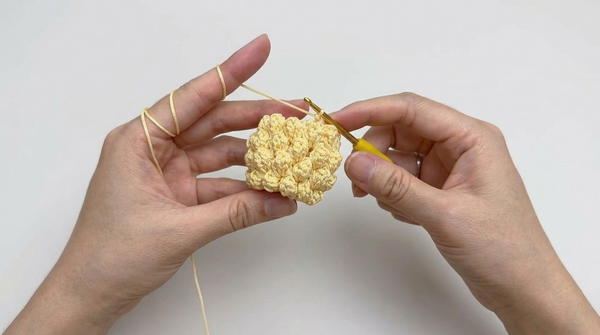
Step 1: Pineapple Body
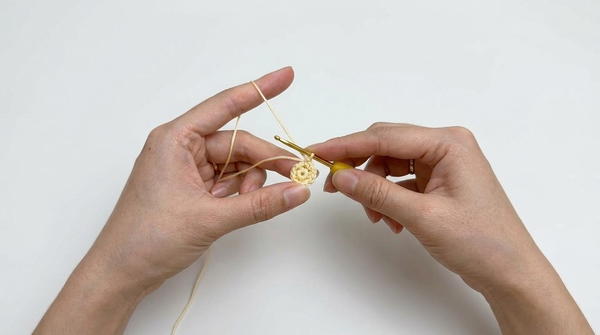
Foundation (Magic Circle)
Create Magic Circle:
- Hold yellow wax string and form a loop.
- Insert hook and pull yarn through.
- Chain 1 to secure the loop.
Round 1:
- Work 6 sc stitches into the magic circle.
- Tighten the loop by pulling the tail securely.
- Join with a slip stitch to the first sc to complete the round.
Round 2:
- Increase:
- Work 2 sc into each stitch around.
- Total stitches: 12 sc.
- Slip stitch into the first sc to close the round.
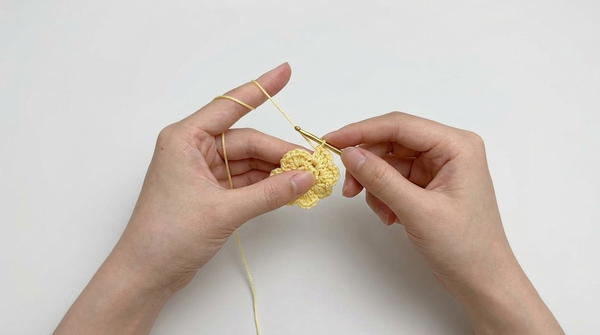
Round 3:
Begin Corn Spikes:
- Chain 3 (counts as the first spike base).
- In the same stitch, work 5 dc (double crochets).
- Remove hook from the last loop, insert hook into the top of the chain-3 loop, and pull the last loop through to form a spike.
Form Remaining Spikes:
- Skip the next stitch.
- Work spikes into every alternate stitch:
- Chain 3, work 5 dc, join top chain with slip stitch to form spike.
Total Spikes:
- Repeat until you have 12 spikes.
- Slip stitch into the base of the first spike to finish the round.
Step 2: Building the Spiked Texture
Rounds 4–6:
- Work spikes in the gaps between spikes from the previous round.
- For each gap:
- Chain 3, work 5 dc, slip into chain-3 base.
Ensure Consistent Spikes:
- Repeat the process for each stitch gap.
- Total spikes remain 12 per round.
Step 3: Shaping the Pineapple (Decreasing Spikes)
Round 7:
- Begin decreasing the spikes to shape the pineapple’s taper.
- Skip one gap and work spikes into alternating gaps:
- Chain 3, work 5 dc, slip into the chain-3 base.
- Result: 6 spikes.
Round Completion:
- Secure the final round with a slip stitch.
- Secure the final round with a slip stitch.
Step 4: Adding Leaves
Foundation Round for Leaves:
Introduce Green Wax String:
- Attach green wax string at the top of the pineapple (between any two spikes).
Round 1:
- Work 1 sc into each gap between spikes.
- Total stitches: 6 sc.
Creating Leaves:
Leaf Formation:
- For each leaf:
- Start with a slip stitch in an sc gap.
- Chain 2, work 2 sc, 2 hdc, and 1 dc.
- Slip stitch to the next sc gap to anchor the leaf.
- For each leaf:
Repeat Leaf Process:
- Repeat to create 6 leaves (1 in each sc gap).
Final Touch:
- Secure with slip stitches and fasten off.
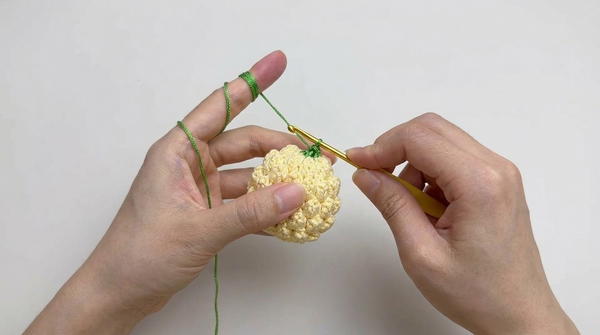
- Secure with slip stitches and fasten off.
Step 5: Finishing and Adding Keyring
Attach Keyring:
- Use black wax string to create a loop at the top of the pineapple.
- Tie it securely or crochet a simple chain to fit through the keyring.
Weave Ends:
- Hide all loose ends neatly using fingers or a wool needle.
- Hide all loose ends neatly using fingers or a wool needle.
Suggestions for Customization
Color Variations:
- Experiment with different colors for a playful look, such as red and green for an apple effect.
Larger Pineapple:
- Increase the number of spikes per round for a larger pineapple keychain.
Decorative Embellishments:
- Add beads to the top of the leaves or embroider small eyes for a kawaii pineapple.
Conclusion
This pineapple keychain is a fun and portable accessory while showcasing textured crochet techniques. It’s perfect as a gift idea, especially customized in the recipient's favorite colors.
Tips for Success
- Keep Tension Consistent: Wax string can be stiff, so ensure even tension for neat spikes and leaves.
- Handle Small Sections Carefully: Smaller rounds, especially for the leaves, require precision to avoid loose stitches.
- Prevent Fraying: Use scissors to trim wax string ends neatly or seal them lightly if allowed by the material.


