Stitch a lightweight cotton sweater that's soft, breathable, and perfect for any season with this free guide for both beginners and pros alike.
It’s not always easy to find clothing that's both stylish and comfortable, but this crochet cotton sweater solves that problem effortlessly. By following a free crochet cotton sweater pattern, you can craft a garment that is soft, breathable, and suited for any season. Its lightweight design and delicate texture make it ideal for layering, whether over casual outfits or something more formal.
Crochet Elegant Cotton Sweater for a Timeless Look

The beauty of cotton yarn lies in its natural softness and elegant simplicity, bringing a timeless charm to this handmade sweater. More than just a fashion item, it’s practical too, providing comfort without compromising on style. Whether for cozy evenings or breezy outdoor wear, this sweater offers a blend of versatility and sophistication. And with easy-to-follow instructions, even beginners can bring this gorgeous design to life, creating a durable and unique addition to their wardrobe.
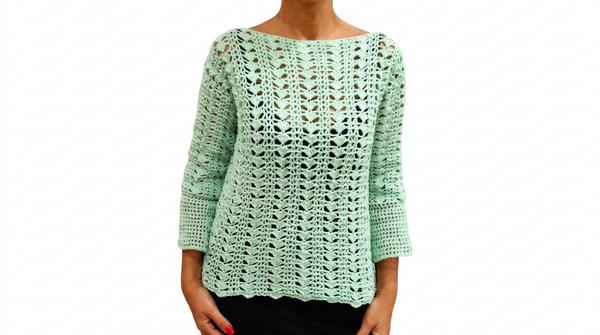
Crochet Cotton Long-Sleeve Sweater
Skill Level
Intermediate
This pattern is designed for crocheters with basic knowledge of stitches (chains, single crochet, double crochet), and experience with creating motifs, shaping panels, and sewing pieces together.
Materials
Yarn:
- 100% Cotton Yarn
- Example: A "Scottish" shiny cotton yarn or Amanda 5 Cotton Yarn.
- Skein Weight/Yardage: 100g per skein, approximately 260 meters (284 yards).
- Approximate total weight for size 40–42: 420g.
Crochet Hook:
- Size 2.0 mm crochet hook.
Additional Notions:
- Tapestry needle: For sewing panels and weaving in loose ends.
- Stitch markers: To mark your center stitches and panel joining points.
- Scissors: To cut yarn.
Key Abbreviations (US Terms)
| Abbreviation | Meaning |
|---|---|
| ch | chain |
| sc | single crochet |
| dc | double crochet |
| sp | space |
| st | stitch |
| rep | repeat |
| sl st | slip stitch |
Special Notes
Sweater Construction:
- The sweater consists of four pieces: one front panel, one back panel, and two sleeves.
- Panels are sewn together at the shoulders and sides before sleeves are attached.
Yarn Multiples: The design is based on a multiple of 13 + 2 chains for the foundation chain.
Customizing Size:
- For every 13 additional chains in the foundation chain, the panel width increases by approximately 5 cm (2 inches).
- Use the table below as a size adjustment guide for panel width:
Foundation Chains Panel Width 117 ch 45 cm 130 ch 50 cm 143 ch 55 cm
Pattern
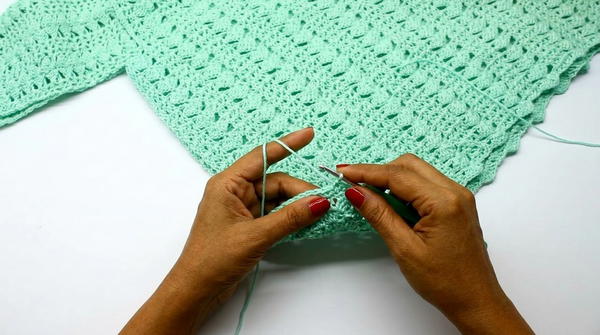
Step 1: Front and Back Panels
Foundation Chain and Row 1
- Make a foundation chain in multiples of 13 + 2 (e.g., 117 + 2 = 119 chains).
- Row 1:
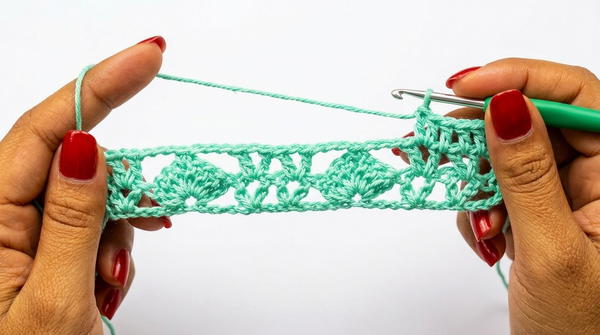
- Ch 3 (counts as 1 dc), skip the next st, and in the following st work:
- 1 V-stitch: (1 dc, ch 1, 1 dc) in the same st.
- Skip 4 ch, in the 5th ch, work a fan stitch: (4 dc, ch 1, 4 dc) in the same st.
- Repeat the sequence of (V-stitch, skip 2 sts, V-stitch, skip 4 sts, Fan stitch) across the row.
- End the row with 1 V-stitch and 1 dc in the last chain.
- Ch 3 (counts as 1 dc), skip the next st, and in the following st work:
Row 2
- Ch 3 (counts as 1 dc) and turn.
- In the ch-1 space of each V-stitch, work 1 V-stitch.
- In the ch-1 space of each Fan stitch, work:
- ch 3, 1 sc in the ch-1 space, then ch 3.
- Repeat this across the row.
Row 3
- Ch 3, turn.
- Work V-stitches in V-stitch spaces as before.
- In the center sc of the fan group, work a new fan stitch: (4 dc, ch 1, 4 dc).
- Repeat this row across by alternating fan and V-stitch motifs.
Repeat Rows 2 and 3
- Continue repeating Rows 2 and 3 until your panel measures desired length (e.g., 50 cm for size 40–42).
Step 2: Sleeves
Foundation Chain (Sleeves)
- For a sleeve width of 36 cm, chain 78 + 2 = 80 chains.
- Add 13 chains for every extra 5 cm in width if required.

- Add 13 chains for every extra 5 cm in width if required.
Sleeve Pattern
- Follow the same fan and V-stitch repeat as the main panels for the first half of the sleeve.
- After reaching mid-sleeve (e.g., 15 fan rows for 24 cm), transition to a grid pattern:
- Ch 3 (counts as dc), ch 1, skip 1 st, dc in the next st. Repeat across the row.
- Add increases every 3 rows by working a V-stitch as an increase within the grid pattern. Repeat until the sleeve has a subtle flare.
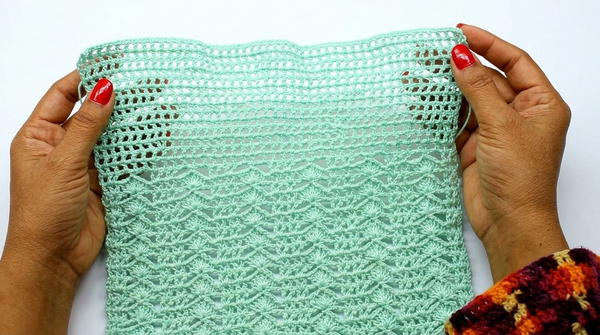
Step 3: Assembly
Shoulder Seams
- Place the front and back panels with the right sides facing in.
- Seam the shoulders for 10 cm on each side using slip stitches or a tapestry needle.
Attaching Sleeves
- Fold the sweater panels so the shoulder seams are centered.
- Align the middle of the sleeve with the shoulder seam and attach using a slip stitch seam or by sewing.
Side Seams
- Fold the sweater along the shoulders so the front and back panels are aligned.
- Seam the sides and sleeves in one continuous motion using a slip stitch or mattress seam.
Conclusion
Congratulations on completing your Cotton Long-Sleeve Sweater! This garment transitions perfectly between seasons with its breathable cotton material and elegant stitching. With its timeless design, it’s perfect for pairing with jeans or dress pants. The versatility in size and style allows you to adapt this sweater to your personal preferences.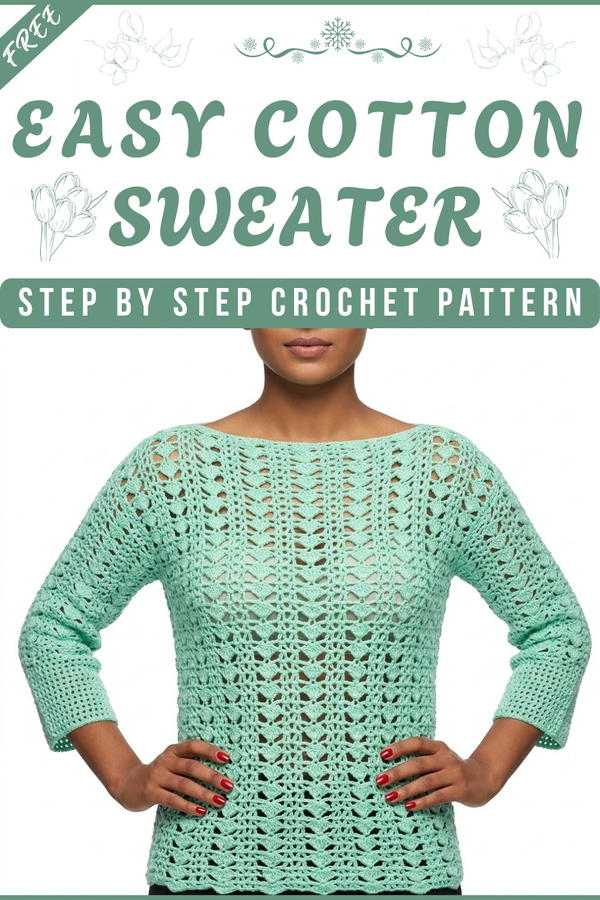
Pattern Corrections
- Ensure the stitch count remains consistent at the edges to maintain symmetry for seaming.
- For beginners: Place stitch markers at the edges to help identify the first and last stitches.
Tips for Success
- Swatch First: Test the fan and V-stitch pattern over a small swatch to determine tension and gauge before starting the project.
- Blocking: Steam or wet block all panels after completing them for smoother seams and enhanced stitch definition.
- Experiment with Colors: Try using gradient, striped, or variegated cotton yarn for a more vibrant design.


