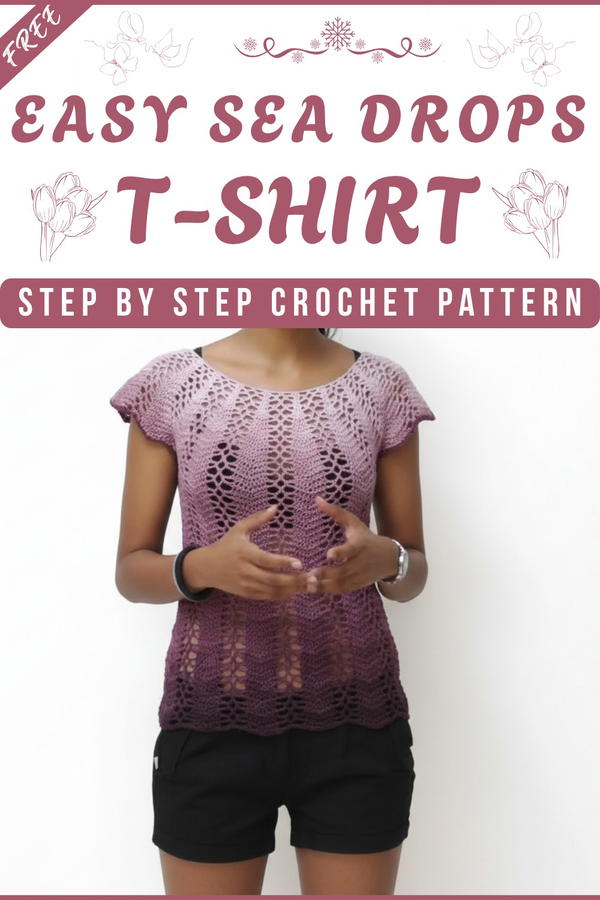
Enjoy the Free Crochet Sea Drops T-Shirt Pattern, offering a lightweight and stylish lacework design to keep you looking cool and casual all summer long.
A summer day at the beach, the ocean breeze gently swaying, and you’re adorned in a breezy, hand-crocheted masterpiece that leaves everyone in awe. The "Free Crochet Sea Drops T-Shirt pattern" helps you create just that! This light and airy T-shirt is designed with comfort and beauty in mind, featuring intricate lacework resembling delicate drops of water — perfect for summer vibes. It’s not just a garment; it’s wearable art that blends elegance with a touch of casual charm, making it ideal for a walk in the city, a relaxing day at the beach, or even as a swimsuit cover-up.
Crochet Sea Drops T-Shirt Pattern That’s Ideal for Warm Weather

The top-down design allows you to customize the size and length to fit your unique style. Crocheted with lightweight gradient yarn using a lace pattern, it provides a flattering finish that is breathable and ideal for hot weather. Whether you’re looking to refresh your wardrobe or gift someone a handmade treasure, this pattern’s versatility and simplicity make it a standout project. Completing this T-shirt is not just a creative endeavor, but also an invitation to step into summer with style and grace. 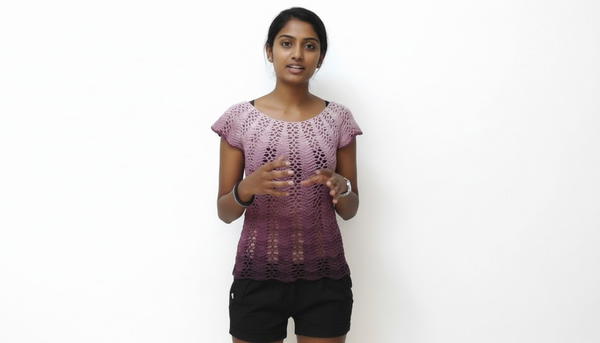
Crochet Sea Drops T-Shirt Tutorial
SKILL LEVEL
Intermediate to Advanced
(You should be comfortable with: top-down garments, working in the round, reading lace repeats, placing markers, and adjusting fit.)
MATERIALS
- Yarn: Light DK / Sport-weight gradient yarn (similar to “Mystery” cake yarn, cotton blend or similar), approx.
- Size S: ~1 cake (the designer used 1 full donut / cake)
- Size M: 1–2 cakes
- Size L or larger: 2 cakes or more (depending on desired length and ease)
- Hook:
- 3.0 mm crochet hook (or size needed to obtain drapey fabric that is not stiff)
- Notions (optional but recommended):
- Stitch markers (at least 4)
- Tapestry needle for weaving in ends
- Measuring tape
- Scissors
GAUGE
This pattern is based on stitch multiples rather than strict gauge, but for reference:
- Approximate gauge in lace pattern (blocked, lightly stretched):
- About 3–3.5 lace “fans” (shell groups) per 10 cm / 4" horizontally
Because this is a lacy, open top, use your measurements and try on as you go instead of relying solely on gauge.
SPECIAL NOTES
- This pattern is a formalized and corrected version of a spoken tutorial, so some interpretation has been applied for clarity and consistency.
- Try on the yoke several times:
- Before committing to armholes.
- After a few body rounds to assess width and length.
- If you have larger bust or arms, work extra repeats of the yoke pattern (i.e., more repeats of Rnd 12 & 13) before forming armholes, or keep increasing where indicated.
- Use stitch markers liberally to keep track of pattern repeats and armhole placement.
PATTERN INSTRUCTIONS
FOUNDATION
Neckline Setup
- Foundation Chain:
- ch 160 (or any multiple of 8 that fits your neckline preference).
- Being careful not to twist, join with a sl st to the first ch to form a ring.
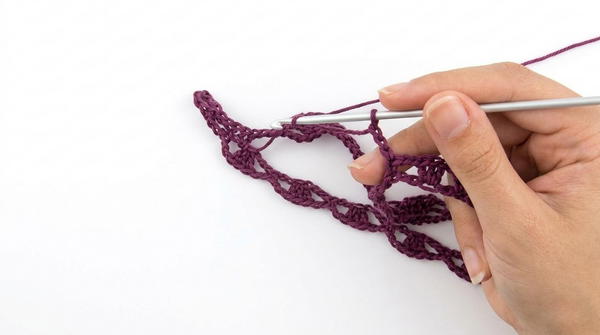
YOKE – LACE PATTERN
ROUND 1
- ch 3 (counts as 1st dc),
- 2 dc into the same ch (3 dc total in this stitch) – this is your first shell.
- ch 3,
- Skip next 3 foundation ch,
- In next ch: 1 sc,
- ch 3,
- Skip next 3 ch,
- In next ch: work another shell (3 dc in same ch).
Rep steps 3–8 around.
End with ch 3 and sl st into top of beginning ch-3 to join.
ROUND 2
- Sl st into the 2nd dc of the shell (the middle dc).
- ch 3 (counts as dc),
- Into SAME dc: 2 dc (shell of 3 dc centered over shell below).
- ch 3,
- In 2nd ch of the next ch-3 arch: 1 sc,
- ch 5,
- In 2nd ch of the next ch-3 arch: 1 sc,
- ch 3,
Rep from step 2–8 around.
End with ch 3, sl st into top of beginning ch-3.
ROUND 3
- Sl st into middle dc of shell (2nd dc).
- ch 3 (counts as dc),
- 2 dc into same st (shell of 3 dc),
- ch 3,
- Skip next ch-3 arch; go directly to next ch-5 arch,
- In 3rd ch of ch-5 arch: 1 sc,
- ch 3,
Rep from step 2–7 around.
End with ch 3, sl st into top of beginning ch-3.
ROUND 4
- Sl st into middle dc of shell,
- ch 3 (counts as dc),
- 2 dc in same st (shell),
- ch 3,
- In 2nd ch of the nearby ch-3 arch: 1 sc,
- ch 5,
- In 2nd ch of next ch-3 arch: 1 sc,
- ch 3,
Rep steps 2–8 around.
End with ch 3, sl st in top of beginning ch-3.
ROUND 5 – INCREASE ROUND
(We begin to widen the dc groups.)
- ch 3 (counts as dc),
- In 2nd dc of shell: 3 dc (increase),
- In 3rd dc of shell: 1 dc,
- ch 3,
- Skip ch-3 arch; go to ch-5 arch,
- In 3rd ch of ch-5: 1 sc,
- ch 3,
Rep steps 2–7 around.
End with ch 3, sl st to top of beginning ch-3.
You now have groups of 5 dc (1 dc, 3 dc in next st, 1 dc).
ROUND 6 – INCREASE ELABORATION
- Sl st into 2nd dc of the 5-dc group,
- ch 3 (counts as dc),
- In 3rd dc: 3 dc,
- In 4th dc: 1 dc,
- ch 3,
- In 2nd ch of first ch-3 arch: 1 sc,
- ch 5,
- In 2nd ch of next ch-3 arch: 1 sc,
- ch 3,
Rep steps 2–9 around.
Join with sl st in top of beginning ch-3.
You now form panels that expand from 5 dc toward 7 dc and beyond in subsequent described rounds.
ROUNDS 7–11 – SUCCESSIVE INCREASE ROUNDS
From the transcription, these rounds gradually increase the size of each dc “panel”:
- Each time, you:
- Sl st into the 2nd dc of the growing group,
- ch 3 (first dc),
- Work additional dc and 3-dc shell in the center of group,
- Then dc in remaining dc of group,
 Maintain lace:
- ch 3, sc into specified ch of ch-3 or ch-5 arch, ch 3 or ch 5 as previously established depending on the round.
Progression (approximate, based on the transcription):
- Rnd 5: panels of 5 dc
- Rnd 6: panels expand (using shell + dc)
- Rnd 7: panels of 5 dc with internal shell rearranged
- Rnd 8: panels of 7 dc
- Rnd 9–11: panels of 7–9 dc, with shell placed centrally.
Because the spoken description is repetitive and partially redundant, use this structural rule:
In every increase round, you:
- Skip the first dc in the group,
- Work dc in next dc(s),
- In the central dc of the group: work 3 dc in the same st,
- Then work dc in next dc(s), skipping the last dc in the group,
- Keep total dc count per panel increasing by 2 each increase round (e.g., 5 → 7 → 9 → 11 if needed).
Practical guidance:
- Try the yoke on after each increase round.
- For a Small, you typically stop once you reach 9 dc per panel and the yoke depth reaches just above the armpit.
ROUNDS 12 & 13 – STABILIZED PATTERN ROUNDS (NO FURTHER INCREASES)
Once your panel reaches 9 dc and the yoke is nearly deep enough, you repeat two rounds:
ROUND 12 (No further increases)
- Sl st into 2nd dc of the panel,
- ch 3 (counts as dc),
- dc in next dc,
- dc in next dc,
- In the central dc of panel: 3 dc in same st,
- dc in each remaining dc of panel until you have 9 dc total.
- ch 3,
- In 2nd ch of next ch-3 arch: sc,
- ch 5,
- In 2nd ch of next ch-3 arch: sc,
- ch 3,
Rep steps 2–11 around, join with sl st.
ROUND 13 (Alternate round)
- Sl st into 2nd dc of panel,
- ch 3,
- dc in next dc(s) until you reach the central dc (the one that held 3 dc of the shell),
- In that central dc: 3 dc,
- dc in remaining dc until 9 dc total in the panel,
- ch 3,
- In 3rd ch of ch-5 arch: sc,
- ch 3,
Rep around, join with sl st.
From this point forward:
- Repeat Rounds 12 and 13 alternately until the yoke reaches the depth needed to form armholes.
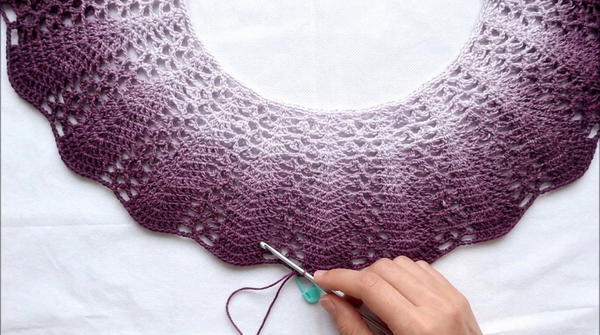
YOKE LENGTH BEFORE ARMHOLES
In the video adaptation:
- The designer repeats Rnds 12 & 13 up to Rnd 17 total.
- At this point:
- She has about 20 vertical “strips” (panels) of dc,
- She divides them as 10 front and 10 back.
For other sizes:
- If arms or bust feel restricted, work 2–4 more repeats of Rnds 12 & 13 before forming armholes.
- Aim for comfortable reach and movement.
ARMHOLE FORMATION
STEP 1 – COUNT & PLACE MARKERS
Count your dc panels (vertical strips formed by 9-dc groups).
Divide them into:
- Front: half the panels
- Back: the other half
For each side (left and right):
- From the side seam area (approximately), count forward and back:
- The designer leaves 6 dc panels for the front and 6 dc panels for the back between the two armholes.
- At the join between panels, place markers at the arch where you have the sc between two ch-3 arches, both front and back.
- Ensure markers line up so that:
- The space between markers on each side corresponds to the sleeve opening,
- The area between the two side markers on the front and between the two side markers on the back forms the body.

(Numbers can be adjusted by size: leave more dc strips for body if needed.)
STEP 2 – FIRST BODY ROUND (JOINING FRONT TO BACK)
You will work one “body” round that:
- Follows the existing lace pattern,
- Bridges across the armhole by using ch-5 arches between markers.
Begin the next round as per Rnd 12 or 13 (depending on which comes next in your sequence):
- Work dc panels and arches as established up to the first marker.
At the first marker side:
- Work your 9 dc panel as usual.
- ch 3,
- In ch-3 arch before marker: sc in 2nd ch,
- ch 5,
- Skip the marked armhole section (do not work stitches over the sleeve panels),
- Go directly to the matching ch-3 arch on the other side of the armhole (other marker),
- In its 2nd ch: sc,
- ch 3,
Continue working dc panels and arches across the front until you reach the second sleeve/marker.
Repeat the same armhole bridge:
- ch 3, sc in arch before marker, ch 5,
- Skip sleeve section, sc in arch after marker on the other side, ch 3.
Continue to end of round, join with sl st as usual.
You now have:
- Two armholes formed by ch-5 bridges,
- A continuous body tube.
BODY
From now on, you work in continuous rounds down the body:
- Continue alternating Rnd 12 and 13 (no increases unless you want more flare).
- For a straighter body:
- Keep dc panels at 9 dc and repeat the established pattern.
- For a more flared shape:
- You can introduce another “increase round” following the same logic as earlier:
- Place the 3-dc shell more widely and expand the number of dc in each panel to 11, etc.
- You can introduce another “increase round” following the same logic as earlier:
In the example:
- From the armhole downward, the designer worked until the body measured approx. 37 cm (14.5") from underarm.
- Stop when desired length is reached (keep in mind yarn quantity).
BOTTOM EDGING – SINGLE CROCHET FINISH
Once body length is achieved:
Make sure you have just joined a round with sl st.
ch 1 (does NOT count as a stitch),
Work as follows around:
Over dc panels:
Work 1 sc in each of the first 4 dc of the 9-dc panel.
In the 5th (center) dc of the panel: 3 sc into the same st.
Work 1 sc in each of the remaining 4 dc (total 11 sc over each panel: 4 + 3 + 4).
If your panels have 11 dc (due to extra increases), then:
- 5 sc, 3 sc in center dc, 5 sc.
Over ch-3 arches:
- Work 3 sc in each ch-3 sp (or:
- 3 sc into the ch-3 space itself or distributed into the chains: 1 sc in each ch).
- Work 3 sc in each ch-3 sp (or:
Over the sc that separated arches:
- Work 1 sl st in that sc to keep the bottom edge slightly scalloped and neat.
Continue this sequence:
- [4 sc, 3 sc in center dc, 4 sc] over each dc panel,
- 3 sc in each ch-3 arch,
- sl st into each sc between them.
Join with sl st to first sc. Fasten off and weave in ends.
Optional: If you still have yarn remaining, you may:
- Work 1 round of sc around the neckline, placing:
- 1 sc in each dc or ch,
- Adjusting slightly (skipping or adding a sc) so the edge lies flat and does not ruffle.
CONCLUSION
This pattern produces a light, airy, top-down lace sweater / beach cover-up, featuring:
- A gradient yarn effect,
- Repeated shell-and-arch pattern,
- Customizable neckline width, yoke depth, and body length,
- Simple armholes created without separate sleeve construction.
PATTERN CORRECTIONS & CLARIFICATIONS (BASED ON TRANSCRIPTION)
Because the original source is a video transcription:
Increases:
- The spoken instructions occasionally repeat or blur counts.
- The corrected approach is:
- Central 3-dc shell in a panel,
- Equal number of dc on each side,
- Increase panel size by +2 dc each time you choose to increase.
Panel Count:
- The pattern stabilizes at 9 dc per panel in the sample; any mention of 7, 9, or “group of 5” refers to different stages in the increase sequence.
Armhole Division:
- The spoken count “6 stripes front and back” is interpreted as 6 full panels each for front and back between markers.
- Adjust panel counts to match your total number of panels and size.
Bottom Border:
- The bottom sc border explanation in the transcript was verbose; here it is formalized as a consistent:
- 4 sc, 3 sc, 4 sc per 9-dc panel.
- The bottom sc border explanation in the transcript was verbose; here it is formalized as a consistent:
TIPS FOR SUCCESS
- Try on often: After every few yoke rounds and again after forming armholes.
- Adjust neckline: If you find the neckline too tight or too loose, adjust foundation chain in multiples of 8.
- Marker usage:
- Use markers at the 2nd dc of each shell/panel if you find it difficult to locate where the central 3-dc shell should go.
- Yarn choice: A smooth gradient or solid cotton/cotton blend shows the lace best and keeps the garment breathable.
- Blocking: Lightly block the finished piece to open the lace pattern and even out the fabric


