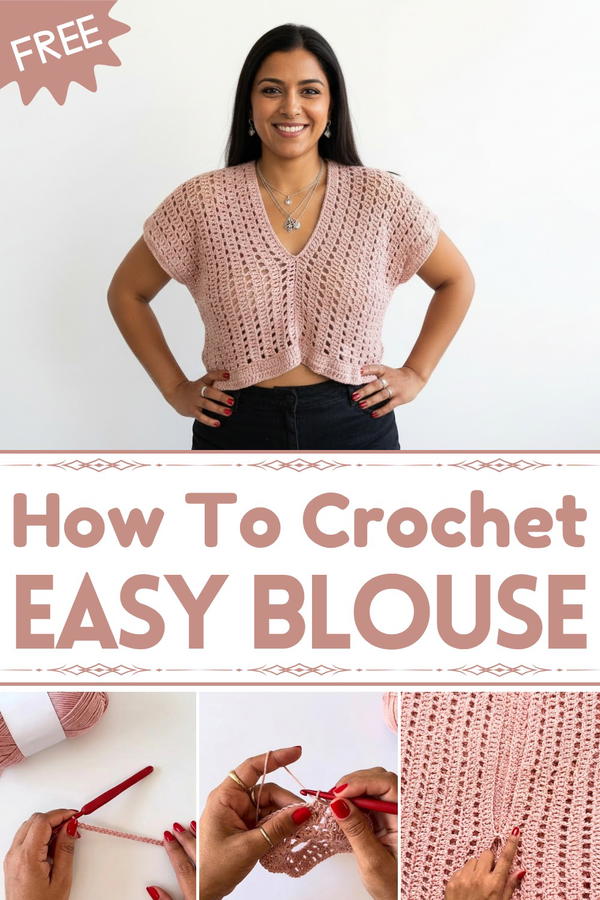
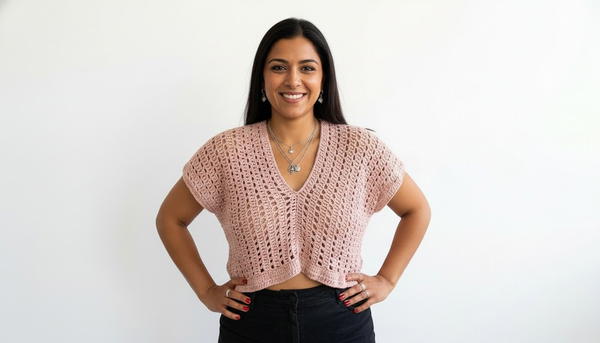
Enjoy a free crochet blouse tutorial that offers effortless elegance and style, providing a perfect choice for casual days or relaxed evenings.
Looking for a stylish and handmade addition to your wardrobe? A crochet boat blouse pattern is your ticket to elegance and comfort all in one! This free pattern helps you craft a blouse with a graceful boat neck that sits beautifully across the shoulders, giving off a sophisticated, timeless vibe. The delicate crochet texture lends it an airy and lightweight feel, making it perfect for sunny afternoons or layering beautifully during cooler evenings.
Free Crochet Blouse Pattern for Comfort and Elegance.
With its relaxed and flowy design, this blouse flatters all body shapes, creating a look that’s both comfortable and chic. You can showcase your creative flair by choosing colors and yarns to match your personal style, ensuring the blouse is as unique as you are. Whether you need a breezy outfit for a casual day out, a hint of charm for a weekend gathering, or are simply searching for your next rewarding projects, this crochet boat blouse pattern has it all.
Detailed Crochet Pattern: Blouse/Tunic with Optional Ruffle
Skill Level
Intermediate
- This pattern is suitable for crocheters who are comfortable working with double crochet stitches, chain stitches, increasing and sewing crochet pieces together.
Materials Needed
Yarn
- Nature Yarn by Fios (or any 100% cotton yarn):
- For Size Small (P): 2 skeins
- For Sizes Large to Extra Large (GG+): 3–4 skeins (approx. 1000–1200 yards).
- Choose a light, breathable cotton yarn for comfort.
Crochet Hook
- 5.00 mm crochet hook for main stitches.
- Optional: Size 3.00 mm crochet hook for single crochet finishing edges.
Additional Notions
- Tapestry needle: For sewing seams and weaving in ends.
- Scissors: To cut yarn at the beginning, end, and during assembly.
- Stitch markers (optional): For marking specific parts of your work (e.g., armhole placement).
Key Abbreviations (US Terms)
- ch – chain
- sc – single crochet
- dc – double crochet
- sl st – slip stitch
Finished Size
The finished blouse/tunic can be adjusted for your size:
- Width: Loose fit with an approximate bust circumference 20 cm larger than the bust measurement used.
- Height: 42–44 cm, depending on the desired length.
Pattern Notes
- Multiple Rectangles: This blouse is created by crocheting two rectangular panels, which are sewn together. Adjust the width/length of the rectangles based on your sizing needs.
- Customization: You can add extra rows or alter measurements for cropped tops, tunics, or ruffles.
- Gauge: Ensure that your chain stitches and double crochet rows measure 120 cm wide for loose fitting garments.
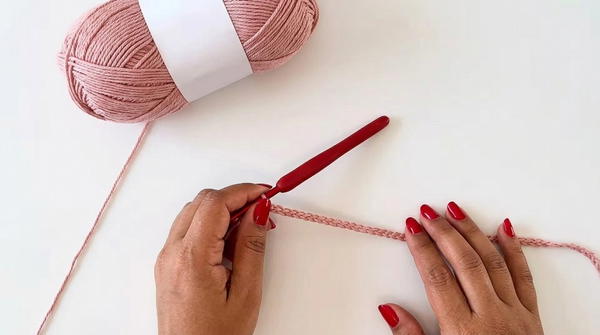
Step-by-Step Instructions
Rectangular Panels
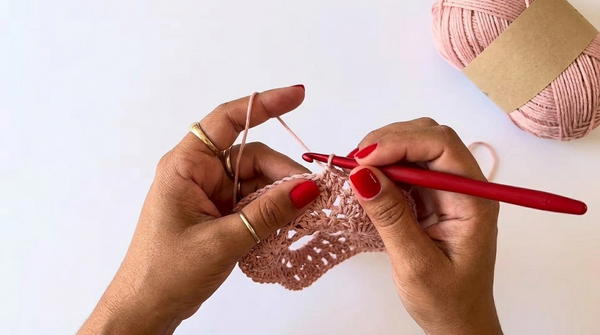
Step 1: Foundation Chain
- For Size P (Small): ch 112
- For Larger Sizes: Increase chains as needed to match your bust size plus an additional 20 cm for loose fitting.
- Example: For a bust size of 100 cm, create chains to reach 120 cm in width.
Step 2: Double Crochet Rows
- Row 1: Work 1 dc into each chain across starting from the 4th chain from the hook. You will have 112 dc (or the number of chain stitches you made).
- Row 2: Ch 4, turn, skip 1 stitch, then (dc, ch 1, skip 1 st) across to create an openwork net stitch pattern.
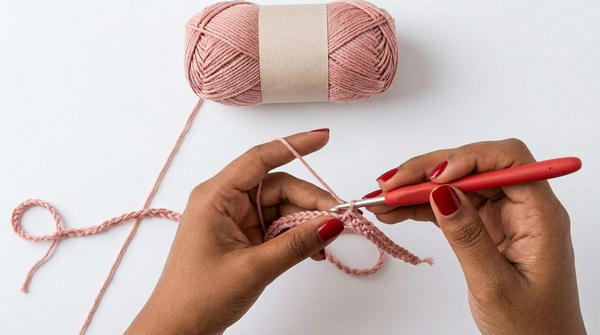
- Row 3: Work dc into every stitch across.
Repeat Row 2 and Row 3 alternately for 21 total rows or until the desired length of your panel is reached.
Making Both Panels
- Once you finish the first rectangular panel, repeat the same instructions to create a second panel of identical size.
Assembly Instructions
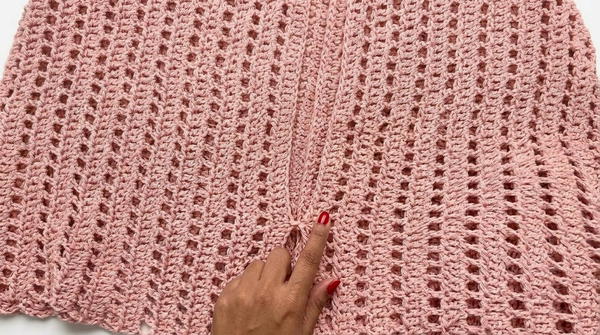
Step 1: Preparing for Sewing
- Lay both rectangles flat and ensure they are identical in size.
- Fold the rectangles inward to align them properly for sewing.
Step 2: Sewing Seams
- Use a tapestry needle and yarn to sew the panels together starting with:
- Back seam: Join the upper edges of the panels evenly.
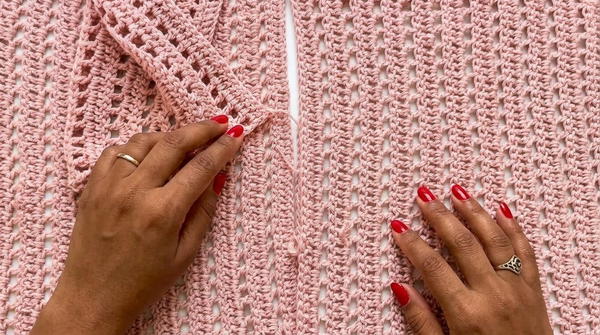
- Shoulder seams: Sew the top edges together on both sides, leaving an opening for the neckline (approx. 15 cm wide).
- Side seams: Leave 22 cm on each side for armholes, then sew the remaining side seam from the base of the blouse up to the marker (use stitch markers for accuracy).
Finishing Edges
Option 1: Simple Finishing
- Collar and Sleeve Edges: Work sc evenly around the neckline, sleeve openings, and bottom edges. Use a smaller hook (e.g., 3.00 mm) for neater borders.
Option 2: Create Ruffles (Optional)
If you'd like to add ruffles to the bottom edge:
- Round 1: Work 2 dc into each stitch along the bottom edge.
- Round 2: Work 1 dc into each stitch from Round 1 to build height and fullness.
- Repeat as needed for desired ruffle size.
Conclusion
Congratulations on completing your Blouse/Tunic with Optional Ruffle! This project combines elegance and comfort into a wearable garment. The alternating rows of double crochet stitches and net stitches create an attractive texture perfect for casual wear. Experiment with colors, yarn types, and ruffle patterns to tailor it to your style.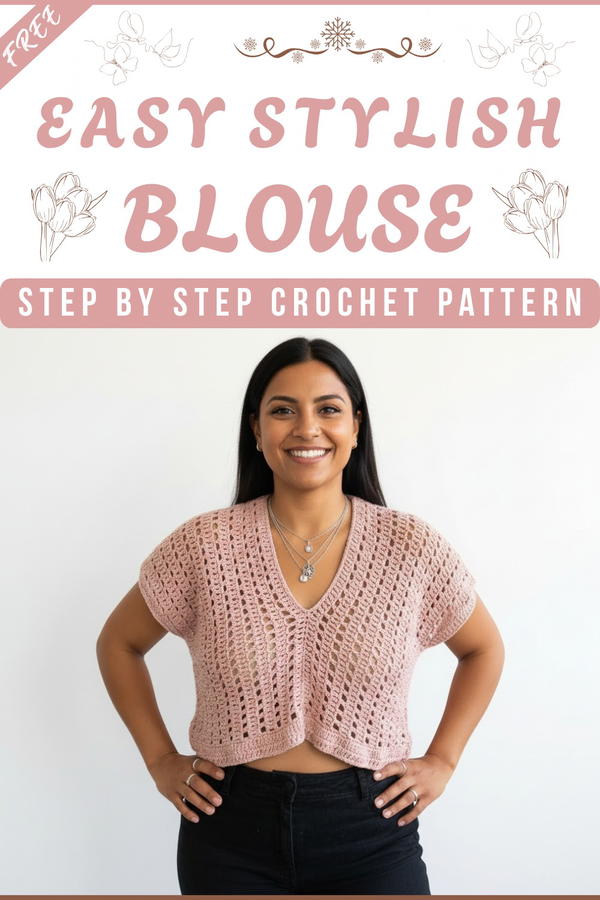
Pattern Corrections
- Ensure you calculate the rectangle width properly based on your bust size and loose fit preference.
- Make sure both panels are identical to avoid mismatched seams.
- If the fabric feels too stiff, switch to a larger hook and adjust stitch counts.
Tips
- Work Neatly: Use stitch markers when setting sewing points (e.g., armholes and neckline) to eliminate uneven seams.
- Block Your Panels: Before sewing, block your rectangular panels to improve shape and alignment.
- Yarn Choice: Cotton yarn is recommended for breathability and comfort.


