Stylize your wardrobe with a free crochet boat neck top pattern that brings airy comfort, relaxed elegance, and handmade charm to your favorite outfits.
A lightweight and breathable garment is perfect for warmer days or layering in cooler weather. A free crochet boat neck top pattern can help you achieve just that. This top is designed with a classic boat neck style, which adds a touch of elegance and simplicity to any outfit. Its relaxed fit and airy texture make it both stylish and comfortable, allowing anyone to look effortlessly chic while feeling at ease.
Free Crochet Boat Neck Top Pattern That’s Easy and Stylish

The beauty of this pattern lies in how versatile the top is, it can be worn casually with jeans or dressed up with skirts for more formal occasions. The boat neck design frames the shoulders beautifully, while the crochet detailing adds a handmade charm that stands out in any wardrobe. This top is not just about appearance, though; it’s practical and lightweight, making it ideal for daily wear, summer outings, or layering over camisoles. Whether you’re heading to the beach or meeting friends, this crochet top adds a touch of timeless style to every look.

Crochet Top Pattern (Step-by-Step)
Skill Level
Intermediate
- Suitable for crocheters who are comfortable with foundation chains, single crochet, triple crochet, working in rows and rounds, and attaching separate panels.
Materials
Yarn:
- Yarn used: Bamboo Pop Sock Yarn
- Weight: Light fingering yarn
- Suggested yardage: 2–3 balls depending on the size and sleeve length.
- Any preferred color.
Hook:
- Smaller hook: Appropriate for your yarn weight. For fingering yarn, start with 2.0mm or 2.5mm.
- Larger hook: Follow the recommended hook size for your yarn, such as 3.0mm or 4.0mm.
Additional Notions:
- Tapestry needle: For sewing seams and weaving in ends.
- Stitch markers: To mark sections during shaping.
- Scissors: To cut yarn neatly.
Optional:
- Measuring tape: To confirm dimensions.
Key Abbreviations (US Terms)
- ch – chain
- sc – single crochet
- hdc – half double crochet
- tr – triple crochet
- tr dec – triple crochet decrease
- tr inc – triple crochet increase
- sl st – slip stitch
- st – stitch
- rep – repeat
Special Notes
Customizable Fit:
- The top is made by constructing two panels (front and back) that are seamed together. Adjust the fit by altering the width/length of the panels.
- You can make it oversized or fitted to your preference.
Multiple Hooks:
- A smaller hook is used for borders and slip stitches to create firm edges.
- The larger hook is used for the main body to keep the fabric light and flowy.
Consistency: Always work into the third loop of triple crochet increases and decreases to create consistent texture.
Pattern
Step 1: Determine Measurements
- Measure Panel Width: Use your bust circumference and desired fit to calculate the panel width. The width should measure approximately half of your bust measurement, adding some ease if needed.
- Example: If your bust is 36 inches, each panel should be roughly 18–20 inches wide for a loose fit.
- Measure Panel Length: Desired top length from shoulders to hem, plus any added length for the lower or upper sections.
Step 2: Lower Section (Panel 1)
Foundation Chain
- With your smaller hook, create a slipknot.
- Ch in multiples of 6 until you reach your measured panel width (e.g., 18–20 inches).
- Add 1 extra chain at the end for turning.
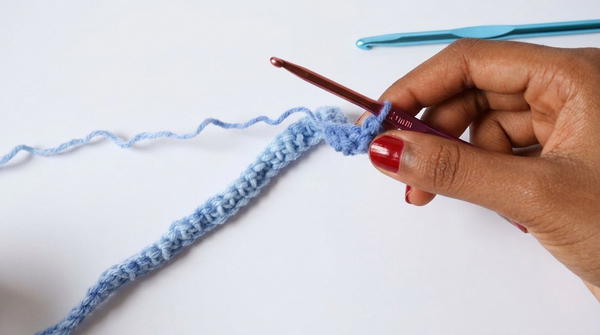
Row 1: Single Crochet Foundation Row
- Skip the first chain, and sc into the second chain from the hook.
- Work 1 sc into the back loop of each chain across.
- At the end of the row, the total number of stitches should be in multiples of 6.
- Turn your work.
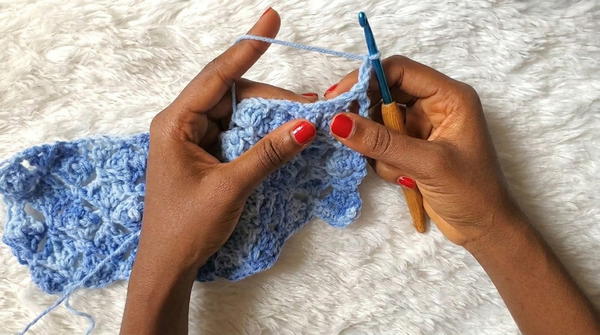
Row 2: Begin Texture with Triple Crochet Decrease (tr dec) and Triple Crochet Increase (tr inc)
Switch to the larger hook for this row.
Ch 4 (this counts as the first triple crochet).
Tr dec:
- Yarn over twice, insert the hook into the same stitch as the chain 4, pull up a loop, pull through two loops, pull through two more loops (leave the last loop on the hook).
- Yarn over twice, skip the next stitch, insert the hook into the next stitch, pull through two loops each time. Repeat one more time. At the end, pull through all 3 loops on the hook.
Tr inc:
- Yarn over twice and work 1 triple crochet into the next stitch.
- Ch 1, then yarn over and work 1 double crochet into the same stitch base.
- Repeat with another ch 1, then 1 double crochet into the same base.

Continue alternating tr dec and tr inc:
- Tr dec: Work into every third stitch.
- Tr inc: Work directly into the base of your previous increase.
End Row: Finish the row with a single tr into the last stitch.
Row 3: Continue Textured Pattern
- Chain 4 to start the row.
- Work into the third loop of the tr inc or tr dec of the previous row to maintain texture.
- Alternate tr inc and tr dec across the row.
- Finish with a single tr into the last stitch.
Step 3: Upper Section and Armhole Shaping
Armhole Shaping (Rows 4–6)
- For Row 4, chain 4, and skip the first tr dec.
- Begin the row with a tr inc into the next stitch.
- Skip the last tr dec of every row during shaping.
- Repeat this for 2–3 rows to create sloped edges for the armholes.
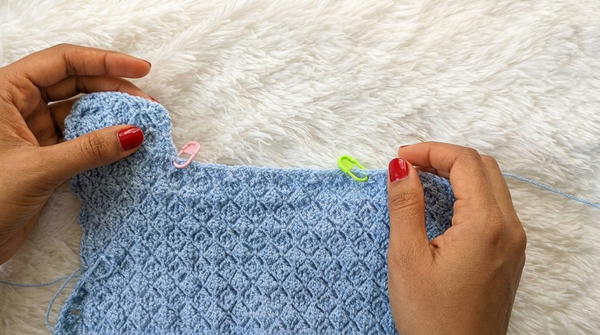
Step 4: Shoulder Shaping
- Divide the top edge into three sections: Left shoulder, center, and right shoulder.
- Mark the boundaries for each shoulder using stitch markers and follow the same textured stitch pattern for the shoulders.
- Finish with a row of single crochet (sc) to create a clean edge before fastening off.
Step 5: Assembly
Seaming Panels:
- Place the panels wrong side facing up.
- Use a slip stitch seam or a tapestry needle to sew the shoulders together.
- Seam the lower sides, leaving the armholes open.
Step 6: Sleeves (Optional – Long Sleeve Variant)
- With the top seams completed, work single crochets into the sleeve openings to prepare for the sleeves.
- Transition into the textured stitch pattern (tr dec and tr inc) in the round.
- Decrease at the top of the sleeve by skipping tr decs to taper the fabric (optional).
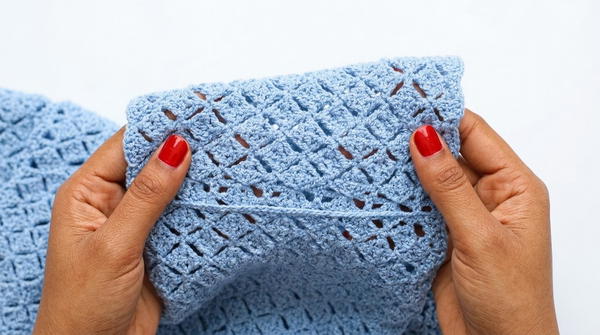
Final Steps
- Add a single crochet border around the neckline and hem of the top for a polished look.
- Weave in all loose ends with a tapestry needle.
Conclusion
The Nova Crochet Top is versatile and stylish, suitable for warm months or layered looks in cooler weather. Using bamboo yarn gives it a soft drape and lightweight feel, but feel free to experiment with other fibers.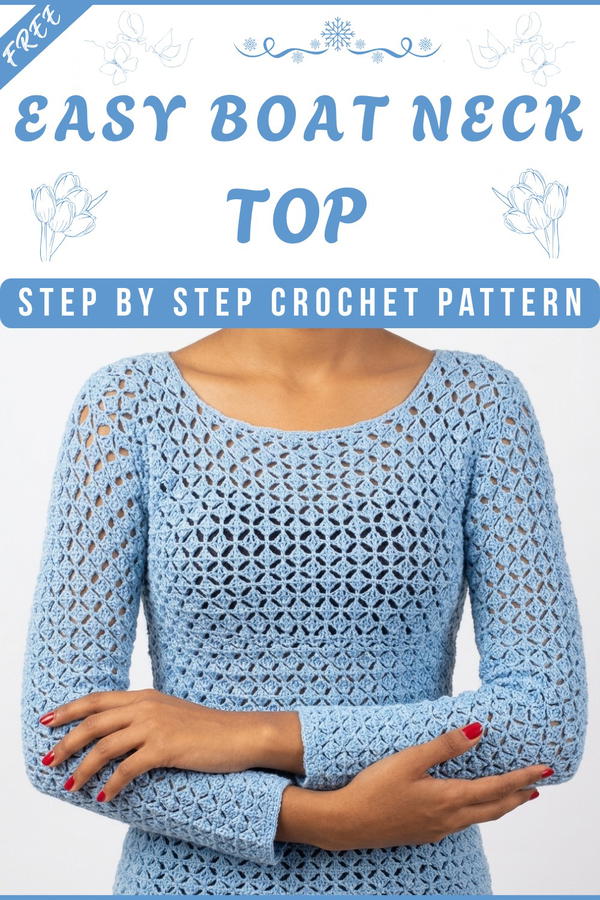
Pattern Corrections
- Confirm your multiples of 6 when creating the foundation chain.
- Skip tr dec stitches carefully during shaping to maintain clean edges.
Tips
- Test Swatch: Make a small swatch before starting to confirm gauge and stitch tension.
- Blocking: Gently block the finished garment with steam or washing for an even texture and clean shaping.
- Customization: Modify sleeve length or omit them entirely for a sleeveless or short-sleeve version.


