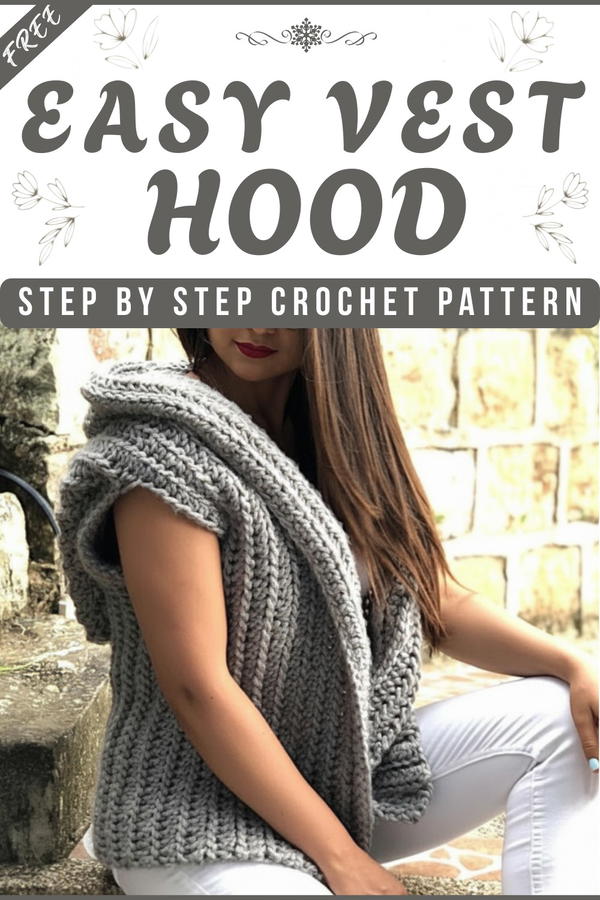
Upgrade your wardrobe with a cozy crochet vest with hood, offering the perfect mix of comfort, style, and practicality for any season or occasion.
Chilly mornings and cozy evenings call for something stylish yet comfortable. A free crochet vest with hood pattern is the perfect solution, combining warmth and functionality with a touch of handmade charm. This versatile piece works wonderfully as a layering option over long-sleeve shirts or dresses during transitional weather.
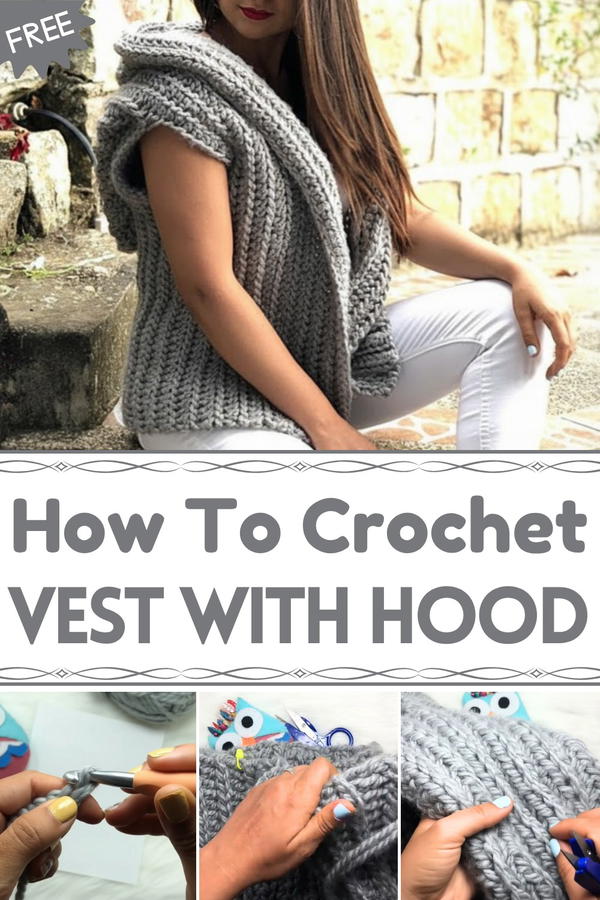
Featuring a hood, it offers extra comfort against breezy winds while giving your outfit a casual, laid-back vibe. You can even customize the length, colors, or stitches to make it truly your own.
Customizable Crochet Vest with Hood Perfect for Your Style
Perfect for autumn walks, relaxing at home, or even as a thoughtful gift, this vest is a rewarding project that blends practicality with creativity. Stay warm, stylish, and proud of something you made with your own hands.

Materials Needed
- Wool: 100% acrylic yarn, Super Bulky (Category 6).
- For a small size: approximately 900–1000 grams (9–10 balls of yarn).
- Adjust yarn quantity for other sizes.
- Crochet Hook Gauge: Size 10 mm (US N/15).
- Plastic Blunt-Tipped Needle: To sew and finish edges.
- Stitch Markers: Approximately 20–22 markers (use any type that is easy to attach).
- Scissors: For cutting yarn and cleaning anything excessive.
- Measuring Tape (Optional): Useful for checking measurements.
Step-by-Step Crochet Pattern
Step 1: Foundation Chain
- Begin by crocheting 70 chains, which will serve as the base of your hooded vest.
- Add an extra chain at the end for turning.
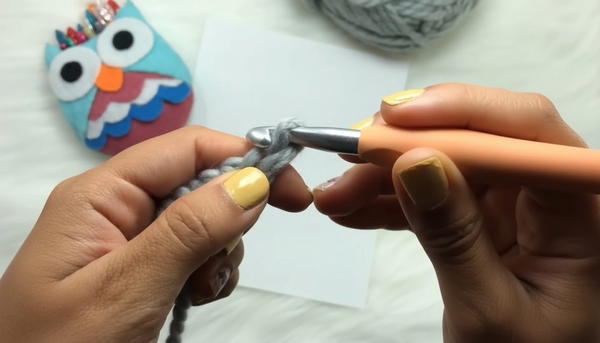
Step 2: Slip Stitches
- Work 70 slip stitches across the foundation chain.
- Important Tip: Insert the hook into the middle back loop of the chain when working slip stitches to achieve a neat texture.
- Use a stitch marker to mark the end of the row.
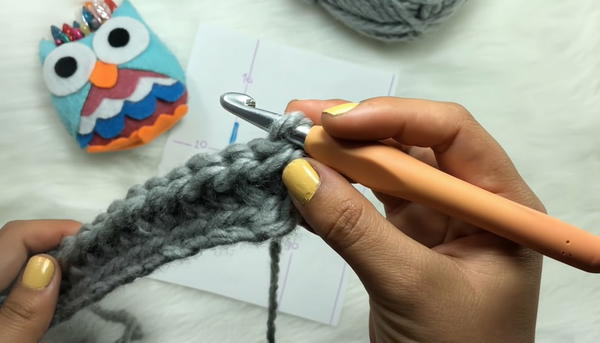
Step 3: Half Double Crochets
- Chain 2, turn your work, and crochet 70 half double crochets across the row.
- Insert the hook into the middle back loop each time.
- Repeat this process for 20 rows to build the front panel.
Step 4: Create the Sleeves
Armhole (First Side):
- Crochet 30 slip stitches, 14 chains, skip 14 stitches, and attach the chains using slip stitches at the 14th skipped stitch.
- Continue crocheting 16 slip stitches to complete the row.
Back Panel:
- Turn your work, chain 2, and crochet 70 half double crochets for the back section.
- Repeat this process for 40 rows to build the back panel.
Second Armhole:
- Repeat the process for the other side by creating another armhole using 30 slip stitches and 14 chains as you did for the first side.
Step 5: Second Front Panel
- Crochet 70 half double crochets to mirror the first front panel.
- Work 20 rows to ensure both front sections match perfectly.
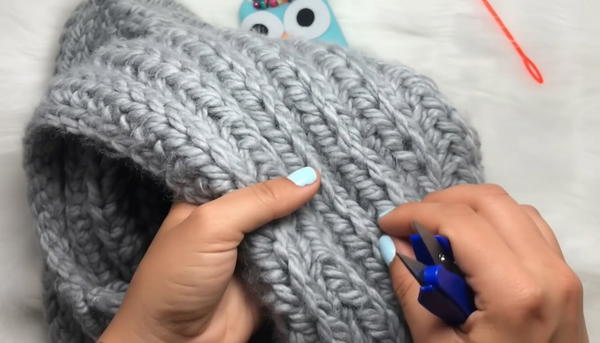
Step 6: Joining the Hood
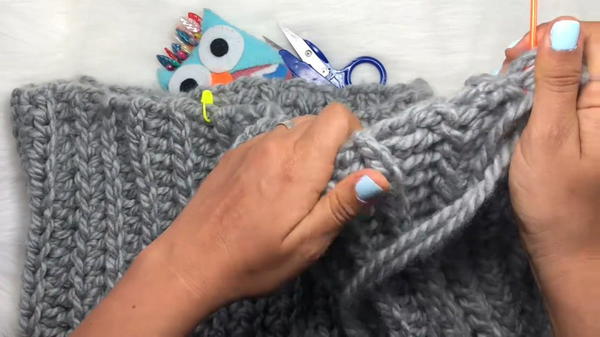
- Fold the Vest in Half: Align both sides and use the plastic blunt-tipped needle to sew the top portion of the hood together.
- Close the hood with whip stitches ensuring the seam is neat and symmetrical.
- Tip: To avoid bulky seams, sew delicately between the chains.
- Use stitch markers to guide the process.
Step 7: Finishing Touches
- Hide all yarn leftovers inside the seams using a needle.
- Trim excess yarn to polish the hooded vest.
- You may apply steam blocking for acrylic yarn to make the edges smoother (optional).
Customization Ideas
Color Variations:
- Experiment with solid colors, stripes, or ombre yarn for an exciting look. For instance:
- Stripes for sleeves with contrasting body color.
- Gradient yarn creating a soft color transition for the hood.
- Experiment with solid colors, stripes, or ombre yarn for an exciting look. For instance:
Size Variations:
- Small: Start with 70 chains.
- Medium: Add 10–15 chains to the foundation.
- Large: Add 20–25 chains to the foundation and adjust the yarn quantity accordingly.
- Adjust armhole dimensions with more chains for broader sections.
Details Additions:
- Add pockets to the front sections for practicality.
- Embellish the hood with pom-poms or buttons for a playful finish.
Tips for Success
- Gauge Check: Test a small swatch before starting to ensure correct stitch sizing.
- Markers: Always mark rows to keep track of your work easily.
- Yarn Choice: Use soft yet durable acrylic yarn for maximum comfort and flexibility.
- Seam Precision: Sew the hood slowly to prevent uneven lines.
Conclusion and Final Look
Once complete, the hooded vest will feature a comfortable yet stylish design, perfect for layering during fall or winter. Its cozy texture paired with the oversized hood enhances warmth while adding elegance. The armholes ensure easy wear, and the texture of slip stitches creates a polished edge. Pair it with jeans and boots for casual outings or a chunky scarf for added flair.


