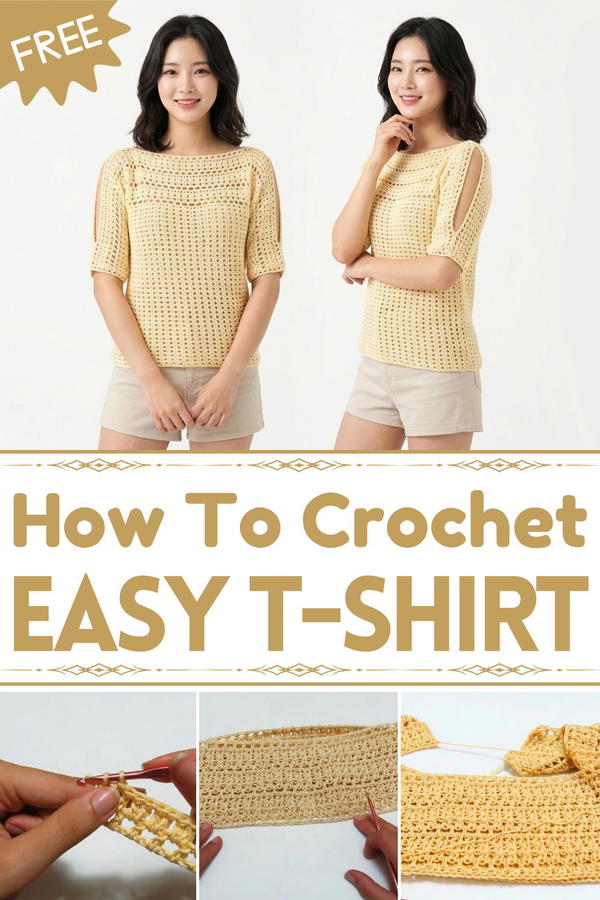
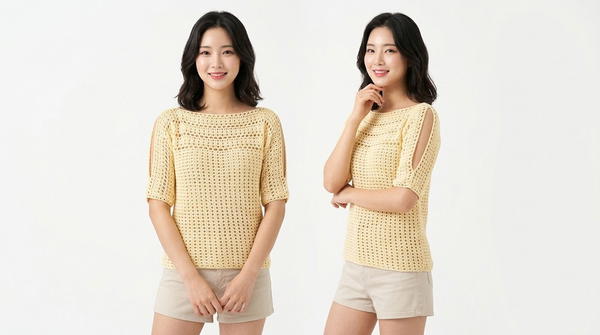
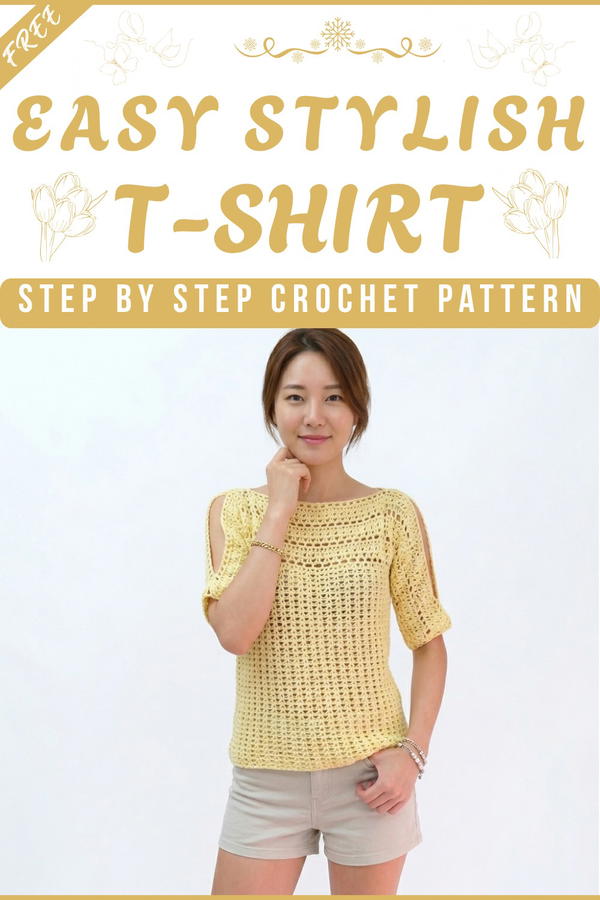
Enjoy the Free Crochet T-Shirt Pattern, a lightweight top with beautiful openwork that's great for casual wear, sunny outings, or layering over swimsuits.
Wearing something that feels as breezy as a seaside sunset yet looks stunningly stylish in every way. The Free Crochet T-Shirt Pattern gives you the chance to create a lightweight and airy top that’s perfect for summer days, casual outings, or even layering over swimsuits. With its beautiful openwork lace design inspired by delicate sea drops, this T-shirt offers both elegance and comfort in one.
Free Crochet T-Shirt free Pattern Everyone Will Love
The versatility of this pattern allows for customization, letting you choose from various colors or yarns to suit your personal style. Whether it’s a relaxed beach stroll, a picnic in the sun, or adding a handmade touch to your everyday wardrobe, this crochet T-shirt is a wardrobe essential. Its simple yet charming appearance makes it easy to pair with shorts, skirts, or jeans, ensuring it fits seamlessly into multiple outfits. Perfect for all skill levels, this pattern will have you feeling proud of your creative effort while enjoying a fashionable result.
Crochet Pearl Knitting Sweater Pattern
Materials Needed
- Yarn:
- Casbah yarn (or equivalent soft yarn).
- Quantity:
- Size S: ~350g (Refer to variations for other sizes).
- Crochet Hook:
- 4 mm (US size G/6). Adjust if necessary for your tension.
- Stitch Markers (4+) for easier alignment while sewing.
- Tapestry Needle for sewing.
- Scissors for cutting yarn.
Gauge
The rectangles are worked on a multiple of 2 + 1 chains for stitch pattern consistency.
Finished Dimensions
- Length of rectangles for Size S: ~95 cm each (sleeve width when draped).
- Rectangle height: Adjustable as per your design requirements:
- Example: Approx. 40 cm width for the front and back panels.
Special Stitch Guide
- Double Crochet (DC) – Standard double crochet worked into the appropriate stitch
- Chain Stitch (CH) – Basic chain stitches.
- Fan Stitch – Composed of 2 double crochets worked into the same space.
Pattern Steps
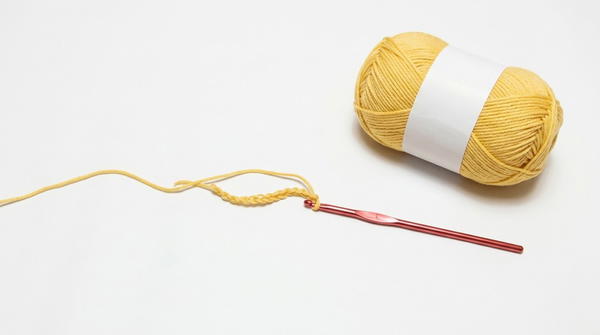
1. Begin with the Main Rectangles
- For Front + Back Panels (2 identical panels):
- Chain 147 to correspond to ~95 cm in width.
- For other sizes:
- Size M: Chain ~157 (adjust for extra fabric required).
- Size L: Chain ~177 (for additional size and ease).
- For other sizes:
- Add an extra chain stitch to ensure balance in the multiple of two.
- Chain 147 to correspond to ~95 cm in width.
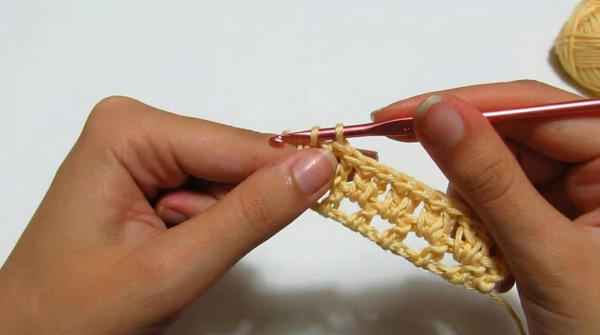
First Round (Base Round)
- Create a foundation of alternating double crochet stitches and chain stitches:
- Work 2 CH (does not count as a stitch).
- Skip 1 chain, DC in the next chain. (Start of Repeat)
- CH 1, skip the next base chain, DC into the following chain. (Repeat to end).
- End the row with 2 DC worked into the last chain.
Second Round
Transition to the next row to build the height. This step establishes the fan stitch structure:
- CH 3 (counts as the first DC); turn.
- Work 2 DC into each CH-1 space of the previous round.
- Repeat across the row.
Third Round and Beyond (Fan Pattern Continuation)
- Begin adding fans by inserting between the spaces of DCs:
- CH 3 (counts as DC), turn.
- Work 2 DC between the space of every 2 DC from the row below.
- Continue to the end of the row.
- Finish with a DC.
Repeat the Third Round to build the desired height for your panel.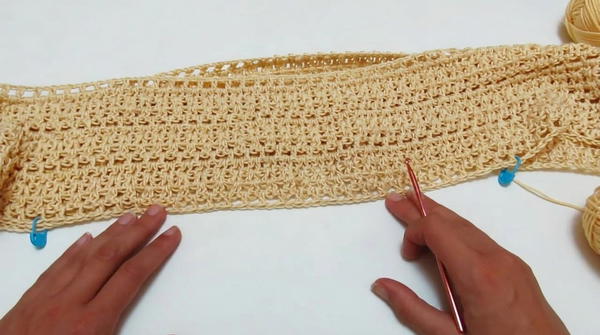
For Size S, crochet the motif approximately 3 times (or ~14 cm in rows) to achieve the correct armhole length.
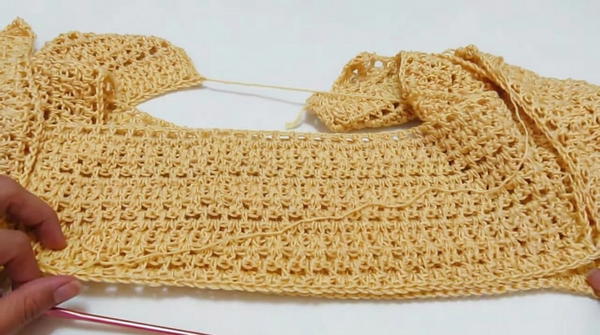
2. Marking Sleeves and Working the Section Below
Once you complete two identical rectangles for the front and back panels:
Position Stitch Markers for the Sleeves:
- Divide the width into 21 squares for the sleeve (left side), 27 squares (central chest portion), and 21 squares (right sleeve).
- Place markers accordingly.
- Adjust increase/decrease in squares for different sizes:
- Size M: Add ~3-4 squares to the central body section.
- Size L: Add ~5-6 squares to the central body section.
Join your yarn to start working below the marker areas:
- Instead of continuing with the motif, switch to fan stitches (2 DC clusters) in every row.
- Repeat this pattern until desired torso length (middle to waist).
3. Optional Waist Modification
- You can resume the earlier motif halfway down (if desired) to create a more elegant design near the hips.
4. Final Rounds Around Edges
- Add a finishing row with alternating fans (two DCs separated by CH-1).
- Work this along:
- Lower hem.
- Sleeve openings.
- Optional neckline.
Assembly
Sewing the Panels:
- Use a tapestry needle and matching yarn to sew the panels as follows:
- Shoulders: Sew 3 squares on each side to connect front and back shoulders. Leave 17 central squares open for the neckline.
- Sleeve Seams: Sew the side panels from wrist to armpit on both sides.
- Use a tapestry needle and matching yarn to sew the panels as follows:
Leave Portions Open:
- For a draped effect, leave portions under the sleeves slightly open.
Final Touches
- Adjust any loose threads and weave in the ends.
- Wet block for crisp stitch definition and uniformity.
Final Thoughts and Tips
- Yarn Choices:
- Use lightweight, breathable yarn for summer wear or switch to thicker yarn for winter.
- Sizing Adjustments:
- Easily modify by increasing chain multiples or repeating motifs.
- Experiment with Colors:
- A two-tone design works beautifully for the upper and lower sections.


